Learn smarter with fresh insights from our tutors.
Practical study guides, course supplements, and learning resources curated to help you move faster through every subject.
How to Grow Sweet Pepper
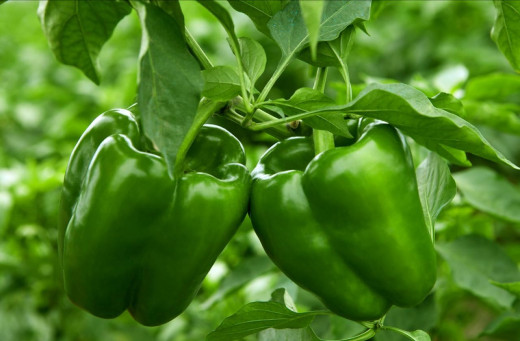
Sweet pepper Cultivation Farming
Sweet pepper is a fruit which can be grown through out the year and is used in many countries' dishes. It can be grown in a variety of containers or on beds. Sweet pepper cultivation is a very rewarding agribusiness.
Sweet peppers contain vitamins A, B and C, protein, fibre, and calcium.This agribusiness article will give in detail on how you can grow your sweet peppers.
Sweet pepper Varieties
Some of the varieties available on the market are:
- King Arthur
- Pacific
- Blue Star
- California Wonder
- Florida Giant
- Yola Wonder
- Lady Bell F 1
- La Bamba F1
- Bullnose
- Jeet
Climatic Requirements
Temperature
Sweet pepper performs well performs well under an extended frost-free season, because it is a warm-season crop. Sweet pepper has the potential of producing high yields of outstanding quality. It is very vulnerable to frost and grows poorly at temperatures between 5 and 15 °C.
The optimum temperature for growing Sweet pepper ranges from 20 to 25 °C. The germination of Sweet pepper seed is slow if sown too early when soil temperatures are still too low, but seedling emergence accelerates as temperatures increase to between 24 and 30 °C.
The optimum soil temperature for Sweet pepper germination is 29 °C. Low temperatures also slow down seedling growth, which leads to prolonged seedling exposure to insects, diseases, salt or soil crusting, any of which can severely damage or kill off the seedlings.
Soil Requirements
Site and soil
A very high level of soil fertility is required for the profitable production of a successful pepper crop. Sweet peppers grow well and give in the best yields on deep, fertile, well-drained soils. You should avoid planting your Sweet peppers in a low- lying fields next to streams and rivers because these sites are subject to high humidity and moisture conditions, that make your Sweet pepper suspectable to bacterial spot epidemics.
As a farmer you should always avoid making Sweet pepper fields where long residual corn or soya bean herbicides have been used, because herbicide carry-over can cause serious damage to peppers.
You should locate your Pepper fields far away from tobacco plantings as possible owing to potential spread of aphid-vectored viruses from tobacco to peppers. It is also advisable not to grow your Sweet peppers after other solanaceous crops (such as tobacco, tomatoes, potatoes, and brinjals) or vine crops for a period of three years because all of these crops are susceptible to some of the same diseases. Peppers do extremely well following fescue sod.
You should use a soil test to determine fertiliser and liming requirements. Peppers grow best at soil pH between 6,0 and 7,0. Adjust the soil pH to near neutral (7,0) for maximum yields.
To reduce the risk of Verticillium wilt and other diseases in your Sweet pepper field, you should avoid using fields in your rotation plans in which eggplant, tomato, pepper, potato and strawberry or caneberry have been planted.
Cultivation Practices
Propagation
Sweet pepper seed may be sown directly in the field, but most commercial Sweet pepper farmers prefer to transplant seedlings bought from vegetable seedling growers. With direct sowing, laborious and costly activities must be carried out to ensure a good plant stand.
Emergence of directly sown Sweet peppers is hampered by soil crusts caused by raindrops, which results in poor plant stands. Frequent irrigation prior to emergence solves this problem, but it results in an unnecessary increase in water use and production cost.
Direct sowing of Sweet peppers seed, requires seed of about 2 kg/ha. Sweet pepper seedlings are produced by sowing seed in seed trays under green house or shade-cloth conditions. Pepper seedlings are ready to be transplanted after 6 to 8 weeks when the seedlings are 150 to 200 mm tall.
Soil preparation
You should avoid growing your Sweet peppers on the same soil more often than once in 3 or 4 years. Just as tomatoes, Sweet peppers are subject to some of the same diseases, neither should follow the other in successive seasons in the same soil. Soil used for plant beds should have had no peppers grown in it for 4 or 5 years, preferably never before.
Planting
Planting periods
The earliest period for seedling establishment in your prepared Sweet pepper field, should be when the soil and air temperatures at least meet the minimum requirements for plant growth. The latest seedling establishment period for your Sweet pepper should be after allowance has been made for the growth and harvest periods to be completed before adverse conditions sets in.
Transplant Seedlings
Sweet pepper seedlings are transplanted 3 to 4 weeks after sowing. Sweet pepper transplanting process should be done late in the afternoon.
You should mix two handfuls of well-rotted manure with the soil in each planting hole. Into each planting hole, place a seedling and ensure it is firmly positioned. Water seedlings immediately after transplanting.
Days to maturity
The exact time to maturity of any Sweet pepper, varies depending on the exact variety of sweet pepper. Most sweet peppers mature in 60 to 90 days after planting; hot peppers can take up to 150 days.
Spacing
If several sweet peppers are planted together space seedlings of 45 cm apart within rows and 60 cm to 90 cm between rows should be considered. One hectare requires 100 to 200 g of seeds.
Fertilisation
Recommendations for supplemental organic matter, fertiliser, lime and manure should be based on a soil test and a nutrient management plan. Only soil test is the most accurate guide to fertiliser requirements. Sweet pepper fertilizer withdrawal quantities are 1,5 to 3.5 kg N, 0,2 to 0,4 kg P and 2 to 4 kg K of fruit harvested.
At transplanting, you should apply 1 table-spoon high phosphorus fertilizer e.g. 12:24:12 dissolved in 1 litre of water. This volume will fertilize 10 Sweet pepper plants. You should apply once either to roots or leaves (foliar).
During the growing stage, you should apply high nitrogen fertilizer e.g. 20:10:10. It should be 10 g (2 tsp) per plant.
At Flowering stage, you should apply high potassium fertilizer e.g. 12:12:17+2 plus Trace Elements. The quantity should be 10 g (2 tsp) per plant.
Irrigation
Many Sweet pepper growers of fresh market peppers, plant under black plastic mulch with trickle irrigation laid under the plastic. This provides uniform moisture and fertilisation during the growing season of your Sweet pepper. Dry conditions result in premature small sized fruit set, which leads to reduced yields.
Sweet pepper plant, has a total water requirement of about 600 mm and a weekly water requirement of 25 mm during the first five weeks and 35 mm thereafter. Excessive rainfall or water supply can negatively affect flower and fruit formation and eventually lead to fruit rot. Unrestricted water supply to your Sweet pepper crop can be as harmful as not enough water.
Root rot diseases can be caused by waterlogged conditions that last for more than 12 hours; therefore drainage of your Sweet pepper field is very important. Drip irrigation is one method of water application that optimises water supply for pepper farming.
Weed control
Good weed control in your Sweet peppers field begins similarly to any other crop, before the crop is planted. You should control established perennials before planning to plant peppers in the field. Use cultural, mechanical and chemical weed control techniques in a coordinated manner to reduce the risk of interference with the Sweet pepper crop.
Pest and Diseases
You should manage your pest and diseases with good cultural practices, biological agents, and chemicals. A combination of these methods is best and is known as Integrated Pest Management.
Harvesting
Sweet peppers are ready for harvest when the fruits have reached their full size, shape and colour. Generally the walls of your Sweet pepper fruits are very thick and fleshy at this time.
Yields of 6 to 10 t/ha of sweet peppers may be obtained for processing. Fresh Sweet pepper market yields may range from 500 to 1 000 12 kg cartons per hectare. You generally harvest your Sweet pepper by breaking it off from the plants with the stems left attached to the fruit.
Strawberry Cultivation Farming
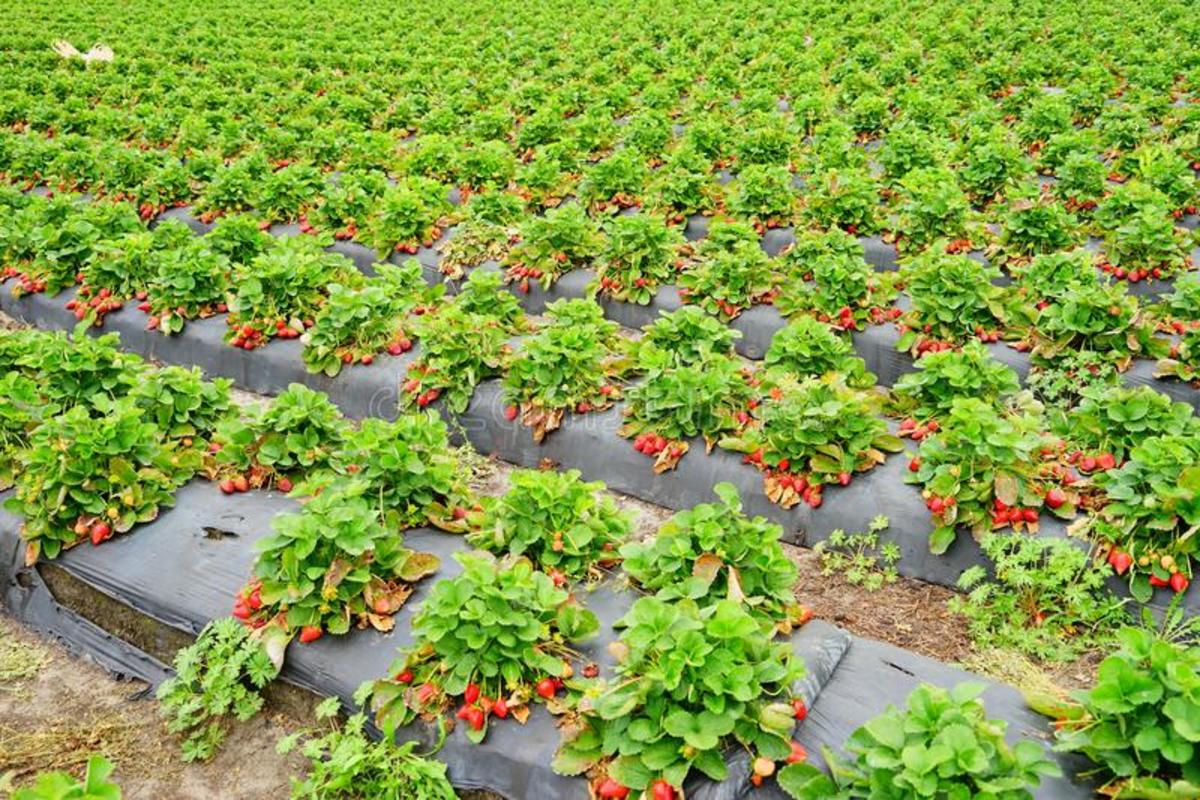
Strawberry Cultivation Farming
Strawberry cultivation is one of the profitable farming business which has a potential to generate a reasonable income and create jobs in different countries.
Strawberry can be used in yogurt as value additional and can as well be used as fresh juice and jam. Strawberries are easy to be cultivated and they perform well in a wide range of climatic conditions. It just need a small land for one to get started on strawberry production.
To get the best results, make sure you grow your strawberry on a fertile, well drained soil which receives a good sunlight and has a moderate water amount. This article will take you in detail on how to grow your strawberry for high yield to be obtained which can maximize your revenue.
Strawberry Cultivars
Choice of cultivators depends on the location where one wants to grow his strawberry, therefore, make sure you select a right cultivar which matches with the climatic conditions of your location among other factors. Strawberry cultivators differ in fruiting time, qualities, fruit size, degree of tolerance to pests and diseases among others.
Climatic Requirements
Strawberry respond well in tropical and sub-tropical areas and achieves the best results at an optimal temperature of a range of 22° C to 25° C and this has to be a day temperature. The optimal night temperature should be 7° C to 13° C. Strawberry do not perform well in frost and cold weather areas.
Soils
Strawberries achieves the best results on a sandy loam soil, but can be grown on a wide range of soils. The optimum soil pH should be in a range of 5.7 to 6.5. More water is required to be applied through irrigation during runners establishment. Make sure you practice crop rotation to avoid depletion of soil fertility.
Land preparation and planting
Make sure you thoroughly prepare your site through tillage or ploughing for cultivation of strawberry. Make sure you improve soil fertility through manure application for high yield to be obtained.
Planting time
Make sure you plant your strawberry as early as possible for best results.
Spacing
The strawberries should be planted in moist, raised beds which has a space between 30 centimeters. Row spacing should be 60 cm apart. Make sure you observe a space of 30 centimeters between strawberries as they are runners.
Propagation
Strawberry are propagated through runner plants. One plant is able to produce 7 to 10 runners.
Irrigation
Make sure you irrigate your transplanted strawberries and your field should be at a right moisture. Frequency of watering should be 2 to 3 times a week for the second month. Drip irrigation is recommended in strawberry production. Make sure your field is not waterlogged as this condition could accelerate build up of pests and diseases.
Pruning or stripping
Make sure you thin your strawberry to 2 to 3 splits every 7 months for rejuvenation.
Weed Management
Make sure your field is free from any weeds as this can be the source of pests and diseases. You can use chemical methods or physical methods to control weeds. Some farmers are known to use cultural method. Select each of these depending on your capital and labour availability in your local area.
Harvesting and Yield
Strawberries are able to give fruits in a range of 2.5 to 3 months after planting. Which means you can start harvesting your strawberries from that time. The life span for strawberry is 3 years. Harvesting can be done every 2 to 3 days. The Strawberry harvesting period is 2 to 3 times per year.
Sweet pepper Cultivation Farming
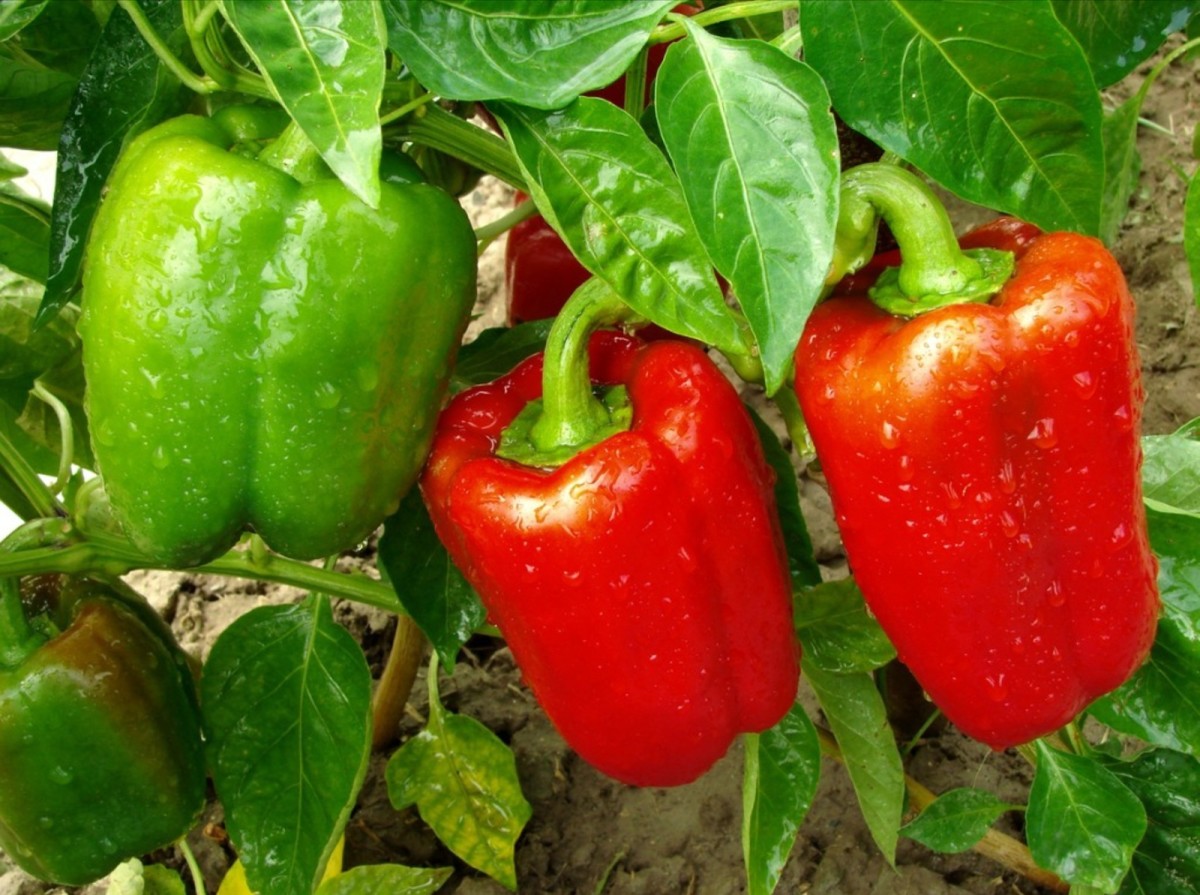
Sweet pepper Cultivation Farming
Sweet pepper is a fruit which can be grown throughout the year under a wide range of soil and is used in food dishes. Sweet Peppers are rich in the following nutrition ingredients; vitamins A, B and C, calcium, protein, and fibre.
This article will give in detail on how to grow Sweet pepper as well as its management practices which can help you benefits from this rewarding business.
Sweet pepper Varieties
The following are commonly grown Sweet pepper in different countries; King Arthur, Florida Giant, Blue Star, Pacific, California Wonder among others.
Adaptability
Climatic requirements
Sweet pepper performs well in warm weather temperate regions and requires an optimum temperature of 20 to 25 °C.
Sweet pepper does not perform well in frost areas, so make sure you grow them during frost free period. When growing them in a temperature range of 5 to 16 °C, it does not give better results.
The optimum temperature for Sweet pepper germination is known to be in a range of 24 to 30 °C. Lower temperatures slow down Sweet pepper growth and this may increase their time to be ready for harvesting and this may also accelerate pest damage since they can be exposed to pests for more period.
The optimum temperature range for Sweet pepper during flowering is 21 to 24 °C. During flowering when the temperature is above 30 degrees, yield ability is slowed down.
Soil Requirements
Site and soil
Sweet peppers perform well on deep, well drained soils having a good soil fertility. Sweet pepper does not do well on waterlogged soils and high humidity areas. The optimum soil pH for growing Sweet pepper is known to be in a range of 6 to 7.
Avoid growing Sweet pepper on a land or field where herbicides have been used recently, similarly avoid growing on a land where long residual corn or soya bean herbicides have been used recently.
Sweet pepper responds negatively to aphid-vectored viruses which attack tobacco, so make sure your field is located away from the tobacco field to avoid the risk of transmission. Make sure you avoid growing Sweet pepper continuously as this will increase chances of depleting soil fertility and in your rotation, make sure that Sweet pepper does not follow Eggplants, tomatoes, strawberry, among others, to reduce risk of Verticillium wilt.
Quantity and quality of sweet pepper depend on soil fertility as well as well as agronomic practice, so make sure you perform this well, i.e. growing your Sweet pepper on high soil fertility having right moisture content.
Rainfall
Sweet pepper requires annual rain of 2000 mm to give optimal yield, any moisture shortfall, should be supplied with Irrigation water.
Cultivation Practices
Propagation
Sweet peppers perform well when they are transplanted from nursery field, but they can also he sown directly in the field and give a better result.
After transplanting Sweet pepper plant, make sure you Irrigation the plant if moisture content is very low, but make sure you avoid waterlogging condition.
Similarly, after sowing your seeds, make sure you Irrigation with clean water if soil moisture content is very low. 2kg of Sweet pepper is required per hectare when sowing Sweet pepper directly in your field.
When pepper seeds are sown in a nursery bed, it takes 3 to 4 weeks for the seedlings to be ready for transplanting to the actual field and make sure you slow down water application one week before transplanting is done.
Soil preparation
Sweet peppers and tomatoes, eggplants e.t.c is attacked by same diseases, so make sure the site where you want to grow Sweet pepper was not recently grown any of these nor hot peppers. You can till or plough the site either through mechanical means or by hands using a hoe.
Planting
Planting periods
You can plant or sow directly Sweet pepper to the field any time of the year, the key is that, you should make sure the soil has required soil moisture and temperature.
Transplant seedlings
Make sure you transplant your Sweet pepper 3 to 4 weeks from the day they are sown and make sure you slow down water application before transplanting is done.
It is recommended to do the transplanting early in the morning and in the evening to avoid direct sunlight which may affect the transplant.
When transplanting, make sure the topsoil is mixed with manure if possible to improve soil fertility.
After transplanting your seedlings, make sure you supply enough water to each transplant and provide a mulch surrounding each transplant.
Days to maturity
From the time transplanting is done, Sweet pepper takes a range of 60 to 90 days to be ready for harvesting.
Spacing
Make sure you observe a seedling spacing of 45 centimeters apart within Sweet pepper rows and 60 to 90 centimeters between rows. Whenever Sweet pepper is intercroped, make sure you observe a root room space of 0.5 square meters per Sweet pepper plant.
Seeding rate
About 100 to 200 grams of Sweet pepper seeds are required per hectare.
Fertilization
Make sure before you apply any fertilizer you conduct a soil analysis first to know right type and as well as the amount of fertilizer to apply in your Sweet pepper field. It is recommended to apply 100 kg of NPK fertilizer per hectare and 40 kg of Nitrogen per hectare to your Sweet pepper plants, but this has to be done after soil analysis is done. Sweet pepper plant requires nitrogen for growth and reproduction while phosphorus is required by Sweet pepper for photosynthesis.
Weed Control
Make sure your Sweet pepper field is free from weeds all the time as these can be sources of pests and diseases. You can remove the weeds by hands using a hoe or you can use herbicides to remove or control them with the help of instructions written on the bottle.
Harvesting
Harvesting can be done 60 to 90 days from the time Sweet pepper transplanting is done, under good agronomic practices and a yield of 142812 kg cartoons may be obtained per hectare of land. Harvesting can be done by hand picking the mature Sweet pepper fruit.
How to Grow Strawberry
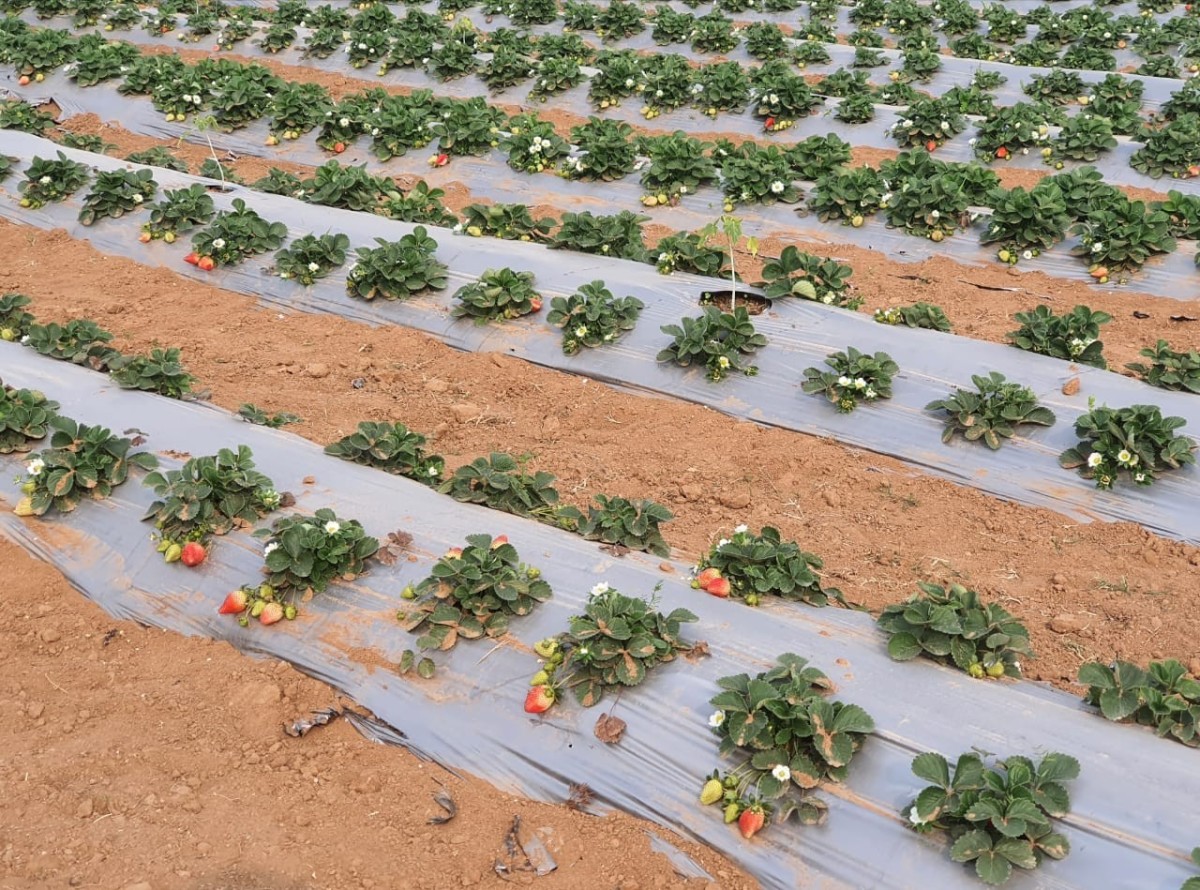
Techniques in Strawberry Farming Production
Strawberry cultivation is one of the profitable farming business which has a potential to generate a reasonable income and create jobs in different countries.
Strawberry can be used in yogurt as value additional and can as well be used as fresh juice and jam.
Strawberries are easy to be cultivated and they perform well in a wind range of climatic conditions. It just needs a small land for one to get started on strawberry production.
To get the best results, make sure you grow your strawberry on a fertile, well drained soil which receives a good sun and has a moderate water amount.
This article will give you in detail on how to grow your strawberry for high yield to be obtained which can maximize your revenue.
Strawberry Cultivars
Choice of cultivators depends on the location where one wants to grow strawberry.
For this reason, make sure you select a right cultivar which matches with the climatic conditions of your location to get high yields, among other factors.
Strawberry cultivators differ in pests and diseases, fruiting time, qualities, fruit size, torrance among other factors.
Climate Requirements
Temperature
Strawberry respond well in tropical and sub-tropical regions and achieves the best results at an optimal temperature of a range of 22° C to 25° C and this has to be a day temperature.
The optimal night temperature for growing strawberry to get high yields should be 7° C to 13° C. Strawberry do not perform well in Frost and cold weather areas.
Soils
Strawberries achieve best results on sandy loam soil, but can be grown on a wide range of soils. The optimum soil pH for growing strawberry to get best results should be in a range of 5.7 to 6.5.
More water is required to be applied in your strawberry field through irrigation during runners establishment.
Make sure you practice crop rotation to avoid depletion of soil fertility which may affect fruiting.
Land Preparation and Planting
Make sure you thoroughly prepare your site through tillage or ploughing for cultivation of strawberry in your local area. Make sure you improve soil fertility through manure application for high yield to be obtained.
Planting time
Make sure you plant your strawberry as early as possible for the best results as agribusiness farmer.
Spacing
The strawberries should be planted on moist, raised beds which have a space between 30 centimeters. Row spacing in your strawberry field should be 60 cm apart. Make sure you observe a space of 30 centimeters between strawberries as they are runners.
Propagation
Strawberries are propagated through runner plants. One plant is able to produce 7 to 10 runners.
Irrigation
Make sure you irrigate your transplanted strawberries and your strawberry field should be at a right moisture. Frequency of watering should be 2 to 3 times a week from the second month. Drip irrigation is recommended in strawberry production to be more efficient in watering. Make sure your field is not waterlogged as this condition could accelerate the build up of pests and diseases in your strawberry field.
Pruning/stripping
Make sure you thin your strawberry to 2 to 3 splits every 7 months for rejuvenation for optimal results.
Weed Management
Make sure your strawberry field is free from any weeds as this can be the source of pests and diseases. You can use chemical methods or physical methods to control weeds. You can as well use biological method. Some farmers are known to use cultural method. Select each of these depending on your capital and labour availability in your local area.
Harvesting and Yield
Strawberries are able to give fruits in a range of 2.5 to 3 months after planting your strawberries. Which means, you can start harvesting your strawberries from that time. The life span for strawberry is 3 years. Harvesting can be done 2 to 3 days. The strawberry harvesting period is 2 to 3 times per year.
Soybean Cultivation Farming
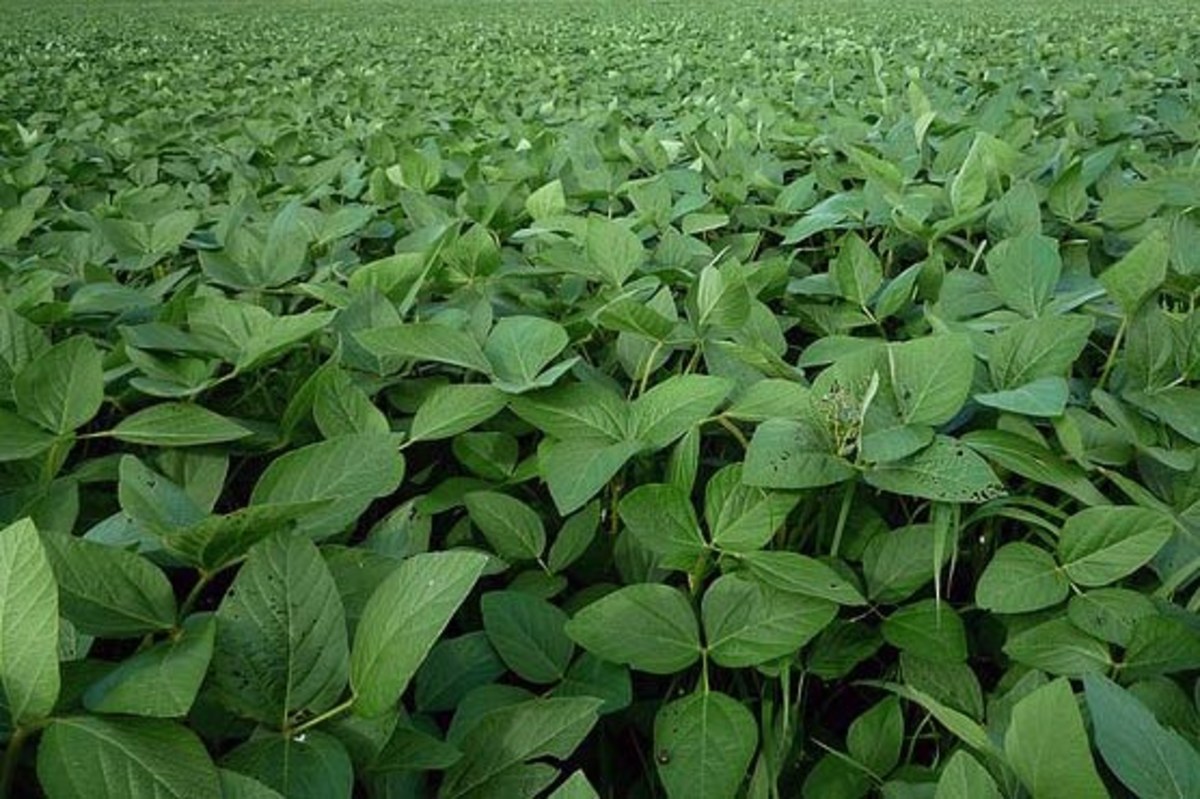
Soybean Cultivation Farming
Soybean is cultivated in different countries and is one of the most profitable crops in the world. It is commonly known due to its multiple uses which includes; source of livestock and aquaculture feed, protein and oil for the human diet and biofuel.
Soybean is able to provide about 64 percent of the world’s oilseed meal supply and is the major source of oil. Soybean meal is considered the primary product and oil is considered the secondary.
For the farmer to be successful in Soybean farming, it starts with proper understanding the needs of the soybean and the environmental conditions required for optimal growth. This is not all as you need to understand and adopt the best agronomic practices for optimal yield.
This agribusiness article will take you in detail on Soybean farming and management. Make sure you understand the production requirements, starting from seed selection to soil preparation, to planting and wedding, and pest control among others.
Soils and climatic requirement for soybean production
Make sure you plant Soybean on the well drained and fertile loam soils with a pH range of 6.0 to 7.5. The Soybean does not give good results on weak sand soils. Make sure you grow soybean in soils which is not soil acidic as it is very sensitive to soil acidity.
You can rotate the Soybean with Maize or any other non leguminous plant. Soybean is relatively resistant to low and very high temperatures, but growth rates decrease above 35°C and below 18°C.
In some varieties, flowering may be delayed at temperatures below 24°C hence keep on observing the temperature changes. The optimal temperature for Soybean range from 26 to 30°C for most of the varieties.
Rainfall requirements
Soybeans are able to be grown throughout the year in the tropics and subtropics regions, but make sure enough water is available. Soybean requires 400 to 500 mm of water in a season for a good crop and for it to perform better.
During germination make sure the soil has enough required soil moisture and this has to be observed during the flowering stage as well as ponding stage for best results. Less rainfall or insufficient soil moistures result in crop failures. Crop failure would be expected if the average annual rainfall is less than 180mm.
Photoperiod
Each Soybean Variety has minimum day length light requirements which must be achieved. Take note that Soybean is a short day plant and, therefore, flowers in response to shortening days and this means the Soybean productivity depends on day lengths. It needs a range of 100 to 130 days or more to be ready for harvest.
Spacing
For best results, make sure you observe the following row spacing of 0.4 to 0.6 m with 30 to 40 seeds per meter of row.
Fertilization
Soybean is sensitive to soil acidity, so for the good results, make sure you check the soil pH in areas where you want to grow Soybean and keep on observing pH changes. You can apply a pre- plant fertilizer of a range of 200 to 300 kg per ha of either a basal fertilizer, Gypsum or Single Super Phosphate before planting, particularly where the soil fertility is low.
Applying manure result in best yield since Soyabean responds well to manure application. Soybean is leguminous plant and do not need much nitrogen fertilizer be applied. It is recommended to apply Rhizobium inoculant to the seed during planting period.
Planting and crop management
The seed rate for Soybean is about 90-100 kg per hectare and this will result in a desirable plant population of 350,000 plants per hectare. Make sure you observe the row spacing of a range of 25 to 90 cm. Closer row spacing has a potential for higher yield.
Mid-season crop management
Soyabean are very prone to drought conditions during the flowering and pod-filling stage. Therefore, make sure you are able to supply additional water through irrigation in case of less moisture content during the pod filling stage, which occurs in the last third of the crop's life and any growth stage as well.
Weed Control
Make sure you keep the farm which you have grown your Soybean clean from weeds as Soybean is sensitive to weed competition during the first six weeks. Make sure you control the weeds adequately during this period.
Harvesting
Make sure you harvest your Soybean as soon as the plants have dried. Any harvest delay after the pod has dried results in losses since the pods may shatter with a consequential loss of yield. You may use hand to pick the dried Soybean. Soybean can also be harvested mechanically.
Things to take note before starting soybean farming
- Make sure you select best varieties which are free from pests and diseases.
- Make sure you conduct a soil test to know soil nutritional content.
- Avoid growing Soybean on acidic soils.
- Look for best technologies which can lower the cost of production.
- Make sure you follow all the agronomic practices.
How to Grow Cabbage: Cabbage Farming
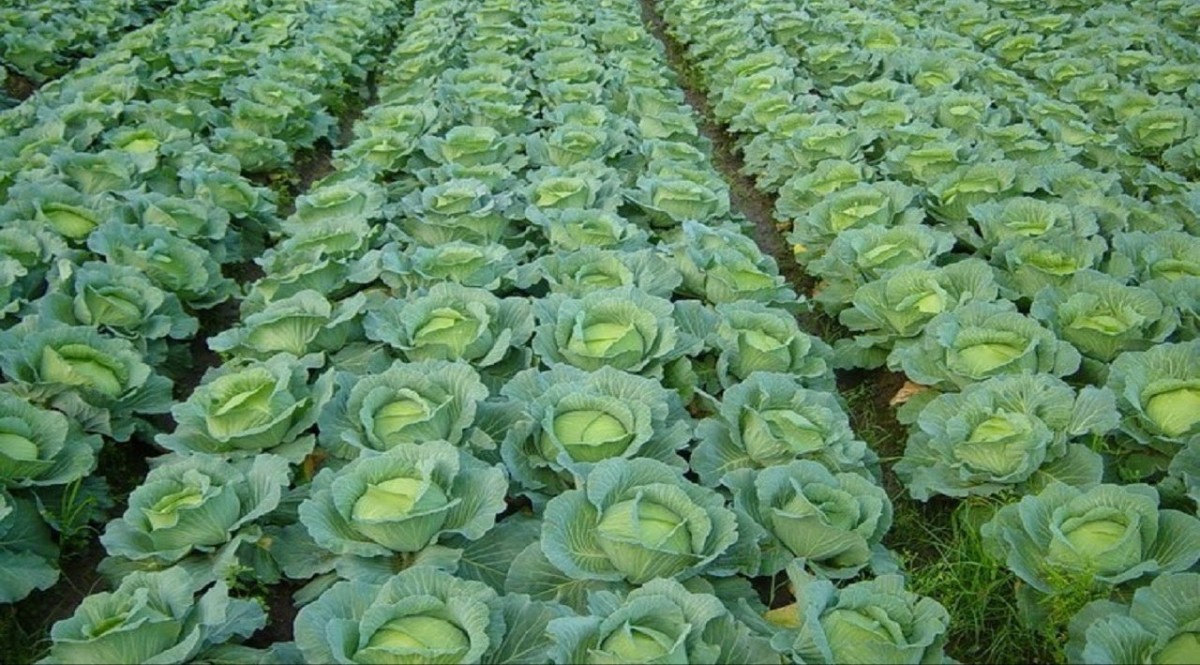
Cabbage Farming
Cabbage is a vegetable which is used as a relish on top of other green vegetables. It does well in altitude ranges from 700 to 2200 m and it has high water requirements of around 500 rain fed water which has to be evenly distributed.
You can also grow cabbage under irrigation system. This article will give in detail about the steps required for you to grow cabbages.
How to Grow Cabbage
To grow cabbage follow the below steps.
1. Site selection
The first step to grow your cabbage is to select the best site where you will grow your Cabbage. Make sure the selected site has high soil fertility, and has a soil pH of the range of 6.0 to 6.5 which is considered optimal. The site needs also to be away from livestock or any animal which could endanger the Cabbage or interfere it's growing.
When setting the site, make sure the chosen place is close to a water source if the production will be under irrigation.
Could also sound good, if it is closer to the market for easy transportation when they mature ready for selling.
In addition, the selected site soil needs to be of loamy type, which needs to be well drained as well. You could also apply organic manure to improve its fertility and structure.
2. Ploughing or Gardening
The second step required for you to cultivate Cabbage is to plough the selected site. In this case, if you are to grow your cabbage in a home garden, you plough it too then make some seed bed.
Ploughing can be done using heavy machine when Cabbage is grown in large scale or you could alternatively hire human labour.
3. Make planting holes
The third step required to grow cabbage is to make planting holes where you will be planting your cabbage.
Make sure the planting hole has a deep of about ¼ an inch. The planting spacing needs to be about 60 cm x 60 cm, but this depends on the type of variety, as other varieties could do well on a spacing of 60 cm x 45 cm.
4. Direct seeding or transplanting
The fourth step to cultivate Cabbage is to direct sow the Cabbage seed or sowing in a nursery bed, then later transplant to actual field where you have made the planting holes.
When you opt for direct seeding, make sure you water immediately as soon as you have direct sown the Cabbage seed. And you maintain watering throughout the growing period, which takes around 90 days on average.
When you opt for transplanting, you will first need to establish a nursery bed, where you will sow your seeds and later transplant after around 2 weeks. Once you transplant your cabbage seedlings, make sure you water the field frequently throughout its growing period.
5. Watering or irrigating
Once you have planted your seed or transplanted your cabbage seedings, the next step is to irrigate them frequently throughout the Cabbage growing period, which take a range of 90-110 days depending on type of variety.
6. Fertilizer application
For optimal yield, make sure you apply 200 to 250 kg nitrogen per hectare, but this depends on nutrient requirements of your soil. So make sure you analyze the soil nutrient content before any fertilizer is applied.
7. Pest and disease control
As a leafy vegetable, cabbage is prone to different pest and diseases, so make sure you keep them in check through chemical, natural, cultural and combination of these methods in controlling pest and diseases in your Cabbage field.
8. Harvesting
After around 90 days your cabbage will be ready for harvesting and it is at this time when you need to find potential buyers. You harvest mature Cabbage by hand with a knife or sickle.
In conclusion, this article has taken a look at 8 steps required for you to cultivate cabbage.
Rabbit Farming Business
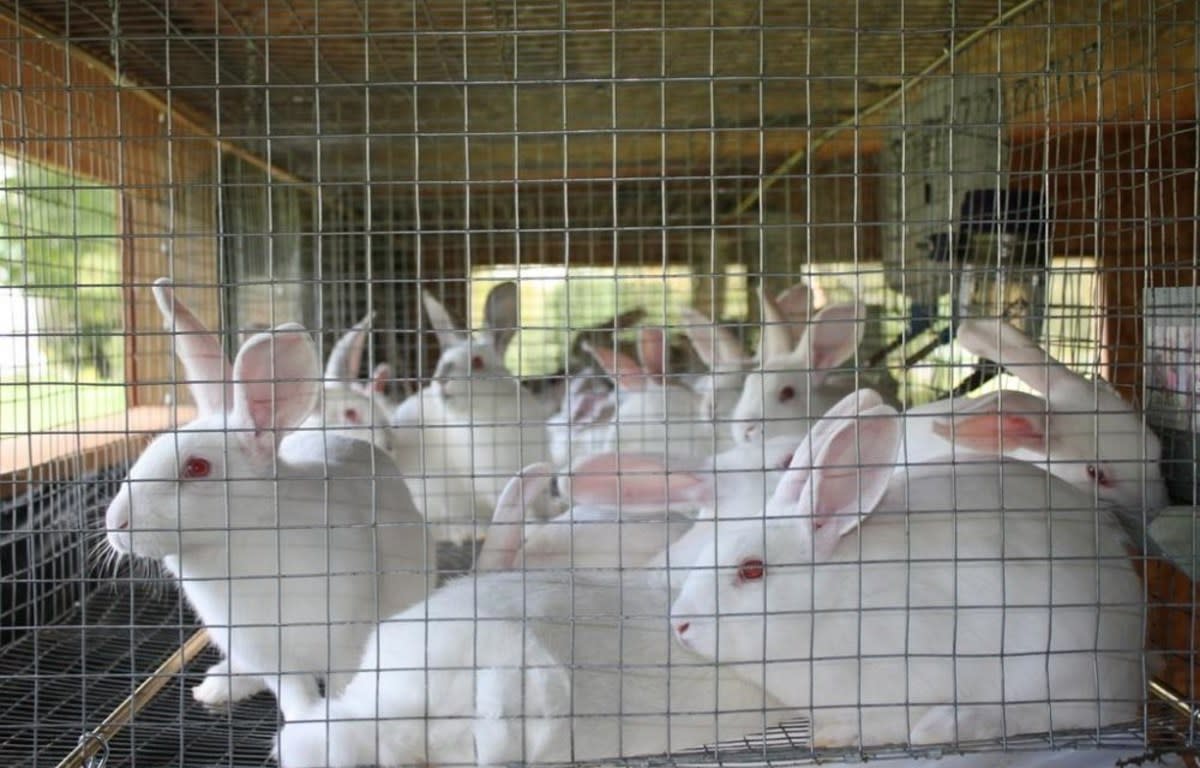
Rabbit Farming
Rabbits are easy to keep animals which are kept for multiple uses which, among others, include for meat purposes, laboratory uses, pert purposes, manure for home garden or farm uses. Most people prefer rabbit meat due to it's meat special characteristics of being low in fat as a lot of people do not like fatty foods, and it is also rich in proteins.
Rabbit farming can be raised on a small scale with an idea of keeping them only for meat purposes or can be kept for commercial purposes, thus being raised for sale as part of agribusiness or could be kept for both.
The animal is preferred to be kept due to it's easy to keep which enables a person to keep them on his/her backyards. Only basic understanding of rabbit farming is needed to start rabbitry.
The information presented in this article provides basic knowledge to run a rabbitry.
Common Production Systems Rabbits
Three production systems are commonly used as follows:
- Small scale rabbitry kept at home or backyard as the first system of production. Under this system of production, one or two males are kept in a rabbit house together with a few females so that they can breed. Usually this does not necessarily fall on commercial production as most of the rabbits kept under this system are for home meat.
- Rabbit Kept for meat as well as business on medium scale or commercial production. Under this rabbits are kept for meat as well as for sale to generate revenues and at least 15 to 40 breeds may be kept. These rabbits may be given leafy vegetables as part of feeding.
- Large scale rabbits farming for commercial purposes.This requires more capital and technical know how in managing the rabbits. It as well needs readily available markets and it's common in European countries.
Reasons for venturing in rabbit business
- Rabbit keeping is very easy to start as amount of space required is not the same as those one would need in cattle farming. Thus small or medium space is enough to kick start the business.
- Feeding rabbits is not a thing to worry about as they are able to eat even leafy vegetables
- The rabbit meat is rich in proteins which is advantageous.
- They can be taken as agribusiness farming.
Environmental Requirements for Rabbits Production
Now the big question is what are the requirements needed for rabbits as well as environmental conditions? The following are the conditions necessary for rabbits keeping:
- Temperature. Rabbits favours a temperature range of 10 - 27 °C. Whenever Temperature raises above 28 °C it affects the feeding and it as well increases water consumption.
- Lighting requirements. Rabbits require 8hours of light for males and about 16 hours for females for easily mating and increased fertility . Provide 2 hours extra light for growing rabbits as they are young and needs enough warmth.
Housing
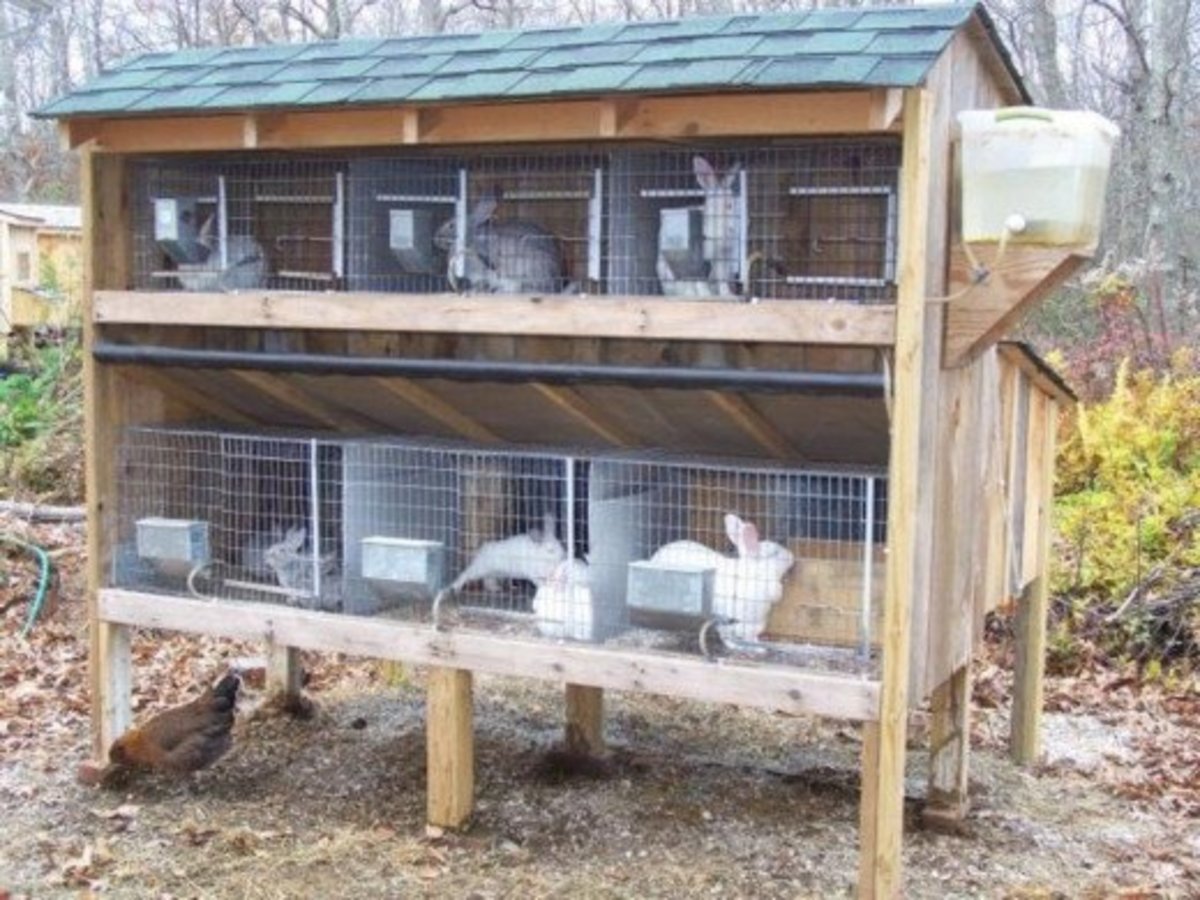
Key points to take note
- Provide a good house for rabbits to protect themselves from predators and bad weather conditions.
- Housing premises should provide adequate shade of trees & peaceful environment free of strong winds.
- The Rabbit house should as well contain nesting boxes for females to use to raise their babies.
- Make sure the house is disinfected and kept clean all the times.
Feeding
- Rabbits may be given leafy vegetables i.e cabbages , carrots, green maize leafs and does not require much spending.
- When feeding rabbits with leafy vegetables make sure that it's free from chemicals which might be sprayed on the leaves like cabbages as this could kill the animal resulting in losses.
Classification for rabbit feeds
Feeds for Rabbits are categorized into roughage, concentrates, greens which includes leafy vegetables and pellets which are classified as compounds.
Water requirements
Make sure adults are given around 150 to 500 mls of water per day while lactating does are given 1000 - 2000 mls as they needs more water.
Which rabbits to choose for breeding?
- When choosing the breeds to keep make sure you focus much on healthy thus keep strong ones for breeding.
- Where possible avoid buying old rabbits for breedings as it might be that their productivities have reached to an end as well as their life span hence of no use.
- Where possible try to check the breeding records as those with good past performances could as well perform better.
Breeding
- It only take 4 to 6 months for female rabbits to reach fertility or breeding stage while for males it only take 5 to 6 months to be used for breeding.
- Mostly the female rabbits becomes more productive in springtime and summer as well early autumn.
- Females rabbits are able to keep pregnancy for one month and gives birth.
What do you have to do when the doe is pregnant?
- Pregnant doe should be kept separately in breeding cage to adopt new housing for kindling.
- The doe holding pregnancy should not be kept in a breeding cage but rather in a new kindling house.
- On 5 to 6 days to kindling, the pregnant doe pulls some furs from its rump around its tits.
- Make sure you give pregnant does enough feeds 10 to 15 days before giving birth.
- Mostly kindling happens during night.
- During the day of kindling the doe is seen restless.
How do you keep young rabbits?
- Make sure young rabbits (bunnies ) milks it's mother only for 2 to 3 weeks.
- From day 15 to 20 introduce leafy feeds to young rabbits.
- Does requires around 4 to 5 liters of water each day during this period.
- On an average doe and her litter may drink about 4 to 5 litres of water/day.
Cannibalism
Cannibalism is when a doe eats her young rabbits. You must make sure that this does not happen. Keep on watch.
Reasons why this happens
- Water shortages at a time before kindling.
- Inappropriate beddings.
- And some disturbances during kindling.
Weaning
- Young rabbits are weaned at the age of 30 to 35 days.
- Young females and males weaned should not be kept on the same cage.
- Young rabbits can be eaten and sold at the age of 3 to 4 months.
How to Prevents Diseases from Starting
well, make sure you observe all sanitation preventive measures.
Preventives measures for diseases in rabbit production
- Make sure the rabbits you buy to keep are healthy and are bought from a good breeders.
- Keep the newly bought rabbits in quarantine.
- Make sure that the house which is constructed to keep the rabbit is of high quality and has enough space required for rabbits and is able to protect the rabbits from predators.
- Observe sanitation practices as well as hygiene to decrease chances for disease outbreak.
- Follow Immunization and all medication programme available in your local countries. Where possible seek guidance from expertise.
Cabbage Farming Business
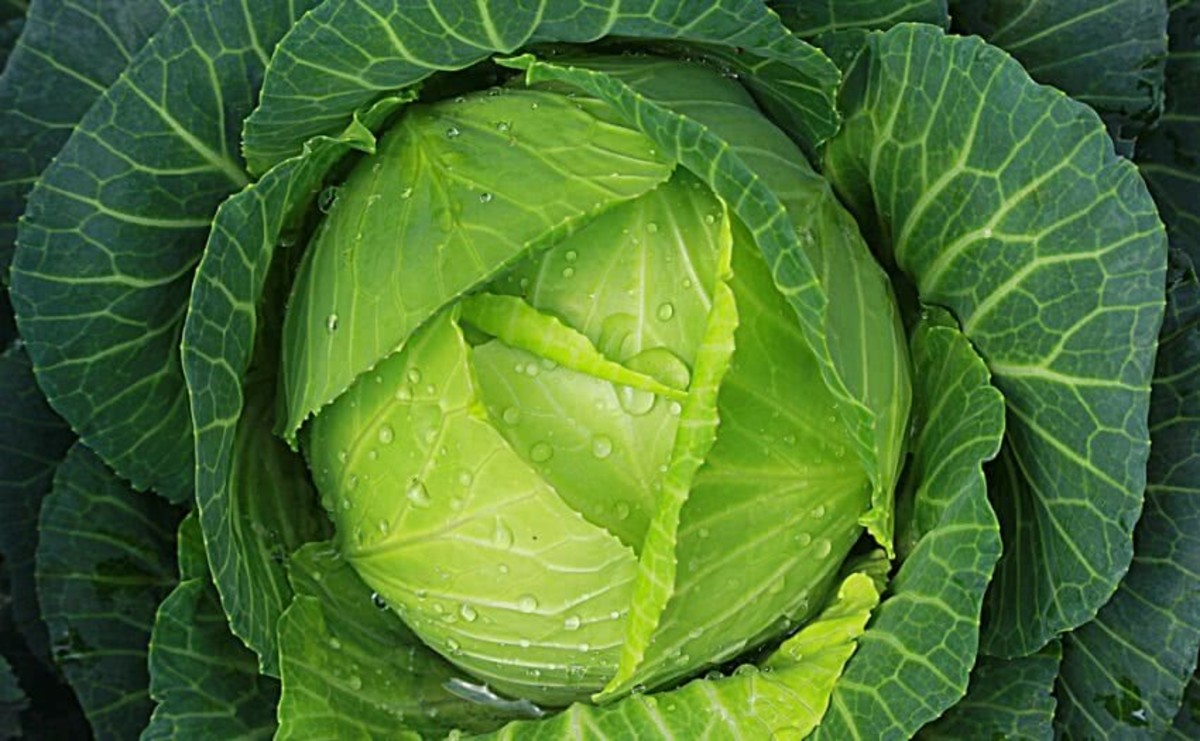
Cabbage Farming Business
Cabbage is a vegetable which is adaptable to a wide range of climatic conditions and it performs better in different soils and this makes it to be popular.
Cabbage farming is done by both smallholder farmers and medium scale farmers, mostly in local and peri-unban areas. Cabbage has the following nutritional elements; Calcium, Iron, Vitamin A, C & E, Minerals, Riboflavin, Nicotinamine and Ascorbic Acid.
This agribusiness article will give in detail on how cabbage is grown as well as its climatic conditions for good yields.
Climatic Conditions or optimal ecological requirements
- Cabbage does well on an altitude of 700 to 2,200 meters above the sea level. In low altitude areas, the crop should be grown during the cooler months of the year for best results.
- Cabbage requires more water compared to other vegetables. Make sure you grow cabbage in an area having rainfall of at least 500 mm of and it has to be well distributed throughout the growing period.
- Cabbage performs better at a temperature range of 16 to 20 °C. As you can see cabbage performs better under cool temperatures. When the temperature is above 25 °C it hampers the head formation.
- Cabbage performs better on a well drained sandy or silt loam soils with high organic matter content and high water holding capacity and the optimal soil pH range from 6.0 to 6.5.
Propagation
Cabbage is propagated from seeds.
Soil preparation
Before planting make sure the land is cleared or cultivated eight weeks before planting. Make sure the ground is ploughed deeply, immediately before planting, with a disk harrow or other suitable implement to a depth of 450 to 600 mm.
Remember also to fumigate the soil two weeks before planting time if necessary, to control nematodes which may become a threat to the cabbage plants.
Planting
Cabbage can be planted in two ways, either by direct-seeding or by transplanting of seedlings. If you plant through direct seeding, use about 2 kg of seed per hectare.
If you want to plant cabbage through transplanting, make sure the seedlings are transplanted as soon as they reach the desired size and only well-hardened, young, stocky plants should be used. Make sure the soil is moist before the transplanting is done.
Plant populations of 40000 to 45000 per hectare is recommended for large scale farmers. For small scale farmers grow about 80 000 to 100 000 plants per hectare.
Cabbage nursery
If you want to plant cabbage through transplanting, make sure you sow the seeds first in a well established nursery and this will have the following advantages; more favourable and even germination, improved irrigation control and crop monitoring during the sensitive germination and seedling stage and weeds are controlled easily on the nursery beds.
Take note that you can use also use flat-cell trays or in Jiffy pots to produce cabbage seedlings.
Make sure the site which is used for cabbage seedlings has good moisture, good aeration and the temperatures does not exceed 30⁰C.
Make sure you check the nursery bed twice daily to make sure that optimum conditions are maintained during the germination and seedling development. Soon after emergence, make sure that the seedling are exposed to adequate sunlight to support good strong growth.
Cabbage seedlings are ready for transplanting in 4 weeks after sowing day.
Make sure you observe the following before transplanting is done; stop fertilizer applications seven days before transplanting, make sure you reduce the amount of water applied to it two days before transplanting and make sure you transplant the seedlings in the cooler part of the morning or evening.
Transplanting
Cabbage seedlings are transplanted into a well prepared rows having a space of 40cm between plants within the rows. Make sure the roots are not disturbed during the transplanting.
Fertilization
Cabbage requires supplemental fertilization in the form of manure or compost since it is a heavy feeder and this fertilizer has to supply the following nutritional elements; nitrogen, phosphorus and potassium. Make sure you test the soil to know the right fertilizer program to be applied. Cabbage requires 200 to 250 kg nitrogen per hectare.
Cabbage water requirements
Young cabbage transplants or seedlings have a lower water requirement, but take note that the water requirement increases rapidly as the cabbage is growing. Make sure the soil has right moisture all the time.
Waterlogging can cause different diseases so keep on monitoring the moisture content. Make sure you irrigate the cabbage immediately after transplanting or sowing.
Any application of soluble fertilizer as fertigation should be done under a normal irrigation and make sure you continue irrigating for 5 minutes after fertigation to flush the system.
Plant protection
Make sure you use the Integrated Pest Management (IPM) to control the pests and diseases easily. Where possible, make sure you plant pests resistant varieties and this will give your crop a natural resistance to pests and diseases which will minimize the cost.
Mulching
Make sure you do row covering immediately after transplanting and left up for 10 to 15 days to be able to protect your crop from numerous insect pests, such as caterpillars, aphids, leafhoppers, leaf miners, beetles and white-flies.
Crop rotation
Avoid planting cabbage repeatedly or more than once every 3 to 4 years in the same field to avoid build up of pests and diseases.
Crop monitoring
Make sure you monitor cabbage plants against pests and diseases every week.
Harvesting
Make sure you harvest the cabbage when the heads has attained their full size and become firm and hard but tender. The cabbage is harvested by hand with a knife or sickle.
Large scale farmers are able to harvest cabbage mechanically and this is done once. Make sure the heads are cut off in such a way that a few of the large, open wrapper leaves are left for protection around the heads.
How to Use Rabbit Urine as Fertilizer: NPK Fertilizer of Rabbit Urine
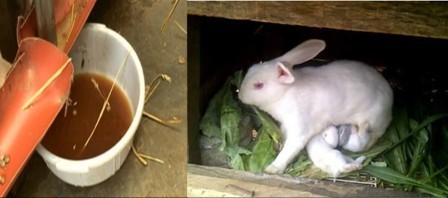
NPK Fertilizer of Rabbit Urine
Rising cost of chemical fertilizer (inorganic) in developing countries has put the lives of smallholder farmers who rely on farming at risk of food insecurity and low income generating through farming.
The rising cost of capital in crop production owing to inflation-driven rates of interest has made both small-scale and large-scale farming in developing countries uncompetitive. In developing countries lack of local manufacturing of inorganic fertilizer has exacerbated the situation and this has forced a lot farmers to start looking for alternative ways which could lower cost of production by substituting chemical fertilizer with organic fertilizer that achieve similar results.
As of today, different studies have shown that Rabbit urine can be used as a fertilizer and pesticide. The studies have shown Rabbit urine contains a high level of nitrates, phosphorus and potassium, which are required by the plant to grow, and it is environmentally friendly and non-toxic in farming system.
The importance of Rabbit urine is that, it has no expiry date as long as it is kept covered after harvesting to preserve ammonia. Rabbit urine is normally alkaline and has a pH between 8 to 9.
Composition of Rabbit Urine
Rabbit urine has a higher nitrogen content compared with the urine coming from other animals. The nutrient content of rabbit urine fertilizer is 2.72% nitrogen, 8.7% phosphorus, 2.3% potassium, 3.6% sulfur, 1.26% calcium and 4.0% magnesium, which are essential for crop production.
Using Rabbit urine as a chemical fertilizer substitute does not only help farmers reduce the high cost of inorganic fertilizer, but also it increases the quantity and quality of the crop produced by improving the soil fertility of the soil and controlling unruly crop pests, simultaneously. Thus, there is no waste in rabbit production.
How do You Collect Urine From a Rabbit
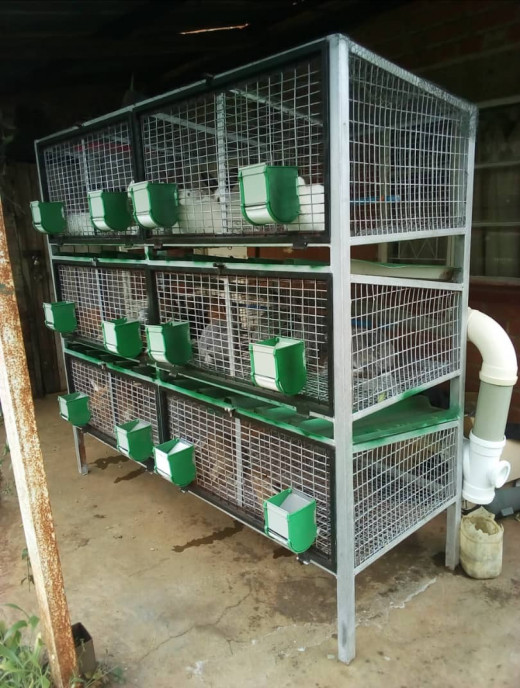
In order to collect as much Rabbit urine as possible, you should raise your Rabbit in cages. The Rabbit cage should be made using a wire mesh floor which the Rabbits rest on. Underneath, a slightly slanted iron sheet should be placed which directs urine to a gutter and, thereafter, to a container for collection as shown above.
Crops That You Can Apply Rabbit Urine as Fertilizer and Pesticide
Rabbit urine is very rich in nitrogen and it is very effective on vegetable crops like cabbage, lettuces, cucumber, watermelon, and other vegetables at any stage of growth. It can also be used at the early stage of other crops like maize (corn).
How to Apply Rabbit Urine as Fertilizer and Pesticide
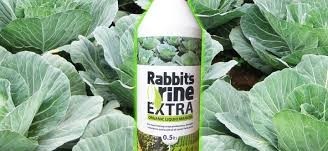
When used as a fertilizer, farmers are required to mix a litre of concentrated Rabbit urine and with four litres of water and apply it to crops three times every two weeks.
When used as an insecticide, farmers are required to mix two litres of concentrated rabbit urine with three litres of water and spray the mixture on affected crops after every two weeks three times to wipe the insects.
The difference between synthetic pesticides and organic pesticides is just their reaction with the target pests. Synthetic pesticides kill the pests which, at times, may be beneficial to the plants in terms of pollination while organic pesticides repel the pests from the plant and does not kill the pollinating agents. It is an organic pesticide that repels the insect pests through its pungent smell.
Examples of insect pests that are repelled by Rabbit urine are aphids, mites, bugs, leaf miners, bugs.
Other Income Generating Ideas From Rabbit Urine
The Rabbit can be raised for meat, and you can venture into this farming in large scale. In this case, you will be generating revenue by selling Rabbit meat.
As a Rabbit farmer, if you do not have the passion for crop production, you can sell Rabbit urine to organic crop farmers at reasonable prices.
Irish Potato Farming
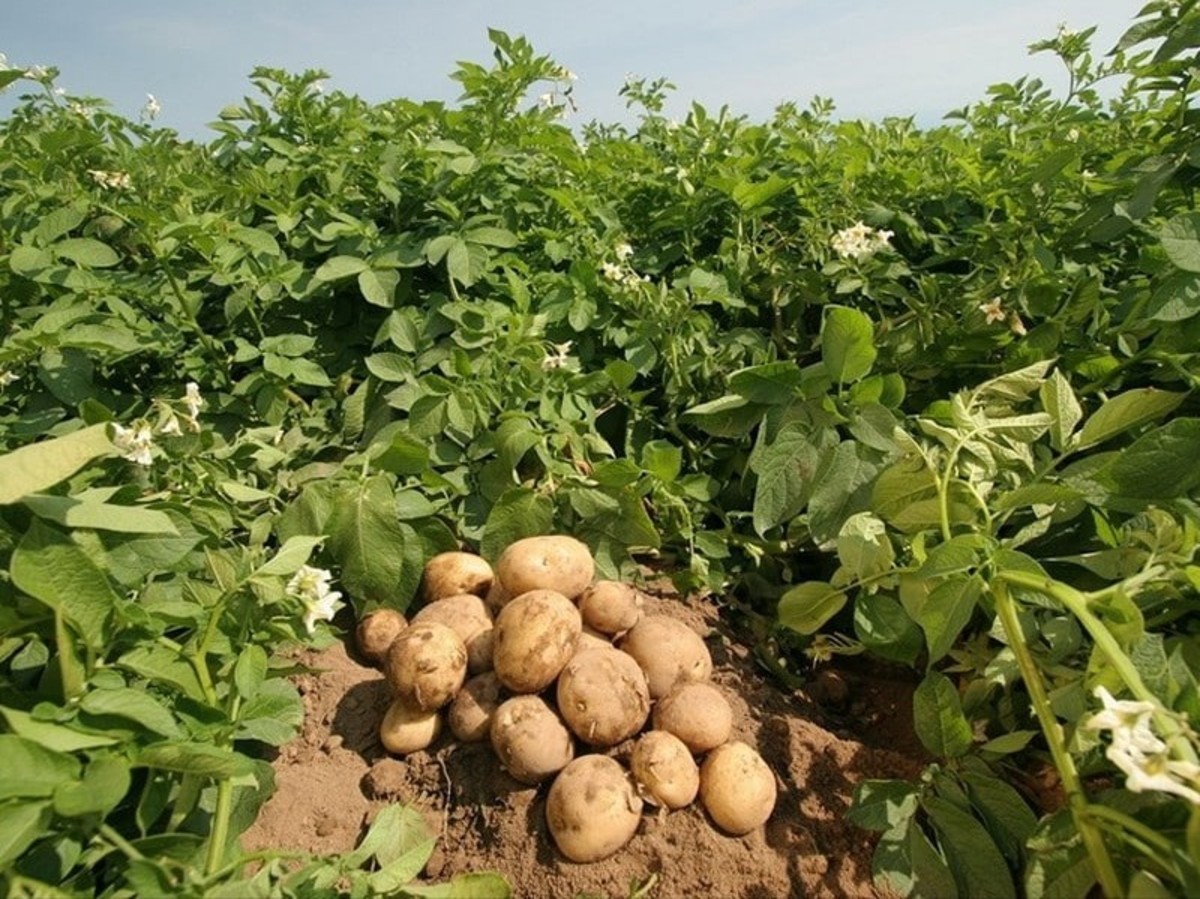
Irish Potato Cultivation Farming
Irish potato is a major food and cash crop in high altitude areas of different countries, and is widely grown by small-scale farmers.
It is one of the most consumed produce, acting as a staple food as well as a cash crop to local people of different countries, and its production in different countries has been growing rapidly due to increased urbanization and fast food industries.
Nutritional Value
Irish potatoes are a rich source of nutrition and energy. They are rich in vitamins, minerals and essential organic compounds, which are needed by your body.
Among others, they are rich in iron, calcium, phosphorous, magnesium and zinc, essential in building and maintaining bone structure and strength.
They also contains fibre, which helps lower the total amount of cholesterol in the blood.
This is not all as they also contain Choline which helps with memory, brain development and muscle movement.
Irish potatoes also contain vitamin B6, which helps in energy metabolism by breaking down carbohydrates and protein into glucose and amino acids. They are also a good source of vitamin C.
Varieties
The common varieties of Irish potatoes are; Red and White. Red varieties require more time in storage to get damaged, unlike the white varieties, but white varieties preferred when it comes to cooking qualities.
Ecological Requirements
The Irish potato growing site should be free from pests and diseases such as bacterial wilt, blight and nematodes.
The site should have a well-drained loamy to sandy loam soils and the soil pH should range between 5.0 and 7.0 but the ideal pH should be 5.5. The site should have an average daily temperature of between 15 to 21 °C.
Irish potato do well in high altitude areas between 1,500 and 3,000 meters. They require between 400 and 800 mm of rains during the growth period.
Site selection
The selected site should match the ecological requirements given above. Among others, it should have an average daily temperature of between 15 to 21 °C and the soil should be a well-drained loamy to sandy loam soils.
To get more yield on Irish potatoes, make sure you grow your Irish potatoes in areas where the sun is mostly available as its one of its requirements to perform well.
Potato Growing
Nutrients management in potatoes
The Irish potato plant has a shallow root system; with a high demand for nutrients. It requires, macro and micronutrients, for proper growth and optimal yields.
Rotational planning
Irish potato growing should rotate after every 4 years with non-root and tuber crops, preferably cereals and legumes to break pest and disease cycle, such as carrot and improved fallow either under Crotalaria ocroleuca or Leucaena and brassicas and this will make your Irish potato to give optimal yields. In general, avoid solanaceious crops.
Land preparation
The selected site should be ploughed when soil is dry. Plough the site to appropriate tilth 45 cm- 50 cm deep. After ploughing, add manure and fertilizers to the soil in the right amounts to provide the required plant nutrients for vigorous crop growth.
Seed preparation
Irish potatoes are propagated, which means pieces from the Irish potato start new plants and does not require seedling.
Cut the Irish potato seeds 5 or 6 days before planting and keep the cut seed in a well ventilated place. You should plant a disease free seed. When possible use the certified seeds.
Planting
During planting, you place your Irish potato seed at 5 to15 cm depth and the tuber sprouts face up. A space of 75 x 30 centimeters between rows and 30-40 centimeters within rows is recommended.
One hectare of land requires 2-2.5 tons. The larger the seed size, the more the amount required.
Fertilizers
A soil test should be conducted before the application of any fertilizer to your Irish potato field.
Having done your soil testing, apply DAPP at 200 kg per acre and on acidic soil, you should apply CAN fertilizer at 120kg per acre, depending on the result of soil analysis.
Watering
For high yields, Irish potato requires a range of 850 to 1,200 mm rainfall during the growing period.
You should grow your Irish potatoes in areas having that annual rainfall range.
When applicable supply water through irrigation, but make sure, the field is not waterlogged.
Weeds Control
In your Irish potato field weed should be kept on watch, as it may result in a build up of pests and diseases. Weeding should be done 2 weeks and 5 weeks after emergence.
Avoid weeding your Irish potato field after flowering because it predisposes the crop to infections and may injure the tubers.
Major Pests In Irish potato Farming
Irish potato fields are commonly affected by potato Tuber Moth, Aphids and Root-knot. Use chemical, cultural and biological methods to eliminate these pests.
Harvesting
Irish potatoes are ready for harvesting when the top leaves start dying and its skin becomes firm.
To harvest your Irish potatoes, you dig under the plants with a hoe or a shovel and uplift it to remove the mature Irish potato tuber.
Irish potatoes are ready for harvesting in a range of 95 to 110 days from the planting day.
How to Grow Vegetables: Vegetable Farming & Gardening
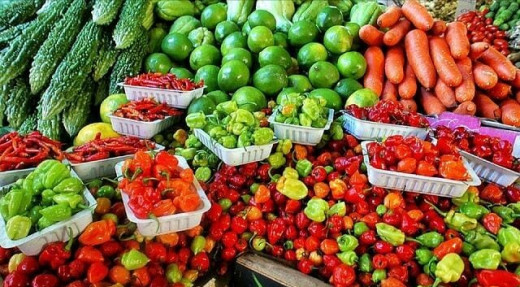
Vegetable Farming & Gardening
Vegetables can be grown in small scale at home gardens or in large scale at your farm. This article will cover both.
Firstly, vegetable farming is defined as growing of vegetables for human consumption. On the other hand, gardening vegetables involve growing of vegetables in low scale in your home gardens, for home use of small scale business.
A successful vegetable garden requires a good site, careful planning, good management and considerable hard work. Similarly, if you want to cultivate vegetables in large scale for human consumption, you need to select a good site, whose soils favour vegetable growing. Apart from this, you will require similar management skills at your vegetable farms.
Basic Techniques
Site selection
For you to get high vegetable yields, it begins with selecting a good site which favours vegetable cultivation. That's a good vegetable garden and farm site, is essential for high vegetable yields. Poor sites not only produce low vegetable yields, but may also be extremely difficult to grow your vegetables.
You should select a site with deep, medium-textured, well-drained, nearly level soil as it favours vegetable growing. Fine-textured, clay soils stay wet late into the spring, are difficult to work and tend to crust badly. Sandy soils dry out very quickly and require frequent nutrient applications, this makes them unsuitable vegetable cultivation.
If you have resorted to grow your vegetables in your home gardens, you should know that most vegetable gardens require six hours of sunlight or more per day to produce well. The more the garden is shaded, the slower the vegetables will grow and the lower their yields will be.
Trees and large shrubs not only shade gardens, but also use nutrients and water needed for proper vegetable growth, which is not the case in your vegetable farms, which favours large scale production.
You should select a vegetable site for your home gardens near your house to make it more convenient to care for the garden and to harvest your vegetables. Water should be available for transplanting and irrigation.
Soil preparation
Having selected a good site to establish your vegetable farm or garden, the next step is to prepare your site or soil. In preparing the land for your vegetable production, the following factors should be taken into consideration: ecological location, mode of cropping, season, crop disposition, and the type of vegetables to be grown.
The selected vegetable site should be prepared by removing old plant supports, plastic mulches, excessive vegetative residues and other debris from the garden area or your vegetable farm several weeks before planting to allow the soil to dry out.
Soil in your vegetable farm and Garden should not be worked when it is too wet. You should pick up a handful of soil and roll it into a ball. If the soil sticks together and does not crumble when dropped, it is too wet to work. Soil worked too wet forms large, hard clods which are difficult to break up and are completely unsuitable for a seedbed.
Soil in your vegetable farm and garden should be worked to a depth of at least 6 or 7 inches and smoothed before planting. Seed should be planted only in moist, finely aggregated soil.
Soils worked into a powdery condition are more likely to crust. Small vegetable seeds planted in cloddy soil usually dries out and germinate poorly. Garden and farm soil may be worked with farm equipment, a rototiller or spaded with a shovel.
Fertilizer and Lime
Vegetable farm and gardens will not reach their potential unless the soil is properly limed and fertilized. Liming in your vegetable farm or garden decreases soil acidity, increases fertilizer availability and reduces certain physiological problems such as blossom-end-rot of tomatoes, peppers and watermelons. A soil test is the only reliable method of determining the optimum amount of lime and fertilizer to apply in your farm or garden.
You should apply fertilizer to your farm or garden soil in the spring before planting. Manure is generally broadcast. Chemical fertilizers should be broadcast, applied in the rows or banded near or under the rows. If fertilizer is broadcast or applied in the rows in your vegetable farm or garden, it should be worked into the soil before planting.
Seeding and Spacing
Proper spacing among rows and between vegetable plants within rows is essential for maximum production of high-quality vegetables. Planting your vegetable on ridges in your farm or garden will ensure good stands of cool-season vegetables and make it easier to plant at the proper time.
Ridges promote germination early in the spring because they warm up and dry out quickly. Ridges in your vegetable farm also reduce the chance of spring vegetables being flooded during heavy rains.
As a general rule, vegetable seeds should be planted at a depth equal to 2 to 4 times their diameter. You should plant your vegetables shallowly early in the spring when the soil is wet and cold and a little deeper in the summer when soils are drier. You should plant shallowly in heavy clay soils and a little deeper in light sandy soils.
Transplants
Some vegetables are easier to grow from transplants than from seed. Beginning with vegetable transplants rather than seed will speed vegetable maturity in your farm or vegetable garden.
Other vegetables, such as sweet potatoes or Irish potatoes, may not be commonly grown from true seed. Thus, gardens will likely contain vegetables grown from transplants, slips or seed pieces as well as from true seed. Cabbage, cauliflower, broccoli, tomatoes, peppers and eggplant are usually transplanted into the garden or your vegetable farm rather than direct-seeded.
Cantaloupe, cucumbers, squash and watermelon may be transplanted if they are grown in individual containers and are transplanted without disturbing their roots. These vining vegetables should be seeded in containers 3 inches or more across, and transplanted about three weeks after seeding.
Vegetable transplants requires initial protection against strong winds, hot sun or freezing temperatures. Hot caps should be made from newspapers or gallon milk jugs with the bottoms removed and use them to as your vegetable protectors.
Irrigation
Vegetables require 1 to 1½ inches of water per week for maximum production. Most years have dry periods when irrigation will greatly increase growth, fruit set, total yield and quality.
The easiest way to irrigate your vegetable farm or garden is with a sprinkler.
Water should be applied slowly to your vegetables to prevent runoff and erosion in your field or garden.
You should place several cylindrical containers in the area covered by the sprinkler to measure the water applied. Apply 1 to 1½ inches of water, then do not irrigate again for several days.
Weed control
Weeds compete with vegetable plants for water, nutrients and sunlight in your home gardens or your vegetable farm. The reduce yields and may cause crop failure unless they are controlled. You should use a combination of mechanical methods and chemical weed killers such as herbicides to eliminate weeds in your vegetable farm or home gardens.
However, it should be noted that most herbicides are not recommended for use in home gardens. This is so because it is difficult to apply small amounts of chemicals uniformly over your garden area. For this reason, hoeing and cultivating are the most common methods of weed control for home gardeners.
Harvesting
Harvesting should be done on clear, dry days, for the fruit vegetables and Individual, manual harvesting is preferable.
Irish Potato Production Farming and Management
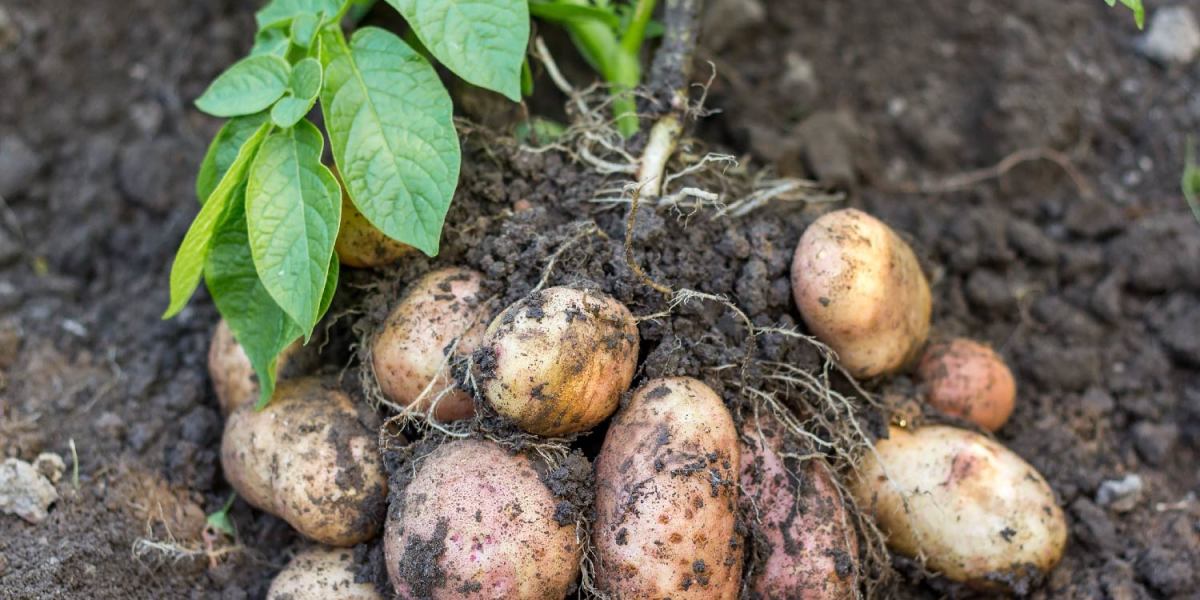
Irish Potato Farming
Irish potato is one of the major food in different countries and also it is used as one of the cash crop in high altitude areas and it is commonly grown by smallholder farmers.
It is becoming one of the profitable crop due to increasing in demand due to an increase in urbanization in different countries as well as an increase in fast food industries.
The edible part is called the tuber and it's not a root but it grows underground. It is an underground stem.
Nutritional content of Irish potatoes
Irish potatoes are able to provide both the nutrition and energy required by the body. In addition, they are able to provide the following nutrients; vitamins, minerals and essential organic compounds.
Varieties
Red and white are the commonly grown varieties. Red varieties takes more time in storage to get damaged, unlike the white varities, but white varieties preferred when it comes to cooking qualities.
Climatic conditions or optimal ecological requirements
- Irish potatoes give best results on an altitude of a range of 1,500 to 2,800 m.a.s.l.
- It requires annual rainfall of a range of 850 to 1,200 mm during the growing period.
- Irish potatoes give the best results when they are grown in areas having a temperature range of 15 to 20 °C and this is known to be optimal temperature. Irish potatoes require a cool climatic conditions, unlike other crops. The tuberization takes place when the temperature is around 15 °C.
- It requires a free draining fertile medium loams and when it comes to soil pH, Irish potatoes do well at a pH of a range of 5.5 to 7.5.
Site selection
To get more yield on Irish potatoes, make sure you grow your Irish potatoes in areas where the sun is mostly available as its one of it requirements to perform well. Irish potatoes do well in a loose and well drained, partly acidic soil.
Land preparation for Irish potatoes
Make sure you clear the site where you want to cultivate Irish potatoes. It has to be ploughed when soil is dry not when it is wet. The ploughing has to be of a deep tilth of a range of 45cm to 50cm. Make sure you apply manure and fertilizers to the soil to get best results. When applying fertilizers and manures, make sure you apply the right amount and do a soil test to know right nutrients to apply for optimal results.
Seed preparation
Irish potatoes are propagated. Pieces from the Irish potato start new plants and does not require seedling. Make sure you plant healthy potato seed to get best results. Avoid buying Irish potato seeds from a grocery shop for planting. Make sure you cut the Irish potato seeds 5 or 6 days before planting and keep the cut seed in a well ventilated place.
Key points to consider
- Make sure you plant a disease free seed when possible use the certified seeds. • •Make sure you produce at least 4 sprouts
- Make sure you keep the Irish potato seed tubers in a diffuse light to enable the development of short strong sprouts.
Planting
During planting make sure, you place your Irish potato seed at 5 to15 cm depth and make sure the tuber sprouts are facing up. Observe a space of 75 x 30 centimeters between rows and 30-40 centimeters within rows. One hectare of land requires 2-2.5 tons per ha. Only a 50 Kilograms of Irish potato seed are required per acre when grown at a spacing of 15-20cm within rows.
Fertilizers
Make sure you do a soil test to apply right fertilizers and manures. Make sure the plant has adequate moisture and fertilizer during the tuber formation. Apply DAPP at 200 kg per acre and on acidic soils make sure you apply CAN fertilizer at 120kg per acre, depending on the result of soil analysis.
Watering
A range of 850 to 1,200 mm rainfall is required for Irish potatoes during the growing period. So make sure you grow your Irish potatoes in areas having that annual rainfall range of that one. When applicable supply water through irrigation, but make sure, the field is not waterlogged.
Weeds Control
Make sure the weed is kept on watch, as it may result in build up of pests and diseases.
Major Pests In Irish Potato Farming
Irish potato fields are mostly affected by the following major pests; Potato Tuber Moth, Aphids and Root-knot.
Harvesting
Irish potatoes are ready for harvesting when the tops start dying and its skin becomes firm. To harvest Irish potatoes, make sure you dig under the plants with a hoe or a shovel and uplift it to remove the mature tuber.
Take a note Irish potato most of the varieties are ready for harvesting in a range of 95 to 110 days from the planting day.
Digital Solutions for Organic Certification and Traceability

Digital Solutions for Organic Certification and Traceability
Are you passionate about organic food? Do you believe in the importance of transparency and trust when it comes to the food we consume? If so, then this blog post is for you! In today's digital age, where information flows freely and consumer demands are increasing, there is a growing need for digital solutions in the organic certification process.
From ensuring traceability throughout the supply chain to combating fraud and promoting sustainability, technology has the power to revolutionize how we certify and track organic products.
Join us as we explore these exciting possibilities and delve into how blockchain and other digital solutions can drive authenticity in the world of organic certification. Get ready to dive into a world where trust meets technology!
The Need for Digital Solutions in the Organic Certification Process
The organic certification process is the backbone of ensuring that food labeled as "organic" truly meets the stringent standards set by regulatory bodies. However, this process is not without its challenges. As the demand for organic products continues to grow, so does the complexity of verifying their authenticity and maintaining traceability throughout the supply chain.
One of the key reasons why digital solutions are needed in the organic certification process is to address issues of trust and transparency. Currently, much of the information related to certification and traceability is stored in disparate systems, making it difficult to access and verify data accurately. This lack of transparency can lead to consumer skepticism and erode trust in organic labeling.
Furthermore, fraud poses a significant threat within the industry. With high consumer demand for organic products, there have been instances where unscrupulous individuals or companies attempt to pass off conventionally grown produce as organically certified. This not only harms consumers who are paying a premium for authentic organic goods but also undermines farmers who follow strict guidelines to produce genuinely sustainable products.
Digital solutions such as blockchain offer promising ways to tackle these challenges head-on. Blockchain technology provides an immutable ledger where every transaction related to certification can be recorded securely and transparently. This ensures that all parties involved - from farmers and processors to distributors and retailers - have access to accurate information about each step in the supply chain.
By leveraging blockchain's decentralized nature, it becomes nearly impossible for anyone within the network to tamper with or manipulate data retroactively. This not only prevents fraud but also enables stakeholders at any point along the supply chain - including consumers themselves -to easily verify if a product has indeed been certified as organic.
In addition to blockchain technology, other digital solutions like internet-of-things (IoT) devices can further enhance traceability efforts by providing real-time monitoring capabilities throughout various stages of production and distribution.
With IoT sensors embedded in equipment or packaging materials, important parameters such as temperature control during transportation or storage can be tracked and recorded automatically.
Current Challenges with Organic Certification and Traceability
The current organic certification process faces several challenges when it comes to traceability. One of the main issues is the lack of transparency and visibility throughout the supply chain. As organic products move from farmers to processors, distributors, and retailers, it becomes increasingly difficult to track their journey accurately.
Another challenge is the reliance on paper-based documentation. This manual record-keeping system is not only time-consuming but also prone to errors and fraud. In some cases, crucial information may be lost or altered during this process, compromising the integrity of organic certification.
Furthermore, there are concerns about verifying the authenticity of organic products. With traditional methods, it can be challenging to confirm that a product labeled as "organic" truly meets all necessary standards and requirements.
Additionally, cross-border transactions pose significant difficulties in ensuring traceability across different countries' regulations and systems. This inconsistency hampers efficient coordination among global stakeholders involved in organic certification.
Consumer trust plays a vital role in the success of organic certifications. Without reliable traceability mechanisms in place, consumers may question whether they are getting what they paid for: genuine organic products with minimal environmental impact.
To address these challenges effectively, digital solutions are needed to revolutionize the way we certify and track organic products throughout their lifecycle—from farm to table.
How Blockchain Can Help Solve the Problems of Certification and Traceability
Blockchain technology has gained significant attention in recent years, and its potential applications go far beyond cryptocurrencies. One area where blockchain can make a significant impact is in the certification and traceability of organic products.
One of the biggest challenges with organic certification is ensuring transparency and trust throughout the supply chain. With multiple stakeholders involved, such as farmers, processors, distributors, and retailers, it becomes crucial to have an accurate record of each step.
This is where blockchain comes into play. By utilizing blockchain technology, all transactions related to organic production can be securely recorded in an immutable ledger that cannot be altered or tampered with. This ensures complete transparency and eliminates the risk of fraud or misrepresentation.
Moreover, blockchain allows for real-time tracking of products from farm to fork. Each stage of the supply chain can input data onto the blockchain which creates a transparent trail that consumers can easily access. This not only enhances trust but also enables consumers to verify if a product meets their desired standards.
Additionally, smart contracts on the blockchain streamline processes by automating tasks such as verification and validation checks. This reduces paperwork and speeds up the overall certification process while maintaining accuracy and reliability.
Furthermore, by leveraging decentralized storage capabilities offered by blockchain technology, sensitive information like test results or certifications can be securely stored without relying on a central authority that could potentially compromise data integrity.
Adopting blockchain for organic certification offers numerous benefits including enhanced transparency across supply chains, improved traceability for consumers seeking reliable food sources as well as streamlined processes through automation using smart contracts.
Other Potential Digital Solutions for Organic Certification and Traceability
Technology has the power to revolutionize the organic certification and traceability process. While blockchain is a promising solution, there are other digital tools that can also contribute to ensuring transparency and authenticity in the organic industry.
One potential digital solution for organic certification is remote sensing technology. This involves using satellite imagery and aerial drones to monitor farms and gather data on crop growth, soil conditions, and pest management practices. By analyzing this data, certifying bodies can gain insights into whether farmers are adhering to organic standards.
Another innovative tool is mobile applications that allow farmers to track their production practices. These apps can enable farmers to record information about seed varieties, fertilizers used, harvesting methods, and more. This data can then be easily shared with certifiers, improving transparency in the certification process.
Artificial intelligence (AI) algorithms can also play a role in verifying compliance with organic standards. By analyzing large datasets of farm records and monitoring data collected through IoT devices, AI systems can detect patterns or anomalies that may indicate non-compliance or fraud.
Furthermore, incorporating Internet of Things (IoT) devices into agricultural operations enables real-time monitoring of critical variables such as temperature, humidity levels during transportation/storage which are crucial for maintaining product integrity throughout the supply chain.
Lastly, implementing a centralized database system could streamline certification processes by allowing stakeholders such as farmers, certification bodies, and retailers access necessary documentation electronically. This would reduce paperwork while increasing efficiency across all stages of the supply chain.
As we move towards a digital future, it's important to explore various solutions that ensure trustworthiness and reliability in organic certification.
The combination of these different technologies has great potential to create an interconnected ecosystem where every step from farm to fork is transparent, fraud-proof, and accountable.
Conclusion
In this fast-paced digital age, the organic certification process and traceability have become paramount concerns for consumers and producers alike. The need for accurate, transparent, and efficient processes has never been greater.
Fortunately, digital solutions are emerging to address these challenges head-on. Blockchain technology offers a decentralized and secure way to document each step of the supply chain, ensuring transparency and trust throughout the organic certification process. It eliminates the possibility of fraud or tampering by providing an immutable record of every transaction.
Additionally, other digital solutions such as IoT devices, AI algorithms, and data analytics can enhance traceability by capturing real-time data on farming practices, soil conditions, transportation routes, storage temperatures, and more. This wealth of information provides valuable insights into the entire lifecycle of organic products.
By leveraging these technologies together with traditional organic certification methods like inspections and audits from certifying bodies, we can create a robust system that guarantees authenticity while meeting consumer demands for sustainable products.
While implementing digital solutions may require initial investment in infrastructure and training programs for stakeholders involved in organic production systems worldwide – farmers associations or cooperatives -, the long-term benefits far outweigh the costs. Increased efficiency in certification processes will save time and resources for both producers and certifiers while boosting consumer confidence in organically certified products.
As we move towards a greener future where sustainability is key to our survival on this planet - it's crucial that we embrace innovative technologies that can help us meet our goals without compromising integrity or transparency in our food systems. Digital solutions provide an opportunity to strengthen trust between consumers who seek out healthy choices from responsible sources; marketers trying hard not only meet but exceed customer expectations; governments looking forward regulating local markets plus international trading partners seeking reliable evidence supporting origin claims made about imported goods...and above all else ensure producers receive fair prices recognizing their efforts producing high-quality produce sustainably!
In conclusion, let us seize this momentous opportunity to leverage digital solutions for organic certification and traceability.
Blockchain Applications Beyond the Food Supply Chain

Introduction to Blockchain
In our fast-paced digital world, innovation is constantly reshaping traditional industries. One such innovation that has taken the tech world by storm is blockchain. Initially popularized as a backbone for cryptocurrencies like Bitcoin, blockchain technology has far-reaching applications beyond just financial transactions.
Imagine a secure and transparent system where information cannot be tampered with or manipulated. Well, that's precisely what blockchain offers - a decentralized ledger that ensures trust and immutability in an increasingly interconnected world.
In this blog post, we will dive into the captivating world of blockchain technology and explore its potential across various industries. From revolutionizing the food supply chain to transforming healthcare and education sectors, let's discover how this groundbreaking technology is changing the game! So buckle up and get ready to embark on an exciting journey into the limitless possibilities of blockchain!
The Benefits of Blockchain
Blockchain technology has gained significant attention in recent years due to its numerous benefits across various industries. One of the key advantages of blockchain is its ability to provide transparency and security in data transactions. Unlike traditional centralized systems, blockchain operates on a decentralized network, making it difficult for any single entity to manipulate or control the data.
Another benefit of blockchain is its immutability feature. Once a block is added to the chain, it cannot be altered or deleted without consensus from the network participants. This makes blockchain ideal for storing sensitive information such as financial records or personal data.
Additionally, blockchain offers increased efficiency and cost savings by eliminating intermediaries in transactions. With smart contracts, parties can automate processes and execute agreements without the need for third-party verification.
Furthermore, blockchain enables traceability throughout supply chains, allowing consumers to have greater visibility into product origins and quality assurance. This is particularly important in sectors like food production where concerns about safety and sustainability are paramount.
Moreover, by using cryptography techniques, blockchain ensures that data remains secure from unauthorized access or tampering. This makes it an attractive option for industries dealing with sensitive information such as healthcare or finance.
Blockchain technology has proven itself as a transformative force with its benefits including transparency, security, efficiency, and traceability across multiple sectors.
The Disadvantages of Blockchain
While blockchain technology offers numerous benefits, it also has its fair share of disadvantages. One major drawback is the issue of scalability. As more transactions are added to the blockchain, it becomes increasingly difficult for the network to handle and process them in a timely manner.
Another drawback is the high energy consumption associated with blockchain networks. The process of mining, which involves solving complex mathematical problems to validate transactions, requires significant computational power and electricity.
Additionally, privacy concerns arise when using blockchain technology. While transactions on the blockchain are transparent and secure, users' identities can still be linked to their public addresses if they're not careful.
Interoperability is another challenge faced by blockchains. Different blockchains may have different protocols and standards, making it difficult for them to communicate with each other seamlessly.
Moreover, since blockchain is an emerging technology, there is a lack of regulatory framework in many jurisdictions. This can create uncertainty and legal issues for businesses looking to adopt blockchain solutions.
Despite these drawbacks, researchers and developers are actively working on addressing these challenges through innovation and improvements in technology. As the field continues to evolve, we can expect even greater advancements that will help overcome these limitations while harnessing the full potential of blockchain across various industries.
How can Blockchain be Used in Different Industries?
How can Blockchain be used in different industries? The potential applications of this revolutionary technology extend far beyond just the food supply chain. Let's explore some other sectors where blockchain is making waves.
In the healthcare industry, blockchain has immense potential to transform patient care and data management. By securely storing medical records on a decentralized network, patients have full control over their health information while ensuring its integrity and privacy. This eliminates the need for intermediaries and reduces administrative costs, allowing healthcare providers to focus more on delivering quality care.
Education is another sector that can greatly benefit from blockchain technology. With academic credentials being stored on a transparent and immutable ledger, fraud and misrepresentation of qualifications can be significantly reduced. Additionally, by providing students with verifiable digital certificates or badges upon completion of courses or achievements, blockchain ensures greater trustworthiness in the education system.
Supply chain management across various industries also stands to gain from adopting blockchain solutions. From tracking products' origins to verifying authenticity and preventing counterfeit goods, this technology provides transparency throughout the entire supply chain process. Moreover, smart contracts enable automation of transactions based on predefined conditions, streamlining processes and reducing costs for all stakeholders involved.
The financial sector has been one of the earliest adopters of blockchain technology through cryptocurrencies like Bitcoin. However, beyond virtual currencies lies an array of possibilities such as cross-border payments facilitated by smart contracts or real-time auditing enabled by distributed ledgers - revolutionizing traditional banking practices.
These are just a few examples showcasing how diverse industries can leverage blockchain technology to enhance efficiency, security, transparency,and trust in their operations.
Nevertheless, the widespread implementation requires overcoming technical challenges, maintaining regulatory compliance, and addressing concerns around scalability.
However, the potential benefits are substantial enough to warrant further exploration.
Food Supply Chain
The food supply chain is a complex and global network involving various stages, from production to consumption. However, this intricate web often faces challenges such as fraud, contamination, and lack of transparency. Fortunately, blockchain technology offers promising solutions that can revolutionize the food industry.
By implementing blockchain in the food supply chain, every step of the journey can be recorded and verified in real-time. This creates a transparent system where consumers can trace the origin of their food products and ensure they are safe to consume. Additionally, farmers and producers can have better control over their supply chains by tracking inventory levels and monitoring quality standards.
Another advantage of using blockchain in the food industry is its ability to detect fraudulent activities. With immutable records stored on decentralized ledgers, it becomes nearly impossible for counterfeit products to enter the market unnoticed. This not only protects consumers but also maintains trust between businesses within the supply chain.
Furthermore, blockchain enables efficient recalls during instances of contamination or safety concerns. Instead of relying on time-consuming manual processes to identify affected batches or shipments, all relevant information is readily available on the blockchain. As a result, companies can act quickly to remove contaminated products from circulation before they reach consumers.
In summary, blockchain technology has immense potential beyond just securing financial transactions; it holds great promise for transforming industries like agriculture and improving our daily lives by creating more secure and transparent systems across various sectors - including healthcare education, transportation , energy etc.,. By leveraging its benefits in areas such as the food supply chain, we can ensure safer consumption practices while building stronger relationships between producers and consumers alike.
Healthcare
Blockchain technology has the potential to revolutionize various industries, including healthcare. By leveraging its decentralized and secure nature, blockchain can address several challenges within the healthcare system.
One of the key applications of blockchain in healthcare is the management of electronic health records (EHRs). Currently, patient data is often scattered across different providers and institutions, making it difficult to access and share information securely. With blockchain, EHRs can be stored on a distributed ledger that allows for seamless and secure sharing between authorized parties. This ensures that patients' medical history is accurate, up-to-date, and easily accessible whenever needed.
Another area where blockchain can make a significant impact is in clinical trials. The process of conducting clinical trials involves collecting vast amounts of data from multiple sources. Blockchain technology can provide transparency and immutability to this process by securely recording all trial-related information such as participant eligibility criteria, consent forms, data collection protocols, and results. This not only helps streamline the trial process but also enhances trust among participants.
Furthermore, supply chain management within the pharmaceutical industry could greatly benefit from blockchain implementation. Counterfeit drugs are a growing concern worldwide. Blockchain's ability to create an immutable record of every transaction along the supply chain can help ensure authenticity and traceability of pharmaceutical products.
Additionally, blockchain-powered smart contracts have the potential to simplify insurance claims processing by automating verification processes based on predefined conditions coded into these contracts. This reduces administrative costs while increasing efficiency and transparency in claim settlements.
While there are numerous benefits associated with implementing blockchain in healthcare systems, it is important to consider some challenges as well. One major hurdle lies in ensuring interoperability between different systems using varied standards for data exchange. Additionally, privacy concerns surrounding sensitive patient information must be addressed adequately through robust encryption mechanisms.
In conclusion (without using those words), integrating blockchain technology into healthcare has immense potential for transforming how patient data is managed securely across various stakeholders within the industry while improving efficiency in clinical trials, supply chain management, and insurance claims processing.
Education
Education is an essential aspect of our lives as it equips us with knowledge and skills that are necessary for personal growth and professional success. In recent years, there has been a growing interest in using blockchain technology to revolutionize the education sector.
One application of blockchain in education is the creation of secure digital credentials. With traditional paper certificates and diplomas, there is always a risk of fraud or loss. By storing educational credentials on a decentralized blockchain network, individuals can have ownership and control over their own records.
Another benefit of using blockchain in education is its potential to facilitate lifelong learning through micro-credentials. These are smaller units of learning that can be accumulated over time to build a comprehensive portfolio of skills and knowledge. Blockchain can provide a transparent and verifiable way to record these micro-credentials, making it easier for employers or institutions to assess an individual's qualifications.
Blockchain also has the potential to transform how academic research is conducted and published. Currently, many researchers face challenges such as plagiarism, data manipulation, or lack of transparency in peer review processes. By utilizing blockchain technology, research findings could be securely stored on the distributed ledger, ensuring integrity and traceability.
Furthermore, blockchain can enable efficient verification processes for academic transcripts when applying for further studies or employment opportunities across borders. This eliminates the need for manual verification by multiple institutions and reduces administrative burden.
In summary, while still relatively nascent in education compared to other industries like finance or supply chain management, blockchain holds great promise for transforming different aspects of education including credentialing systems, lifelong learning opportunities, academic research integrity, and transcript verification processes.
Precision Agriculture and Soil Mapping: The Key to Sustainable Farming

Precision Agriculture and Soil Mapping: The Key to Sustainable Farming
Welcome to the future of farming! In a world where sustainability is paramount, precision agriculture and soil mapping have emerged as powerful tools in revolutionizing the way we cultivate crops.
Gone are the days of relying on guesswork and generic approaches; today, farmers can harness cutting-edge technology to optimize their land usage, reduce environmental impact, and maximize yields. So join us as we delve into this exciting realm of precision agriculture and discover how it holds the key to sustainable farming practices.
Get ready to dig deep into the soil mapping revolution, uncover its importance, explore its myriad benefits, and learn how you can get started on your own journey towards agricultural excellence. Let's dive in!
What is Precision Agriculture?
Precision agriculture, also known as precision farming or site-specific crop management, is a modern approach to agricultural practices that utilizes advanced technology and data analysis to optimize farm operations. Unlike traditional methods that treat an entire field uniformly, precision agriculture takes into account the specific needs of different areas within a field.
One key aspect of precision agriculture is the use of GPS (Global Positioning System) technology to accurately map and track various parameters such as soil composition, moisture levels, and nutrient content. This allows farmers to create detailed maps of their fields and identify variations in soil conditions across different sections.
By harnessing this valuable information, farmers can make informed decisions regarding irrigation schedules, fertilizer application rates, and even planting strategies. This targeted approach not only ensures that resources are distributed efficiently but also reduces waste by minimizing unnecessary inputs.
In addition to GPS technology, other tools like remote sensing devices and drones are used for collecting data on plant health and growth patterns. These insights enable farmers to detect early signs of stress or disease in crops so they can take prompt action before it spreads throughout the field.
Precision agriculture empowers farmers with accurate data-driven insights that enhance productivity while reducing environmental impact. It's all about optimizing resource allocation based on real-time information rather than relying on generalized assumptions. By embracing this innovative approach, farmers can achieve higher yields while promoting sustainable farming practices for future generations.
Soil Mapping and its Importance
Soil mapping plays a crucial role in precision agriculture, providing farmers with valuable information about the composition and health of their soil. By accurately analyzing the characteristics of different areas within a field, farmers can make informed decisions on how to optimize resource allocation and improve crop yields.
One key aspect of soil mapping is understanding its variability across a farm. Soils can differ significantly in terms of nutrient levels, pH balance, organic matter content, and water holding capacity. By creating detailed maps that highlight these variations, farmers can target specific areas for tailored interventions such as fertilization or irrigation.
Furthermore, soil mapping helps identify potential issues like soil erosion or compaction that may hinder plant growth or reduce productivity. Armed with this knowledge, farmers can implement appropriate measures to mitigate these challenges and prevent further degradation.
Another advantage of soil mapping is its ability to support sustainable farming practices. With accurate data on soil composition and fertility levels, farmers can minimize inputs such as fertilizer application - reducing costs while minimizing environmental impacts caused by excessive chemical usage. Moreover, optimizing resource allocation based on precise knowledge allows for more efficient use of resources like water and energy.
Incorporating soil mapping into precision agriculture offers numerous benefits for both farmers and the environment. It provides valuable insights into the variability of soils within fields and enables targeted interventions to maximize crop productivity while minimizing environmental impact. Precision agriculture driven by comprehensive soil analysis sets the stage for sustainable farming practices that preserve natural resources for future generations.
The Benefits of Precision Agriculture
The benefits of precision agriculture are vast and significant. By using technology and data-driven strategies, farmers can optimize their crop production while minimizing waste and environmental impact.
One major benefit is increased efficiency. Through the use of GPS systems, drones, and sensors, farmers can accurately monitor soil conditions, water levels, and plant health in real-time. This allows for precise application of fertilizers, pesticides, and irrigation resources only where they are needed most. As a result, farmers save time, money, and resources by avoiding over-application or under-application.
Another advantage is improved yields. With precision agriculture techniques such as variable rate planting or seeding systems, farmers can optimize seed placement to ensure uniform growth across their fields.
Additionally, precision agriculture promotes sustainability. By reducing inputs such as
fertilizers, pesticides, and water usage,
farmers can minimize negative impacts on soil quality and nearby ecosystems. This leads to healthier crops, reduced runoff contamination in water sources, and ultimately a more sustainable farming system.
In summary, the benefits of precision agriculture cannot be ignored. It offers increased efficiency, improved yields,
better resource management
and contributes to sustainable farming practices.
How to get Started with Precision Agriculture
Precision agriculture is revolutionizing the way farming is done, but getting started can seem like a daunting task. However, with the right approach and tools, anyone can embrace this sustainable farming practice.
The first step in getting started with precision agriculture is to assess your farm's needs and goals. Take some time to evaluate what you hope to achieve through precision agriculture – whether it's reducing input costs, increasing yields, or minimizing environmental impact.
Next, invest in technology that will help you collect data about your soil and crops. This could include sensors for measuring moisture levels or drones for aerial imaging. By gathering accurate data about your farm's conditions, you'll be able to make informed decisions about how best to optimize production.
Once you have the necessary data collection tools in place, it's important to analyze the information gathered. Use software programs or apps specifically designed for precision agriculture to interpret the data and generate actionable insights.
Implement changes based on these insights and continuously monitor their effectiveness. Precision agriculture requires ongoing assessment and adjustment as conditions change throughout the growing season.
Remember that transitioning to precision agriculture doesn't have to happen all at once – start small and gradually expand your efforts as you become more comfortable with the process.
By following these steps and staying open-minded towards new technologies and practices, you'll be well on your way to embracing precision agriculture for a more sustainable future of farming!
Case Studies
Case studies serve as valuable examples of how precision agriculture and soil mapping techniques have led to sustainable farming practices. Let's take a look at a couple of these case studies:
In one study conducted in the United States, farmers utilized soil mapping technology to identify areas within their fields that had varying nutrient levels. By precisely targeting fertilizer application based on this information, they were able to significantly reduce their overall fertilizer use while still maintaining high crop yields. This not only saved them money but also helped reduce the environmental impact associated with excessive fertilizer usage.
Another case study from Australia focused on water management in irrigated crops. Through the use of precision agriculture tools such as remote sensing and advanced irrigation systems, farmers were able to effectively monitor soil moisture levels and apply water only when necessary. This resulted in improved water efficiency, reduced runoff, and ultimately increased profitability for the growers.
These examples demonstrate how precision agriculture and soil mapping can contribute to sustainable farming by optimizing resource utilization and minimizing negative impacts on the environment. By implementing these innovative techniques, farmers can achieve higher productivity while simultaneously reducing costs and preserving natural resources.
As more research is conducted and technologies continue to advance, we can expect even greater success stories emerging from around the world showcasing the power of precision agriculture in creating a more sustainable future for farming.
Conclusion
Precision agriculture and soil mapping play a vital role in promoting sustainable farming practices. By harnessing the power of technology and data analysis, farmers can optimize their crop production while minimizing resource use and environmental impact.
Through soil mapping, farmers can gain valuable insights into the characteristics of their land, allowing them to make informed decisions about irrigation, fertilization, and pest control. This targeted approach not only improves crop yields but also reduces input costs and minimizes the risk of nutrient runoff or contamination.
The benefits of precision agriculture are manifold. From increased productivity to enhanced resource efficiency, this innovative farming method offers a promising solution to meet the growing demand for food while preserving our planet's natural resources. Moreover, by reducing chemical usage and optimizing water usage through precise irrigation techniques, precision agriculture contributes to mitigating climate change impacts on agricultural systems.
Getting started with precision agriculture may require an initial investment in technology and equipment; however, it is a worthwhile long-term investment that can generate significant returns both economically and environmentally. Farmers can start by conducting soil tests to identify nutrient deficiencies or imbalances within their fields. They should also consider partnering with agronomists or agricultural consultants who specialize in precision farming techniques.
To illustrate the effectiveness of precision agriculture approaches, several case studies have showcased remarkable results across different regions globally. From vineyards in California using remote sensing technology to optimize irrigation schedules based on plant needs to grain farms incorporating GPS-guided machinery for precise planting patterns - these success stories demonstrate how embracing technology-driven sustainability measures can revolutionize modern-day farming practices.
As we face mounting challenges posed by climate change and global population growth, adopting sustainable agricultural practices becomes paramount for securing food security without compromising our environment's integrity. Precision agriculture provides us with an opportunity to align productivity with ecological responsibility – ensuring that future generations inherit a healthy planet capable of sustaining their needs.
So let us embrace this transformative approach towards sustainable farming: one that combines innovation with stewardship, precision with conservation.