Learn smarter with fresh insights from our tutors.
Practical study guides, course supplements, and learning resources curated to help you move faster through every subject.
Understanding Exchange-Traded Funds (ETFs): A Beginner's Guide

Understanding Exchange-Traded Funds (ETFs): A Beginner's Guide
Welcome to the exciting world of Exchange-Traded Funds (ETFs)! If you're new to investing or looking for a simple yet effective way to diversify your portfolio, ETFs might just be the perfect fit for you.
In this beginner's guide, we'll break down everything you need to know about ETFs - from their history and types to the benefits and risks associated with them. So sit back, relax, and get ready to embark on a journey towards understanding one of the most popular investment options available in the market today!
What are Exchange-Traded Funds (ETFs)?
Exchange-Traded Funds, commonly known as ETFs, are investment funds that trade on stock exchanges just like individual stocks. They are designed to track the performance of a specific index, commodity, bond, or a basket of assets. This means that when you invest in an ETF, you are essentially investing in a diversified portfolio of securities without having to buy each one individually.
ETFs offer investors the opportunity to gain exposure to various markets and sectors with lower costs compared to traditional mutual funds. They provide flexibility and liquidity as they can be bought and sold throughout the trading day at market prices. Additionally, ETFs offer transparency as their holdings are disclosed daily, allowing investors to know exactly what they own within the fund.
ETFs have gained popularity among both novice and seasoned investors due to their simplicity, diversification benefits and cost-efficiency.
The History and Growth of ETFs
Imagine a world where investors have a new way to diversify their portfolios – enter Exchange-Traded Funds (ETFs). The concept of ETFs was born in the early 1990s, offering individuals an alternative to mutual funds. Initially designed to track major stock market indices like the S&P 500, ETFs quickly gained popularity for their flexibility and lower costs.
Over time, the ETF market witnessed exponential growth as more investors recognized the benefits of this innovative investment vehicle. Today, ETFs cover a wide range of asset classes including stocks, bonds, commodities, and even cryptocurrencies. With thousands of options available on various exchanges globally, investors now have unparalleled access to diverse markets through these liquid and transparent instruments.
The evolution of ETFs has revolutionized the way people invest by providing cost-effective solutions with intraday trading capabilities. As technology advances and investor demand grows, we can expect further innovation and expansion in the realm of Exchange-Traded Funds.
Types of ETFs and How They Work
When it comes to Exchange-Traded Funds (ETFs), there is a wide variety of types available to investors. Some ETFs track stock market indexes like the S&P 500, offering diversified exposure to large-cap companies. Others focus on specific sectors such as technology or healthcare, providing targeted investment opportunities.
Bond ETFs invest in fixed-income securities like government or corporate bonds, offering income and potentially lower volatility compared to stocks. Commodity ETFs track the prices of commodities like gold or oil, allowing investors to gain exposure to these markets without owning physical assets.
There are also inverse ETFs that aim to profit from declining prices in their underlying assets, as well as leveraged ETFs that seek amplified returns through the use of financial derivatives. Understanding the different types of ETFs and how they work can help you build a well-rounded investment portfolio tailored to your financial goals and risk tolerance.
Benefits and Advantages of Investing in ETFs
Investing in Exchange-Traded Funds (ETFs) offers a range of benefits and advantages for both novice and experienced investors. One key advantage is the diversification that ETFs provide, allowing you to invest in a wide variety of assets with just one purchase. This can help spread risk and potentially enhance returns over time.
Another benefit of ETFs is their flexibility - they can be bought and sold throughout the trading day at market prices, unlike mutual funds which are only priced once daily after markets close. Additionally, ETFs typically have lower expense ratios compared to actively managed funds, which can save you money on fees in the long run.
Furthermore, ETFs offer transparency as their holdings are disclosed daily, giving investors insight into exactly what they're investing in. This level of transparency can help build trust and confidence in your investment decisions.
Risks and Considerations for ETF Investors
When it comes to investing in Exchange-Traded Funds (ETFs), there are risks and considerations that investors need to be aware of. One risk is market volatility, which can impact the value of your ETF holdings. Another consideration is liquidity risk, where selling your ETF shares may be challenging if there is low trading volume.
Additionally, tracking error is a risk to consider as the performance of an ETF may not perfectly mirror its underlying index. It's also important to factor in expense ratios, as these fees can eat into your returns over time. Furthermore, regulatory changes or shifts in interest rates can affect the overall performance of certain types of ETFs.
Diversification does not eliminate the risk of investment losses; it ensures that all eggs aren't put in one basket! Be sure to carefully assess your risk tolerance and investment goals before diving into the world of ETFs.
How to Get Started with ETF Investing
To get started with ETF investing, the first step is to do your research. Understand what ETFs are and how they work. Explore the different types of ETFs available in the market - from stock and bond ETFs to sector-specific or commodity-based ones.
Next, consider your investment goals and risk tolerance. Determine how much you're willing to invest and for how long. Remember that diversification is key when it comes to building a solid investment portfolio with ETFs.
Once you have a clear strategy in mind, open a brokerage account that allows you to trade ETFs. Compare fees, commissions, and available resources before making your decision.
After setting up your account, start small by investing in one or two ETFs to gain hands-on experience. Monitor their performance regularly and adjust your investments as needed based on market trends.
Stay informed about economic news and global events that could impact your chosen ETFs. And most importantly, stay patient - investing takes time to see significant returns!
Is Investing in ETFs Right for You?
When considering whether investing in ETFs is right for you, it's important to assess your investment goals and risk tolerance.
ETFs offer diversification across a range of assets, making them suitable for those seeking a well-rounded portfolio without the need for extensive research or management.
If you prefer a hands-off approach to investing but still want exposure to various markets, industries, or sectors, ETFs could be a good fit.
However, if you enjoy picking individual stocks and have the time and expertise to do so effectively, you may find more satisfaction in direct stock trading.
Keep in mind that while ETFs can provide liquidity and transparency, they still carry market risks that can impact your overall returns. It's crucial to understand these risks before diving into ETF investing.
Conclusion
In the world of investing, Exchange-Traded Funds (ETFs) offer a diversified and flexible approach that appeals to both beginners and seasoned investors. With their ease of access, low costs, and broad range of options, ETFs have become a popular choice for many looking to build wealth over time.
Whether you are looking to invest in specific sectors, regions, or asset classes, there is likely an ETF out there that suits your investment goals. By understanding the basics of ETFs - from how they work to their benefits and risks - you can make informed decisions about whether they align with your financial objectives.
Remember to do thorough research before diving into ETF investing and consider consulting with a financial advisor if needed. Investing in ETFs can be a valuable addition to your investment portfolio when done thoughtfully and strategically. So, take the time to learn more about these versatile investment vehicles and see how they may fit into your long-term financial plans. Happy investing!
What is a Diversified Portfolio? A Guide for Beginner Investors

Introduction to Diversified Portfolios
Are you a beginner investor looking to dip your toes into the world of investing? One key term you'll often come across is "diversified portfolio." But what exactly does it mean, and why is it essential for your financial success?
In this guide, we will break down the concept of a diversified portfolio in simple terms, explore its benefits, discuss different types of investments you can include, and provide practical tips on how to create and manage one effectively. So buckle up as we embark on this journey towards building a robust investment strategy that stands the test of time!
What is a Diversified Portfolio?
A diversified portfolio is like a financial safety net, spreading your investments across various asset classes to reduce risk. It's the concept of not putting all your eggs in one basket but rather diversifying to protect yourself from market volatility. By investing in different types of assets such as stocks, bonds, real estate, and commodities, you can potentially minimize losses during times of economic downturns.
The beauty of a diversified portfolio lies in its ability to balance out the highs and lows of individual investments. When some assets underperform, others may thrive, helping to stabilize your overall returns. This strategy aims to optimize returns while mitigating risks associated with any single investment sector.
In essence, a diversified portfolio is about building resilience and flexibility into your investment approach by spreading out your capital strategically. It's all about managing risk intelligently while seeking opportunities for growth across various sectors within the market landscape.
Benefits of a Diversified Portfolio
Diversifying your portfolio can help spread risk across different investments, reducing the impact of volatility in any single asset. By investing in a variety of assets such as stocks, bonds, real estate, and commodities, you can potentially increase your chances of long-term success.
One major benefit of diversification is the potential to earn more consistent returns over time. Different asset classes tend to perform differently under various market conditions. Therefore, having a mix of investments can help smooth out fluctuations in your overall portfolio performance.
Additionally, a diversified portfolio may offer better protection against economic downturns or sector-specific risks. If one industry experiences a decline, other sectors within your portfolio might still be performing well, helping offset potential losses.
Moreover, diversification allows investors to take advantage of growth opportunities across different markets and industries without being overly exposed to any single area's risks. This strategy could potentially enhance overall returns while minimizing downside risks.
In essence, embracing diversification in your investment approach provides you with increased flexibility and resilience when navigating the uncertainties of the financial markets.
Types of Investments in a Diversified Portfolio
When it comes to building a diversified portfolio, the types of investments you choose can play a crucial role in spreading risk and maximizing returns.
One common type of investment is stocks, which represent ownership in a company and have the potential for high returns but also come with higher volatility. Bonds are another popular option, offering fixed income payments over time and stability to balance out the riskier assets in your portfolio.
Real estate investments can provide both income through rental properties and potential appreciation in property value. Additionally, commodities like gold or oil offer diversification benefits by reacting differently to market conditions compared to traditional stocks and bonds.
Alternative investments such as hedge funds or private equity can further enhance diversification by providing exposure to different asset classes not correlated with traditional markets. It's essential to consider your risk tolerance and investment goals when selecting the types of investments for your diversified portfolio.
How to Create a Diversified Portfolio
When it comes to creating a diversified portfolio, the key is variety. You want to spread your investments across different asset classes, such as stocks, bonds, real estate, and even commodities. This helps reduce risk because if one investment underperforms, others may offset those losses.
Start by assessing your financial goals and risk tolerance. Understanding how much you're willing to invest and how comfortable you are with market fluctuations will guide your diversification strategy.
Next, research different investment options within each asset class. Look for opportunities that align with your objectives while offering growth potential and stability.
Consider using mutual funds or exchange-traded funds (ETFs) to gain exposure to multiple assets at once. These can be an efficient way to diversify without needing to pick individual stocks or bonds.
Regularly review and adjust your portfolio as needed based on changes in the market or in your own financial situation. Diversification isn't a one-time task; it requires ongoing maintenance to ensure optimal performance over time.
Common Mistakes to Avoid When Diversifying Your Portfolio
When building a diversified portfolio, it's crucial to avoid common mistakes that could hinder your investment success. One mistake is over-diversification, spreading your investments too thin across various assets can dilute potential returns and complicate monitoring.
Another pitfall to steer clear of is neglecting to review and rebalance your portfolio regularly. Market fluctuations can cause your asset allocation to drift from your original strategy, necessitating adjustments to maintain diversification.
Additionally, emotional decision-making can lead to impulsive changes in your portfolio based on short-term market movements rather than sticking to a long-term plan. It's essential not to let fear or greed drive investment choices when diversifying.
Failing to consider correlation among different assets can undermine true diversification. Including investments that move in sync during market shifts defeats the purpose of spreading risk effectively across uncorrelated holdings. Be mindful of these missteps when crafting a diversified portfolio for optimal results.
Monitoring and Rebalancing Your Diversified Portfolio
Once you have set up your diversified portfolio, it's crucial to regularly monitor and rebalance it to ensure its continued success. Monitoring involves keeping an eye on the performance of your investments and evaluating if they still align with your financial goals. Rebalancing, on the other hand, entails adjusting the proportions of assets in your portfolio to maintain the desired level of diversification.
Regularly reviewing your portfolio allows you to make informed decisions based on market changes, economic trends, and personal circumstances. It helps you stay proactive in optimizing returns while minimizing risks. Rebalancing is essential as asset values fluctuate over time; by realigning your holdings periodically, you can restore the original asset allocation percentages.
Remember that each investor's situation is unique, so there is no one-size-fits-all approach to monitoring and rebalancing a diversified portfolio. The key lies in staying informed about market conditions and being prepared to adjust your investments accordingly for long-term financial success.
Why Every Investor Should Consider a Diversified Portfolio
When it comes to investing, putting all your eggs in one basket is a risky game. Diversification is like having a safety net for your investments – spreading out your money across different assets can help reduce risk.
A diversified portfolio allows you to weather the ups and downs of the market by not being overly reliant on the performance of a single investment. It's like having multiple streams of income instead of just one.
By diversifying, you can potentially maximize returns while minimizing losses. Different asset classes tend to perform differently under various market conditions, so having a mix can help balance out your overall returns.
In essence, diversification is about building resilience into your investment strategy. It's about protecting yourself against unforeseen events and volatility in the market. So, whether you're a seasoned investor or just starting out, considering a diversified portfolio could be key to long-term financial success.
Conclusion
A diversified portfolio is essential for beginner investors looking to mitigate risk and maximize returns. By spreading investments across different asset classes, industries, and geographical regions, investors can protect themselves from market volatility and potential losses. Building a well-diversified portfolio takes time, research, and careful planning but the benefits far outweigh the effort.
Remember to regularly monitor and rebalance your portfolio to ensure it aligns with your financial goals and risk tolerance. Embrace diversification as a key strategy in your investment journey towards long-term success.
A Beginner's Guide to Setting Financial Goals

Introduction to Setting Financial Goals
Embarking on a journey towards financial stability and success begins with one crucial step: setting clear and achievable financial goals. Whether you're aiming to buy your dream home, save for retirement, or simply build an emergency fund, having well-defined financial goals is the roadmap to turning your dreams into reality.
In this beginner's guide, we'll explore the ins and outs of setting financial goals that work for you, ensuring a brighter and more secure future ahead. So buckle up as we dive into the world of financial goal-setting!
Understanding Financial Goals
At its core, understanding financial goals involves identifying what you want to achieve with your money in the short and long term. It's about envisioning your ideal financial future and taking actionable steps to get there. Financial goals can encompass a wide range of objectives, from paying off debt to investing for retirement.
By setting specific, measurable, achievable, relevant, and time-bound (SMART) goals, you create a clear roadmap for your financial journey. These goals act as milestones that help track your progress and keep you motivated along the way.
Remember that everyone's financial goals are unique to their own circumstances and aspirations. What works for one person may not necessarily work for another. That's why it's essential to tailor your financial goals to align with your values, priorities, and lifestyle choices.
Understanding financial goals is not just about numbers; it's also about understanding the impact these goals will have on your life now and in the future. By gaining clarity on what truly matters to you financially, you set yourself up for success in achieving those objectives over time.
The Importance of Setting Financial Goals
Setting financial goals is crucial for achieving long-term financial stability. Without clear objectives in place, it's easy to lose track of your spending and savings habits. By establishing specific goals, you give yourself a roadmap to follow and a target to aim for.
Financial goals help you prioritize your spending and saving decisions. When you have a clear goal in mind, it becomes easier to make choices that align with your objectives. Whether you're saving for retirement, buying a home, or starting a business, having defined financial goals can keep you motivated and focused on your aspirations.
Moreover, setting financial goals allows you to measure your progress over time. Tracking how close you are to reaching each goal gives you a sense of accomplishment and helps identify areas where adjustments may be needed. It also provides you with the opportunity to celebrate milestones along the way.
In essence, the importance of setting financial goals lies in providing direction for your finances and empowering you to take control of your future financial well-being.
Types of Financial Goals
When it comes to setting financial goals, it's essential to have a clear understanding of the different types you can aim for.
One common type of financial goal is saving for emergencies. Having an emergency fund set aside can provide peace of mind and security in unexpected situations like medical expenses or sudden job loss.
Another important financial goal is saving for retirement. Planning ahead and setting aside money regularly towards your retirement fund ensures a comfortable future when you no longer work.
Investing in assets such as stocks, real estate, or businesses is another type of financial goal that can help grow your wealth over time.
Paying off debts like credit cards, student loans, or mortgages is also a crucial financial goal to achieve financial freedom and reduce stress.
How to Set Realistic and Achievable Financial Goals
Setting realistic and achievable financial goals is crucial for your long-term financial success. Start by analyzing your current financial situation, including income, expenses, debts, and savings. Identify areas where you can cut back on spending or increase your income to reach your goals.
When setting your goals, make sure they are specific, measurable, attainable, relevant, and time-bound (SMART). For example, instead of saying "I want to save money," specify how much you want to save each month or year.
Consider breaking down bigger goals into smaller milestones to track your progress more effectively. This will also help you stay motivated along the way. Remember that it's okay to adjust your goals as needed based on changes in circumstances or priorities.
Seek guidance from a financial advisor if needed to ensure that your goals align with your overall financial plan and objectives. Stay committed and disciplined in following through with the necessary steps to achieve your objectives.
Tips for Sticking to Your Financial Goals
Staying focused on your financial goals can be challenging, but with the right strategies, you can increase your chances of success. One tip is to break down your long-term goals into smaller milestones. This will make them more manageable and help you stay motivated along the way.
Another helpful tip is to track your progress regularly. By monitoring how you're doing against your targets, you can make adjustments as needed and stay on course. Setting reminders or using apps to keep yourself accountable can also be effective in maintaining momentum.
It's important to celebrate small victories as well. Rewarding yourself when you reach a milestone can help reinforce positive habits and keep you motivated for the next steps ahead. Surrounding yourself with like-minded individuals who support your financial journey can also provide encouragement and accountability.
Remember, setbacks are a natural part of any goal-setting process. Instead of getting discouraged, use them as learning opportunities to adjust your approach and move forward stronger than before.
Revisiting and Adjusting Your Financial Goals
As you progress on your financial journey, it's essential to revisit and adjust your goals regularly. Life is dynamic, and so are your priorities and circumstances. Take the time to evaluate if your current goals still align with where you want to be in the future.
When revisiting your financial goals, consider any changes in income, expenses, or unexpected events that may have occurred. It's okay to adjust your goals accordingly; flexibility is key to staying on track towards financial success.
Reflect on what has worked well for you and what needs improvement. Be honest with yourself about any setbacks or challenges you've faced along the way. Use these insights as learning experiences to refine your approach moving forward.
Remember, setting realistic and achievable financial goals requires adaptability and willingness to make necessary adjustments when needed. Stay proactive in monitoring your progress and making changes as required for continued growth and success in managing your finances effectively.
Conclusion
Setting financial goals is crucial for achieving long-term financial success. By understanding the different types of financial goals and learning how to set realistic and achievable ones, you can take control of your finances and work towards a brighter future.
Remember to stay committed, track your progress, and be willing to adjust your goals as needed. With dedication and perseverance, you can turn your financial dreams into reality. Start setting your financial goals today and watch how it transforms your life for the better!
Dividend Yield vs. Dividend Payout: Which is More Important for Income Investors?

Introduction to Dividend Investing
Are you looking to boost your investment income? Dive into the world of dividend investing, where steady returns can be music to an investor's ears. But when it comes to choosing between dividend yield and dividend payout, which one should income investors prioritize? Let's unravel this financial puzzle together in this insightful blog post.
What is Dividend Yield and How is it Calculated?
Dividend yield is a key metric that income investors pay close attention to when evaluating potential investments. It represents the percentage of the company's annual dividend compared to its current stock price. Calculating dividend yield is fairly straightforward - you simply divide the annual dividend per share by the current stock price and multiply by 100.
For example, if a company pays out $2 in dividends per share annually and its stock price is $50, the dividend yield would be 4% ($2/$50 x 100). A higher dividend yield typically indicates a better return on investment for shareholders.
Investors often use dividend yield as a quick way to gauge how much income they can expect to receive from owning a particular stock. However, it's essential to remember that high yields can sometimes signal financial distress within the company or unsustainable payout ratios.
Understanding Dividend Payout Ratio
When it comes to dividend investing, understanding the dividend payout ratio is crucial. This ratio indicates the percentage of earnings a company pays out to its shareholders in the form of dividends. A lower payout ratio suggests that a company retains more earnings for future growth and stability.
A high payout ratio may signal that a company could be sacrificing reinvestment opportunities or facing financial challenges. It's essential to consider industry norms and historical trends when evaluating a company's dividend payout ratio.
Investors often prefer companies with sustainable and consistent dividend payouts over those with erratic distributions. A stable dividend payout reflects financial health, management confidence, and long-term viability.
Analyzing the dividend payout ratio alongside other financial metrics can provide valuable insights into a company's ability to maintain or grow its dividends over time. Make sure to conduct thorough research before making investment decisions based on this ratio alone.
Importance of Consistent Dividend Payouts
Consistent dividend payouts are a crucial factor for income investors seeking reliable returns from their investments. Investors rely on these payouts to generate passive income, build wealth over time, and achieve financial goals. When companies consistently pay out dividends, it demonstrates stability and confidence in their financial health. This consistency can attract long-term investors looking for steady income streams.
Moreover, consistent dividend payments indicate that a company is profitable and has the potential for future growth. Companies that prioritize regular payouts tend to have strong fundamentals and management teams dedicated to shareholder value. By receiving consistent dividends, investors can reinvest the earnings or use them as additional income.
In times of market volatility or economic uncertainty, companies with a history of stable dividend payments often perform better than those with erratic payout patterns. Consistency in dividend payouts provides reassurance to investors during turbulent periods and helps maintain portfolio stability.
Consistent dividend payouts play a vital role in income investing by offering predictability, reliability, and potential growth opportunities for investors seeking sustainable returns over the long term.
Comparing Dividend Yield vs. Dividend Payout
When it comes to dividend investing, understanding the difference between dividend yield and dividend payout is crucial.
Dividend yield is a measure of how much a company pays out in dividends each year relative to its stock price. It helps investors assess the income potential of an investment.
On the other hand, dividend payout ratio indicates what percentage of a company's earnings are paid out as dividends. A lower ratio suggests that the company retains more earnings for future growth.
While high dividend yields may seem attractive, a high payout ratio could indicate that a company is distributing most of its profits as dividends, leaving little room for reinvestment.
Investors should strike a balance between dividend yield and payout ratio to ensure sustainable income and long-term growth in their portfolios.
Which is More Important for Income Investors?
When it comes to the question of which is more important for income investors, dividend yield or dividend payout ratio, there isn't a one-size-fits-all answer. Both metrics play crucial roles in evaluating the attractiveness of an investment opportunity.
Dividend yield provides insight into how much a company pays out in dividends relative to its stock price. A high dividend yield may indicate an attractive income-generating investment, but it's essential to consider other factors like sustainability and growth potential.
On the other hand, the dividend payout ratio reveals the proportion of earnings that a company distributes as dividends. A lower payout ratio suggests that a company has room to increase dividends in the future or reinvest profits back into the business for growth.
For income investors seeking stable and consistent returns, focusing on companies with a balance between healthy dividend yields and sustainable payout ratios can be key. It's all about striking the right balance between current income and long-term growth potential in your investment portfolio.
Strategies for Maximizing Dividends in Your Portfolio
When it comes to maximizing dividends in your investment portfolio, diversification is key. Spread your investments across different sectors and industries to reduce risk and increase potential returns.
Consider investing in dividend aristocrats – companies with a history of consistently increasing their dividends year after year. These stable and reliable companies can provide a steady income stream for investors.
Reinvesting your dividends can also help grow your investment over time. By using the power of compounding, you can accelerate the growth of your portfolio without having to inject more capital.
Monitoring the financial health of the companies you invest in is crucial. Keep an eye on factors like earnings growth, cash flow, and payout ratios to ensure that they can sustain their dividend payments in the long run.
Don't overlook international markets when seeking opportunities for higher dividend yields. Investing in foreign stocks can add diversity to your portfolio and potentially boost your overall returns.
Conclusion
When it comes to dividend investing, both dividend yield and dividend payout are crucial factors for income investors to consider.
While dividend yield indicates the percentage return on investment through dividends, the dividend payout ratio shows how much of a company's earnings are being distributed to shareholders.
For income investors, it is essential to strike a balance between high dividend yields and sustainable dividend payouts. A high yield may be attractive, but if the company is paying out more than it can afford in dividends, it could be unsustainable in the long run.
Income investors should prioritize companies with a history of consistent and growing dividends supported by healthy earnings and cash flows. By focusing on both dividend yield and payout ratio, investors can build a diversified portfolio that generates reliable income over time.
Understanding both dividend yield and payout ratio is key to making informed investment decisions that align with your financial goals as an income investor.
How to Control Fall Armyworm in Maize in 5 Ways
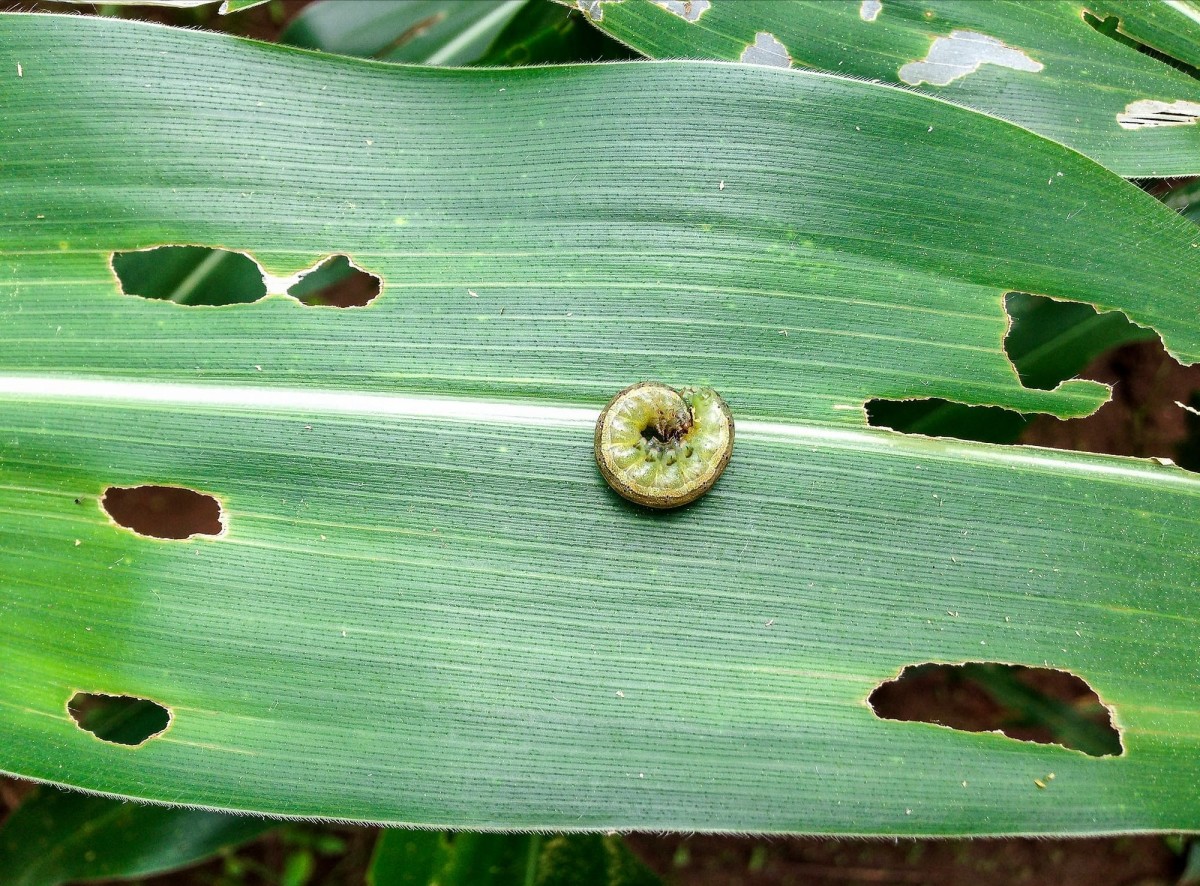
5 Ways Fall Armyworm in Maize
Fall armyworm is an insert which cause excessive damage to maize and other evergreen plants. In maize, it cause damage almost in all stages of its growth, to the point of causing damage to corn ear. When the maize plant is at an early stage, it cause damage by eating the maize plant leaves, and this leaf feeding cause more damage as these leaves are used for photosynthesis which accelerates its growth. Fall armyworm also cause direct damage to corn ear, making it uneconomical.
In summary fall armyworm can be controlled by using; Chemical, biological, cultural, natural and Integrated pest management (IPM) control methods, which is a combination of biological and chemical control. This article will provide in detail on how you can control fall armyworms through these 5 methods.
5 Ways to Control Fall Armyworm
The following are considered 4 ways for controlling fall armyworm.
1. Chemical control
Chemical method to control fall armyworm involves using pesticides, fungicides and bactericides to put down the fall armyworm population. With this method, you apply chlorpyrifos, sulprofos, and thiodicarb, which kills fall armyworm and these are new chemicals to some individuals, but they have been proven to show positive results. Fall armyworm larvae, can be chemically controlled using synthetic pyrethroids. Sometimes pyrethroids are used in combination with chlorpyrifos.
The disadvantage of using chemical method to control fall armyworm is that, it kills other beneficial inserts, and could cause poisoning damage to human and plants, when applied to vegetable leaves.
2. Biological control of fall armyworms
Biological method of controlling fall armyworm involves using living organisms to suppress fall armyworm population, making it less damaging than it would otherwise be. There are three primary methods available for biological control of fall armyworm and these are; Mass rearing and periodic release, conservation of existing natural enemies and introducing new natural enemies and establishing a permanent population.
In our case, fall armyworms can be effectively controlled by mass rearing of introduced parasitoids which is done in African laboratories, and later released in the field to increase parasitism.
3. Cultural control of fall armyworms
Cultural method to control fall armyworm refers to the manipulation of the crop production system or cultural practices to reduce or eliminate fall armyworm population. The basis of cultural control is to make the crop environment unfavourable to fall armyworm. It is mostly used as a preventative measure of fall armyworm.
In our case, cultural method to control fall armyworm in maize will involve using intercropping, weeding, planting high resistant varieties, among others. The control techniques avoid or minimize the fall armyworm impact on the maize crop.
4. Natural control of fall armyworm
Natural control of fall armyworm refers to the maintenance of insect populations within certain bounds by environmental factors, or conditions. Both non-biological and biological factors contribute to the fall armyworm natural control.
Natural control include physical factors such as weather e.g. cold winters can reduce some fall armyworm populations naturally. This method, relies on chemical free ways. In our case you could apply a mix of ash and sand to put down the fall armyworm population.
5. Integrated Pest Management (IPM) of fall armyworm
Integrated Pest Management (IPM) of fall armyworm involves using a combination of techniques such as biological control methods, cultural method, habitat manipulation, and use of resistant varieties. It is an ecosystem-based strategy which focuses much on long-term prevention of fall armyworm or their damage through a combination of the above techniques.
In conclusion, this article has taken a look at ways which can be used to control fall armyworm, which cause excessive damage to maize plant. Among others, the article has uncovered that, chemical, biological, natural and cultural control, are some of the methods which can be used to control fall armyworm in maize plants.
How to Manufacture Soap Locally at Home: Step by Step
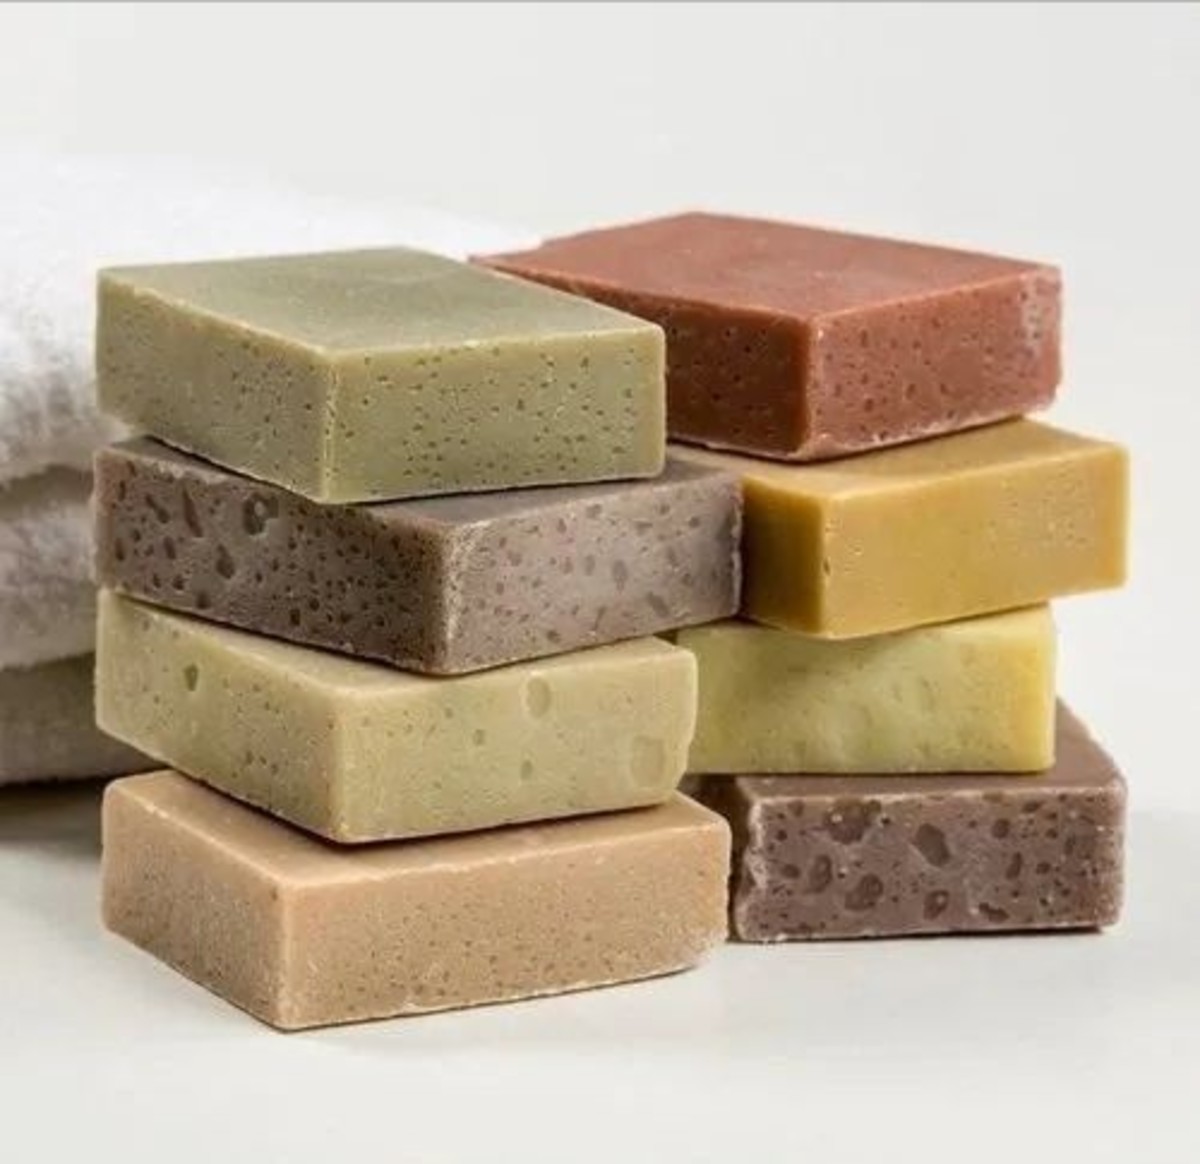
Step by Step to Make Soap at Home
In an ever changing world, it is a dream of every household to lower spendings on cleaning products such as soap by either buying them at a lower price or by finding an easy way of manufacturing them locally.
This article will give detailed steps on how you could be able to manufacture tablet soap at home with the help of local available resources. By the end of this article, you will be able to manufacture your own home soap for home use and you could also take this as your opportunity for starting small scale soap manufacturing in your local area, which could make you earn a few dollars.
Steps Followed to Manufacture Tablet Soap at Home
The following are the recommended steps you must follow for you to successfully manufacture tablets soap at home.
Step 1: Gather materials
The first step to manufacture tablet soap at home is to gather the required materials. First of all, you need to buy the ingredients which are used to manufacture your soap locally, and the following are the required materials which you must buy locally or in any chemical selling shop. These are; Palm oil, Caustic soda, Jerry power, Perfume and Dye. Apart from these, you also need to buy home utensils which would be used during the manufacturing process and these are, plastic buckets, plastic cups, wooden hand blender, plastic spoons, plastic basins, gloves and plastic soap dish.
Step 2: Follow right local measurements on materials
The second step to successfully manufacture bar soap at home using local available resources is to follow right measurements on materials. In our manufacturing, we will be using a plastic cup and spoons in replacement of measuring scale. In our manufacturing, we will use a ration of 1 cup of palm oil, 2 cups of water, half cup of Caustic soda, quarter a spoon of dye, 2 spoons of perfume and 2 spoons of Jerry as our convenient measurements in replacement of the scale. In this case, if we are to add another cup of palm oil, then it means we will have 4 cups of water, a cup of Caustic soda (half + half), 4 spoons of perfume and so on. It must be clear here that before we start measuring and putting them in required plastic buckets, we must know that the palm oil needs to be boiled and allow it to cool.
You might be wondering as to why we are using plastic buckets, plastic spoons, wooden hand blender, plastic cups among others? Well, the reason here is that, the manufacturing process of soap requires mixing of Caustic soda, water, Jerry and palm oil as the major ingredients, and the reaction of these involves releasing heat to the surrounding since it's an exothermic reaction, this is why we opted for plastics and wooden materials.
Step 3: Mixing stage
The third step to locally manufacture tablet soap at home is to mix the required materials. In this step we will use the ratios given above in the step 2. Thus we need to measure a cup of palm oil and put it in a plastic bucket.
Having done that, then we need to add 2 cups of water on that bucket as well and start blending using a wooden hand blender. The main point here is to at least mix the palm oil with the water even though these two have different density which could lead palm oil to be on top.
Having added 2 cups of water, you need to add quarter a spoon of dye, 2 spoons of perfume and 2 spoons of Jerry powder and continue blending or mixing, while you are doing this another person should measure half a cup of Caustic soda and dissolve it in half a cup of water and blend or mix.
You must know that the moment the Caustic soda is added to water, a chemical reaction which releases heat to the surrounding will be spotted such that you will be able to notice a rise in temperature of water and the plastic basic could get warm.
Having mixed half a cup of water with half a cup of Caustic soda, the next step is to transfer that to the bucket containing the mixture of water, palm oil, dye, perfume and Jerry. Once you have added this, you need to continue blending (mixing) until solid like structure starts forming, thus when you need to transfer the mixture to the dish plate bearing on the size of soap you want as well as the design of your soap to bear.
Another key point worth knowing is that the dye is responsible for soap colour, which means if you use a green colour, then your soap will also be green. Another key point you should know is that, this article is talking about tablet soap manufacturing and does not give more details on powder soap manufacturing.
Another key point is that, every step needs to be done while you have put on protective materials on your body or skin. Another key point worth knowing is that we could change the ingredient ratios from the ones given above, but we must know that if we double one ingredient, other ingredients should be doubled too.
Step 4: Solidification
The last step on tablet soap local manufacturing is solidification process, which involves waiting the porridge like mixture to solidify resembling the structure of bar soap we use or buy and usually this process takes 72 hours. Which means, you need to wait for 72 hours before your soap which has been locally manufactured to get used. To maximize the results, you could also cover the top of the dish plate with a plastic paper.
Having waited for 72 hours, your soap will be ready for home use or for selling and you could find local markets, which could see you make a few dollars a day as every household uses a soap on a daily basis.
In conclusion, this article has uncovered a local way of manufacturing table soap, which is used for washing clothes and other related use. Among others, the article has given detailed step by step easy to understand steps which an individual can follow for local production.
How to Recycle Soap Scraps
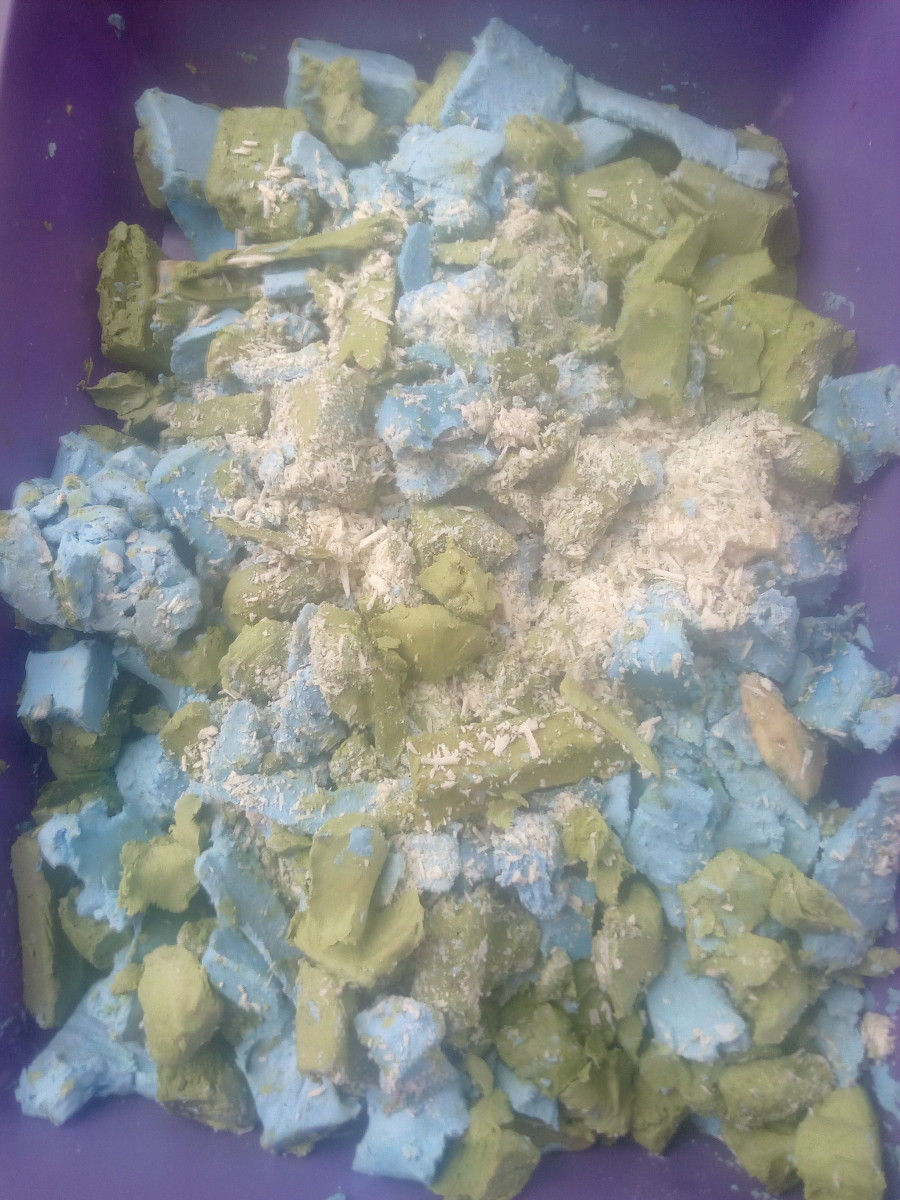
Recycling Soap Scraps
Nowadays people are looking for different ways which can make them spend less money on washing clothes, while at the same time getting a similar satisfaction which they expect from soap which they are using. When it comes to bar soap, the majority of people get soap scraps after using it, wether through washing or bathing and they throw those small soap pieces away since they do not know that they can be recycled and reused.
This article will give in detail the steps required for you to recycle small soap pieces and this will help you lower your home spending on soap.
6 Steps Required to Recycle Soap Scraps
The following are the steps you need to follow to successfully recycle soap scrap.
Step 1: Gather required materials
The first step for you to successfully recycle soap scraps is to gather required materials. In our discussion, we will need the following;
- Soap scraps
- Heat source
- Water
- Pot and stirring material
- Others
Step 2: Break down the small pieces of soap to much smaller pieces
The second step for us to successfully recycle tablet soap at home is to break down soap scraps into very small pieces. The purpose of this is to speed up the recycling process. You can add a little water on your soap scraps to soften them to ease the process.
Step 3: Put broken soap scraps into a pot and heat it
The third step involves putting broken soap pieces into the pot and put it on the heat. Soap is made up of 3 main ingredients which are; Caustic soda, water and oil (fats). When you put it on the heat, it melt as heat spread on it. Which means your soap will start melting as the temperature rises.
Step 4: Remove pot from heat source and allow it to cool a little
As we have said in the step 3, once your soap scraps in a pot are put on the heat, they will start melting forming porridge like structure. Once all the scraps have melted, you need to remove the melted soap on heat and stir to mix the porridge like structure evenly. You need to wait a little before you can put your melted soap on your soap mold.
Step 5: Add some additives
The fifth step involves adding some additives to your melted soap and this could be perfume, and other oil in the form of additives. Once you add in, make sure you stir to mix your added additive with your melted soap.
Step 6: Put melted soap on mold
The sixth step involves transferring your melted soap which has cooled a little into a soap mold. For you to get soap with good shape and smooth, make sure you consider using the best quality soap molds. Once you transfer the melted porridge like structure into a soap mold. You should wait for 24 hours and your soap will be ready for using.
Using your soap within 24 hours is hazardous because the caustic soda will be reaching with oil (fats) since they melted on fire or any form of heat you have used.
In conclusion, this article has uncovered 6 steps required for you to recycle soap scraps. Among others, the article has uncovered that, gathering required materials, breaking small pieces of soap further, putting them in a pot and heat to melt them, and transferring the melted soap into soap mold are some of the required steps which you will go through.
How to Make Soap at Home From Maize (Corn) Flour
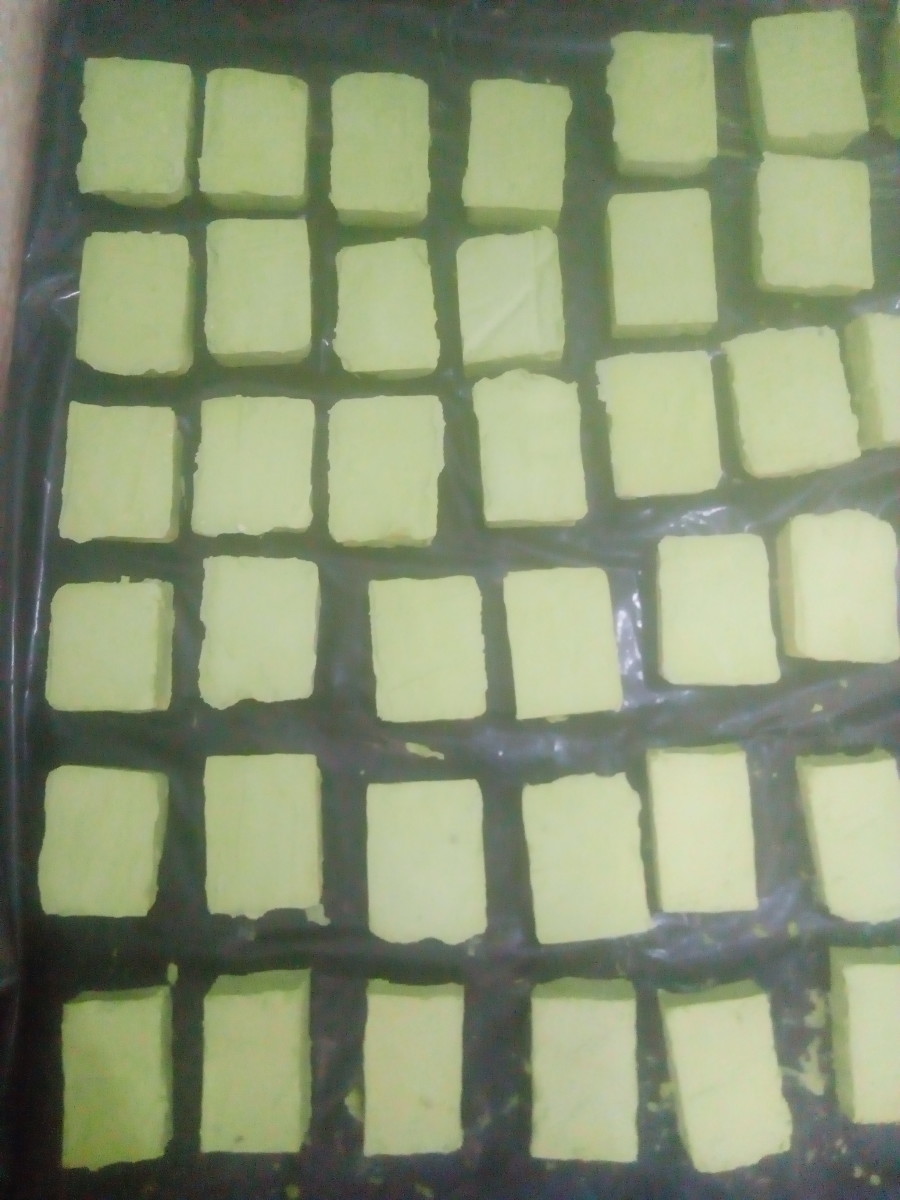
How to Make Soap at Home From Maize (Corn) Flour
It is common for home soap makers to use common ingredients like caustic soda, palm oil, Jerry powder, dye and perfume to make soap at home, which they may use for home washing or start a local manufacturing business.
If you are home soap maker, what you may not know is that, you can replace a few ingredients with others to lower overall cost of production in your soap local manufacturing.
This article will give in detail on new ingredients and step by step procedures on how you can make home soap from corn flour and cooking oil, as your ingredients in soap making to lower your cost of production.
Before we go further, you should know that three main ingredients required to make soap at home are, caustic soda, oil (palm or coconut oil) and water. In our discussion, palm oil will be replaced with home cooking oil, which will further be mixed with corn flour in our corn manufacturing soap.
Steps Required to Locally Manufactured Soap From Maize (Corn) flour
The following are the steps you need to do to successfully manufacture home soap from your corn flour.
Step 1: Gather required materials
The first step for you to successfully manufacture corn soap, you will need the following materials and ingredients; Caustic soda, water, cooking oil (which will replace palm oil), maize (corn) flour, salt, basin, cups, stirring material, among others.
Step 2: Measure required materials and mix
The second step to locally manufactured corn flour soap is to measure the right amount of ingredients and mix. In our case, we will use home cup as local measuring material.
Take a half cup of caustic soda and put it in a plastic basin and add two cups of water. Once two cups of water are added to half a cup of caustic soda, stir so that water should mix caustic soda in an exothermic reaction. Which means, heat will be coming out of the solution.
Measure 2 to 3 cups of maize (corn) flour and add to the caustic soda solution and keep on stirring.
Measure 3 cups of cooking oil and add it to the mixture of caustic soda, while you keep on stirring. At this time, you should also add dye colour and all other additives, like perfume, Jerry powder, among others.
Once the mixture has started to form porridge (hardening) like mixture, you should proceed to step 3.
Step 3: Transfer the porridge like mixture into soap mold
The next and last step to make corn soap is to transfer porridge like mixture into a soap mold. The width and length of your soap will depend on your choice of soap mold.
Once you transfer the hardening mixture into soap mold, wait for 72 hours for it to harden further. After 72 hours, your corn soap will be ready for home use.
In conclusion, this article has given in details on how you can locally manufacture corn soap. Among others, the article has uncovered that, gathering required materials, mixing the right amount of ingredients and transferring the hardening mixture into soap mold, are some of the steps which you will use to make soap from maize flour.
Sugarcane Farming Techniques for Successful Cultivation
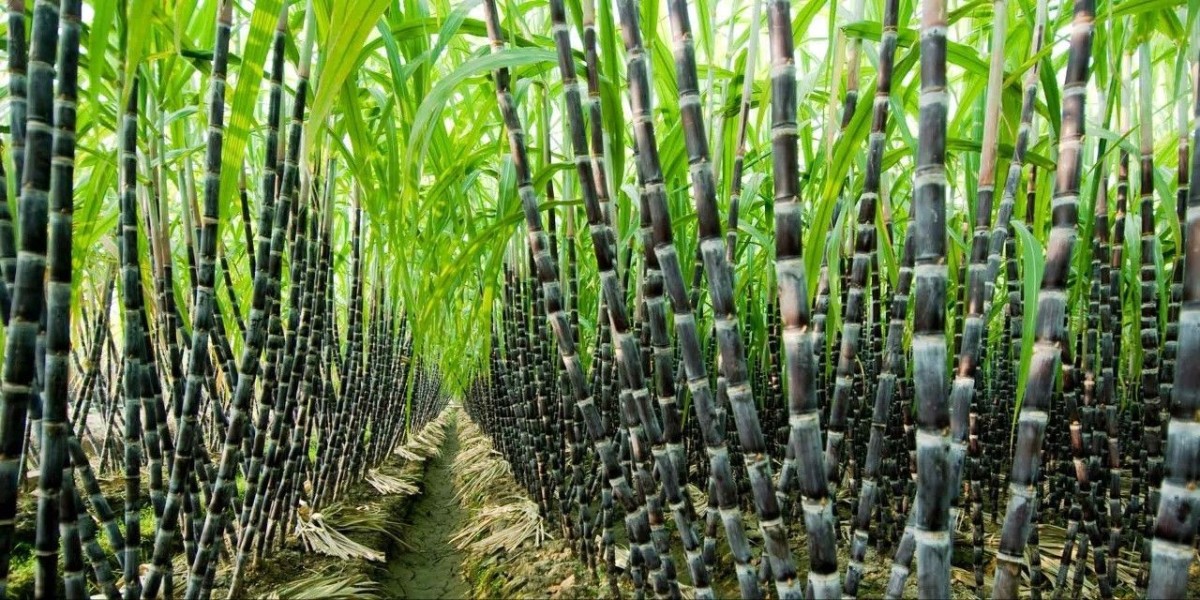
Sugarcane Farming Techniques
Sugarcane is a tropical perennial grass which has a potential to grow to a height of 4.3 meters having a thickness of around 5.1 centimeters. Sugarcane is called a perennial grass of value because of its ability to store Carbohydrates in the form of sucrose. Its economic value comes from stalk sucrose or Carbohydrates, which it reserves and can be grown both on a small scale and on large scale special for commercial purposes.
The sucrose stored in sugarcane is used as a raw material in production of sugar which is used in different countries.
Most of the world's sugar we use is made from sugarcane, making it a hot business in different countries.
The success of sugarcane production depends on farmers agronomic skills on cane production.
This article will provide in detail on how to grow sugarcane both on a small scale and commercial large scale production.
Climatic Requirements
1. Temperature
Sugarcane requires a warm, sunny and moist climate and fertile, deep and well aerated soils to give optimal yield.
Moisture and heat favor sugarcane growth, while dry sunny periods and low night temperatures are favorable for maturation and sugar accumulation.
The crop cycle, growth and maturation are largely influenced by climatic conditions. The Sugarcane is sensitive to frost and hurricanes or typhoons.
It can grow well where the temperature ranges from 20 to 35 °C. The optimum temperature for germination of sugarcane stem cuttings ranges from 32 to 38 °C.
Sugarcane responds to a long period of sunlight of about 12 to 14 hours. High humidity (80–85 %) favours rapid cane elongation during the main growth period.
2. Rainfall
Rainfall favouring growth of sugarcane ranges from 1100 to 1500 mm and is adequate provided the distribution is right, abundant in the months of vegetative growth and followed by a dry period for ripening of sugarcane.
In case of little rainfall access to irrigation supplies is required. During the sugarcane growing the soil should be kept loose and thoroughly moistened during planting and watered afterwards till the plants have attained to their full height.
3. Soil requirements
Humid soils from 100 to 150 cm deep with good drainage are most suitable. Sugarcane grows on almost all classes of soil, but it needs fertile, well-drained soil.
It grows well in deep, well-drained soils of medium fertility of sandy loam soil textures with optimal soil pH range from 6.0 to 7.7. Waterlogged soils, which have no drainage, are not suitable. Sugarcane growing as it is regarded as a relatively salt sensitive plant.
Salinity in sugarcane induces water stress, which is evident in cane by premature wilting, scorching of the leaves, and restricted growth and, in severe cases, death of the plant.
Cultivation Practices
Soil preparation
The soil should be left fallow for a period before new sugarcane is planted. The land is cleared and ploughed to ensures that the soil is broken into fine even particles which help the roots of the new plants reach food and moisture and also to incorporate previous crop’s crop residues and organic manures.
Destruction of the old crop where you want to grow sugarcane should be done by either mechanical or chemical means. Land shaping should be done to provide the required gradient for draining excess water during rainy season.
In the finely prepared field, ridges and furrows are formed using a tractor and some small farmers open furrow manually.
Field layout and design
This involves leveling of the field, establishment of drainage systems, contour planning and the construction of roads which ensures ease of access to the field.
Sugarcane setts are directly planted by adopting two systems, i.e. the ridges and furrows system and flat system.
Propagation
Cultivars of sugarcane are mainly propagated in a vegetative way by stem cuttings of immature canes known as “setts”, with 2-3 lateral buds (or dormant eyes).
Sugarcane cuttings are usually taken from the upper third of the stalk in plant canes 8-12 months old or from ratoons of 6-8 months. Sugarcane setts are usually 30-45 cm in length, and are planted in long furrows 15-30 cm deep, or in trenches at an angle of 45°. After planting, the buds develop into primary and secondary stalks, and gradually form a dense, homogeneous tuft, known as a stool.
The average sugarcane planting density is 15,000 to 24,000 cuttings per hectare, with an intended stalk density of 90,000-150,000/ha.
Planting recommendations and suggestions
Some people grow sugarcane from seeds. Farmers should plant seed cane that is disease-free as possible.
Healthy seed cane will provide the best possible stands if adverse environmental conditions such as drought, water logging or freezing temperatures occur during sugarcane growing season.
Mechanical planters should be operating so as to minimize stalk damage.
Planting
There are two methods of sugarcane planting, namely manual and mechanical. The cane setts are manually placed end to end (or overlapping) together with fertilizer in the furrow and then covered with soil at an angle of 45°.
With mechanical planting, the three operations of opening the furrow, planting the setts and applying fertilizer are conducted simultaneously.
Timing of the planting operation
The ideal time for planting sugarcane is in autumn under irrigation condition, when adequate moisture is present for a quick canopy and optimum use of summer conditions during cane growing.
Under rain-fed conditions sugarcane planting should be done in spring once the rain has soaked the soil.
Autumn planting is possible, but conditions must be favourable for germination before winter.
Row spacing
Closer spacing tends to result in higher yields, provided there is adequate moisture in the soil. Row and plant spacing for manual sugarcane planting is 1.0 to 1.3 m x 0.5 m.
For normal mechanical operations, the best row spacing is between 1.4 and 1.6 m.
Depth of planting
Furrows for planting sugarcane should be approximately 100 mm deep. Sets should be cut into five bud lengths.
Fertilisation
Fertiliser is applied in sugarcane to promote development of the plant. Fertiliser can be spread by hand by applying a standard container of fertiliser over a predetermined length of cane row.
Mechanical distributors can also be used to apply fertilizer in your cane field. Sugarcane requires N, P and K.
Nitrogen requirement of sugarcane is greatest during the tillering (formative) phase. This is required for adequate tiller production and canopy development.
Tillering in field grown sugarcane commences around 30 to 45 days after planting. Sugarcane requires 80 kg urea and 100 kg Single Super Phosphate per hectare for better yield.
Always fertilizers should be well mixed with soil and applied 4 – 5 cm deep in the soil. Make sure you apply fertilizers when soil is moist.
Irrigation
The frequency of irrigation in cane field depends on the stage of development of the cane. Light, frequent irrigations are preferred when the seed is germinating and the young seedlings are getting established.
As sugarcane root system extends into deeper and deeper soils, the irrigation intervals should be extended, and the amount of water applied in your cane field with each irrigation increased.
As the cane approaches maturity, extended irrigation intervals should be scheduled to reduce the rate of vegetative growth, dehydrate the cane, and force the conversation of reducing sugars to recoverable sucrose.
Weed control
It is necessary to spray herbicide (weed killer) in order to prevent weed competition in your cane field and losses in sugarcane production.
Weed control methods employed will be either hand weeding or by application of herbicides.
Pests and diseases control
Sugarcane can become infested by a variety of diseases and pests. You should control them by chemical, biological and cultural methods.
Harvesting methods
Sugarcane is harvested mostly done manually by hand using knife and sometimes mechanically.
When harvested by hand, the field is first set on fire. With knives, harvesters cut the standing sugarcane just above the ground, while with mechanical harvesting, sugarcane combine or chopper harvester is used.
How to Grow Cucumber: Cucumber Farming
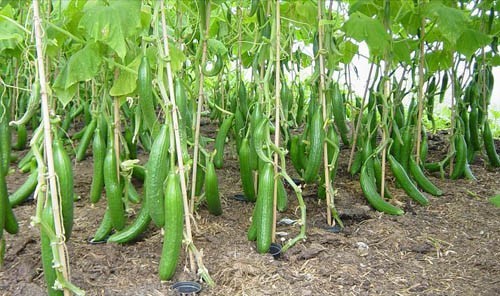
Cucumber Farming
Cucumber farming is one of profitable vegetable crop which is commonly grown by small scale and medium size farmers. Cucumbers are usually eaten in salads, or as accompaniments to various foods. They are grown in green houses and some people grow them in an open field.
They are frost sensitive and may be killed at 1 °C. Cucumbers has a minimum germination temperature of 16 °C, an optimum germination range of 16 °C to 35 °C, with an optimum germination temperature of 35 °C, and a maximum germination temperature of 40 °C.
Soil temperatures at Cucumber planting should be at least 10 °C for table cultivars and 13 °C for gherkin cultivars. To get high Cucumber yields, planting should be delayed until all danger of frost is past. Windbreaks are essential for early production.
The general Cucumber fruit shape is roughly cylindrical, elongated, with tapered ends and range from 12-38cm when ready for harvest.
Adaptability
Climatic requirements
The optimum germination temperature for cultivation of Cucumber ranges from 25 to 28°C, night temperature not lower than 20°C. The optimum growth temperature is known to be in the range of 25 to 30°C, night temperature not lower than 18°C.
Soil requirements
Cucumbers should be grown on a well drained loam to sandy loam soil with high organic matter with no frost pockets or problems with surface drainage. Wind protection, natural or artificial, is necessary during cultivation.
Optimum pH
Cucumbers do well under slight soil acidity. The optimum soil pH ranges from 5.5 to 7.0.
Culture and Management Practices
In typical commercial operations, cucumbers are grown in polyethylene-mulched beds with drip irrigation. Under this Cucumber cultivation technique, water and nutrient inputs are closely monitored and adjusted with drip irrigation.
The plastic mulch in your Cucumber field helps control weeds, maximizes effects of water and fertilizer, and reduces incidence of fruit rots. Cucumber should be procured from windbreak because susceptible to damage from wind.
Field preparation
Cucumber field requires plowing or subsoiling to break a hard pan. The field should then be disked and / or tilled to break up soil clods. Soils with poor drainage benefit from the 4 incorporation of manure or other organic matter materials into the soil.
If a soil amendment in your field such as lime is needed, broadcast it before plowing and incorporate at a depth of 10 to 12 inches (25 to 30cm) 8 to 12 weeks prior to planting. This allows the lime to react with the soil in your Cucumber field to correct pH assuming sufficient moisture is available in the soil.
If a nematicide is used in your field, you should apply at least 2 weeks prior to planting in light soils and 3 weeks prior to planting in heavy soils. Cover crops should be turned over 2 to 4 weeks (earlier for the ones that decompose faster) prior to planting cucumbers to allow for litter decomposition.
Propagation
Cucumbers are both direct seeded and transplanted. Proper soil temperatures for Cucumber seed germination range from 55 to 95°F (13 to 35°C). Thinning should be conducted in two operations for direct-seeded crops.
The first thinning should occur at the two-leaf stage leaving 4 to 5 plants per hill.The final thinning should take place about a month after seeding, leaving two plants per hill.
Cucumbers should be transplanted when adverse growing conditions are expected during the initial growing stages, when expensive seed is used, or for special operations such as hydroponic cultures. About 1 to 21b seeds is required per acre for direct-seeded cucumbers (there are about 1100 seeds per ounce).
Germination and transplanting
The optimum germination temperature for cucumber seed is 25°C to 28°C. Daytime temperatures should be maintained in your Cucumber field and should be between 23°C to 25°C and night temperature not lower than 18°C. Seedling should be kept moist, but not water soaked.
Planting spacing
The light availability, production system and trellising method will affect the exact spacing required in your Cucumber field. Generally, under good light conditions, 2.2 to 2.5 plants per square meter is sufficient. This ensures good air circulation and adequate light for fruit production. A well-ventilated tunnel in your field have lower disease pressure and also have easier access for spraying of pest and diseases.
In your fields rows should be spaced at 4 to 6 feet apart to allow space for spraying and harvesting in trellised fields. Plant spacing within the row should be 1 to 5 feet, depending on the number of plants per hill and on vine vigor of the particular cultivar.
Fertilizer recommendations
Fertilizer applications in your Cucumber field should be based on crop nutrient demands and stage of crop growth. Cucumbers respond better to nitrate than ammonium-N fertilizer. This results in greater Ca, Mg, and K levels in the fruit. The recommended fertilizer rates are 1500 to 2000 Ib/acre of 15-15-15 or similar N-P-K fertilizer.
If the soils in your Cucumber field is very low in phosphate, you should apply 1500 lb/acre of treble super phosphate (47 percent P) or 1500 lb/acre of monoammonium phosphate (11-52-0).
Trellising and Pruning
To obtain optimum cucumber yields in your field, a proper balance is needed between the vegetative growth and fruit load. This balance is achieved by constant pruning of shoots, foliage, fruit and flowers. If the canopy of leaves in your Cucumber field is too dense, it will shade fruits from sunlight, causing them to be pale or unevenly coloured.
If your Cucumber fruits in your field, are not pruned and too many are allowed to form at any one time, a large proportion may be aborted, malformed or poorly coloured because the plant may not have sufficient reserves.
Therefore, generally only one fruit should be allowed to develop in a leaf axil, although vigorous cultivars can sometimes mature more than one fruit at a node. Cucumbers are trellised on a string or wire system.
Various trellising methods are used by different Cucumber growers. The main aim should be to capture sunlight uniformly throughout the greenhouse.
Weeds Control
You can apply herbicides to eliminate weeds in your Cucumber field. Alternatively, you can also remove it through hoeing. Cucumbers should be planted to land where the annual weed seed population has been reduced by cultural procedures such as crop rotation, summer fallowing or stale seedbed.
Harvesting
Cucumbers are harvested as immature fruit when full length has been reached. They are hand harvested, normally 3 times per week, depending on the weather and growth stage of the Cucumber plant.
How to Grow Rice: Rice Cultivation Farming
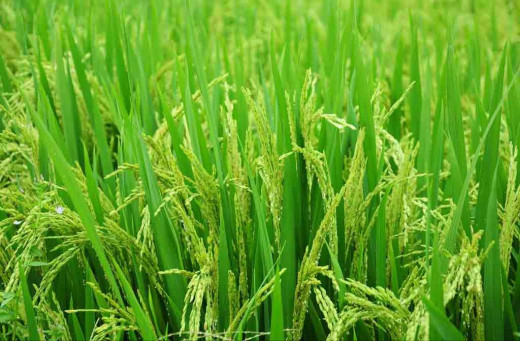
Rice Cultivation Farming
Rice is one of the major staple foods in the world, which is grown and consumed across all geopolitical zones and socioeconomic classes.
Rice consumption is increasing rapidly in the world because of the shift in consumer preference towards rice, increasing population growth, increased income levels, and rapid urbanization in different countries.
Adaptability
Climatic requirements
Temperature
Rice performs better in regions having prolonged sunlight. It performs well in areas having hot and high humidity climatic conditions. The optimum temperature for Rice seedling emergence is 25 - 30℃. A temperature higher than 40 ℃ seedlings die. Lower than 10 ℃ Rice seedlings cannot grow. Growth of seedlings need 5-6 ppm oxygen.
Rainfall
Rice cultivation requires a well distributed rainfall which has an optimum of 1750 mm to 3000 mm annually. It can also be cultivated in areas having annual rainfall as low as 711.45 mm.
Soil
Rice performs well in clay or clay loam soils having an optimal soil pH of a range of 6 to 7.
Cultivation Practices
Site selection
You should select a good site which has all the rice cultivation ecological requirements. Thus, the selected site should have clay or clay loam soils having an optimal soil pH of a range of 6 to 7. The selected site should be in a region which receives an optimum of 1750 mm to 3000 mm annually, if your Rice will be grown under rain water.
Some farmers grow their Rice on lowland, which are areas very close to flood places) while others grow Rice in uplands, which are areas having 700 mm of rainfall annually and have good soil fertility.
Seed selection
For high yields, you should select high quality seeds, which are disease free with high germination percentages at least 80% to reduce the extra cost of Rice production. The best way to do this, is by buying certified Rice seeds from certified companies in your local area.
Seed dormancy
Dormancy is a problem in Rice cultivation, and is defined as the inability of a seed to germinate under good conditions required for germination. You should solve this problem by heating your Rice seeds to a temperature around 50 °C.
You can also eliminate dormancy in Rice by break soaking the Rice in a concentrated nitric acid for a period of 16 to 24 hours. Concentration percentage of nitric acid should be 69% per litter of water.
Planting methods
Rice is planted by any of these three methods in your field: Drill, Broadcast and Dibble. For straight row planting and optimum plant population, you should use the Drilling and Dibbling methods.
Time of sowing
Planting or sowing time depends on location of selected sites where you want to grow your Rice as lowland closest to flood area has moisture all the time suitable for growing Rice, while upland areas will have to wait for rain season.
When you are growing your Rice under rainfall, you should plant your Rice at the beginning of the rainy season.
Transplanting of Rice
Rice can be sown in a nursery bed and later transplanted into your field when all the seedlings have germinated. This method works best when you want to grow your Rice on a small piece of land, but it becomes tiresome when you want to grow more hectares of land.
Fertilization
To ensure the right amount of fertilizer is applied to your Rice field, you should conduct a soil test first, to know the nutrient content of the soil. For lowland, it is recommended to apply 60 to 80 kg of nitrogen per hectare and 13 kg of phosphorus per hectare. You will likely apply 4 bags of N-P-K fertilizer per hectare of Rice to achieve required nutrients. Similarly, you can also apply similar quantity in uplands Rice cultivation.
Weed control
Rice field requires weeding 2 times in 3 to 6 weeks and this should be done manually using a hoe. Herbicides can also be used to control the weeds, but you should follow the instructions.
Harvesting
Rice harvesting starts from 125 to 136 days from the time of planting depending on the type of variety and other factors Harvesting is done by cutting the rice stem close to the base and this can be done using a sickle.
How to Grow Cucumber : Cucumber Cultivation Farming
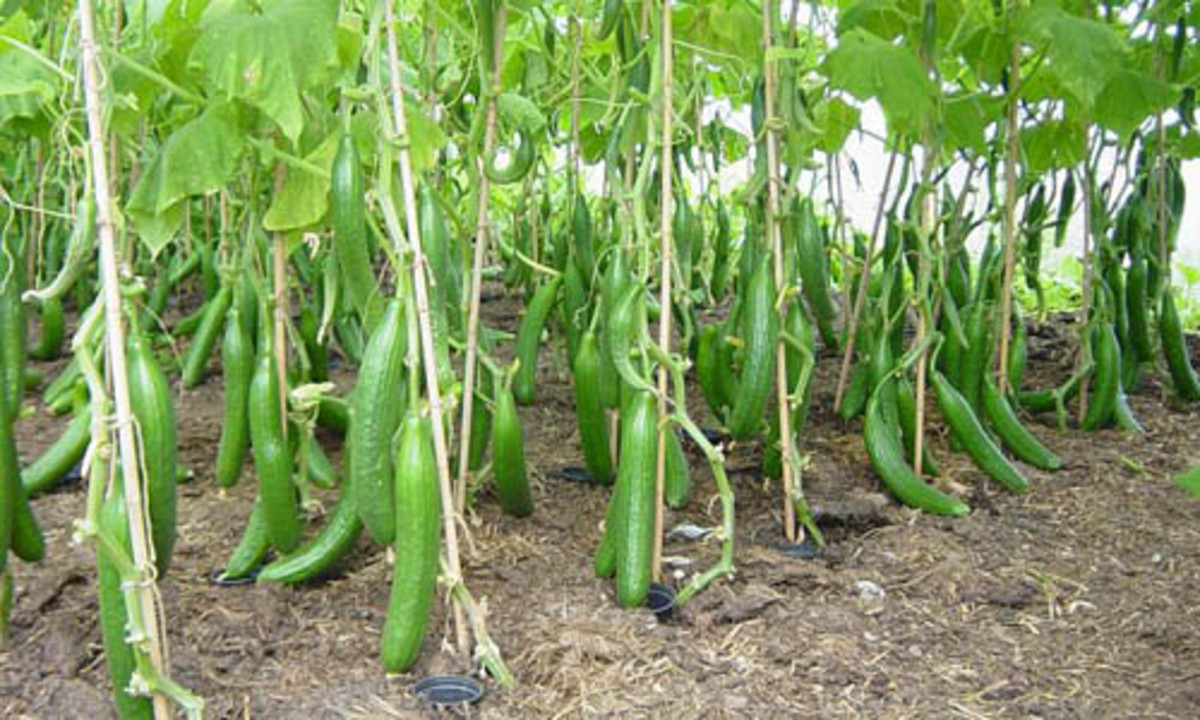
Cucumber Farming
Cucumbers are usually eaten as in salads, or as accompaniments to various foods. They are known to be cultivated in greenhouses and some people grow them in an open field. It is one of profitable vegetable (while others call it both a fruit and a vegetable) crop which is commonly grown by small scale and medium size farmers.
This article will take you through on how you can grow Cucumbers in detail.
Adaptability
Climatic requirements
- Make sure you grow your Cucumbers in areas having a temperature range of 25 to 28°C. This temperature is considered as optimal for germination. Make sure also the night temperature does not fall below 20°C.
- A temperature range of 25 to 30°C is favourable for growth of Cucumbers and a night temperature should not be less than 18°C.
- The optimum soil pH for Cucumber farming is known to be in a range of 5.5 to 7.0.
- Cucumbers do not perform well in cold places and have greater chances to be killed when the temperature falls below 1 °C.
Cultivation Practices
In large commercial Cucumber production, they may be grown under a drip irrigation in beds in a polyethylene mulch. The mulch in polyethylene helps to control weeds and make the applied water be used more efficiently.
This is not all as it helps in fertilizer applied to be more efficient. Make sure you protect your Cucumbers from wind.
Field preparation
Make sure you prepare your field to be ready for Cucumber planting. The field preparation can be done manually by using a hoe for tillage or can be done mechanically using a tractor. Apply manure if the soil has less fertility.
Soil requirements
Cucumbers perform well in soils having high organic matter content and it has to be of well drained loam to sandy loam soil.
Seed treatment
Sometimes seed germination may become a problem in Cucumbers so make sure you pellet the seed to facilitate it for planting.
Transplant production
If you want to harvest your Cucumbers early, make sure you plant your Cucumber seeds in the following; peat pellets, peat blocks and cellular trays. Whenever you plant them make sure you protect them from cold weather. 2 plants may be planted per cell.
Make sure your peat pots are well soaked and buried when transplanted. This prevents soil from excessive drying in the pots. One hectare requires 2.2 Kilograms of Cucumber seed for transplanting.
Germination and transplanting
As said Cucumber seeds are able to germinate at a temperature range of 25°C to 28°C. Make sure the soil has enough required moisture content and observe that it is not waterlogged as this can be the source of diseases. Transplanting of Cucumber seedlings is usually done at 3 to 4 weeks after germination.
It is possible to plant Cucumber seed directly into the planting bag. Three days after transplanting, make sure you apply fertilizer, but make sure that before the fertilizer is applied you have done a soil analysis to know the required soil nutrients.
Propagation
Cucumbers are both transplanted and able also to be planted directly.
Planting spacing
In Cucumber farming, make sure you observe a spacing of 2.2 to 2.5 plants per square meter. This is good for good air circulation and adequate light exposure.
Fertilization
Any applied fertilizers should be done after you have done a soil analysis to know the nutritional requirements for your soil.
Cucumbers perform well with nitrate fertilizer than ammonium-N fertilizer. Make sure you apply nitrate fertilizers and this will result in high Ca, Mg, and K in the Cucumber fruit. Apply a fertilizer of a range of 1500 to 2000 Ib per acre of N-P-K fertilizer. Make sure you apply also manure in your Cucumber field for improved soil fertility.
Weeds Control
Make sure you keep your Cucumber field free from weeds as this can be sources of pests and diseases. You can control the weeds by physical means or by using herbicides.
Harvesting
You harvest your Cucumbers at a tender stage or immature by hands. Make sure the harvesting is done in a cool day. After harvesting make sure you keep your Cucumber in a place having a temperature of 10 to 12.5ºC.
Rice Cultivation Farming : Basic Rice Production Techniques

Rice Production
Rice is considered one of the major staple foods in countries around the globe and is consumed across all socioeconomic classes.
Nowadays it is becoming common to see people shifting to rice from other food alternatives like Maize (Corn Field) and this makes rice consumption to be increasing rapidly in the world.
In some people as their daily income level changes, they shift their main food meal to Rice making it to have an ever increasing demand across the world.
Much as this is the case, a lot of farmers are looking for various ways which would enable them to grow Rice in the most efficient way.
This article will provide you in detail on how to grow Rice and it explains the agronomic requirements for optimal yields.
Adaptability
Climatic requirements
Rice crop performs well in areas having hot and high humidity climatic conditions and has optimum temperature requirements of 21 to 37 °C, however, it can also be grown in areas which has a temperature as high as 42 °C and still gives a better result.
Rice performs better in regions having prolonged sunlight and has optimal germination temperature requirements of a range of 25 to 30℃.
Rainfall
Rice cultivation requires well distributed rainfall having an optimal annual requirement of 1750 mm to 3000 mm. However, it can also be grown in areas having annual rainfall as low as 711.45 mm.
Soil
Rice cultivation gives optimal yields when grown on clay or clay loam soils having an optimal soil pH of a range of 6 to 7 with best results be achieved in 6 which is uncommon in most soils.
Cultivation Practices
Site selection
For best results, make sure you select a good site which have all the rice cultivation ecological requirements. Some people grow Rice on lowland, which are areas very close to flood places) while others grow Rice in uplands, which are areas having 700 mm of rainfall annually and has good soil fertility.
The key point here is that, the site where you want to select, should match all the required conditions for growing Rice as stated in adaptability section.
Seed selection
Make sure you select good and healthy seeds with high germination percentages at least 80% to reduce the extra cost in Rice production. The best way to do this, is by buying certified Rice seeds from certified companies in your local area.
Seed dormancy
Dormancy is a problem in Rice cultivation, and is defined as the inability of a seed to germinate under good conditions required for germination.
Dormancy in Rice is solved by heating to a temperature around 50 °C. Alternatively, you can also break the dormancy in Rice by soaking the Rice in a concentrated nitric acid for a period of 16 to 24 hours. Concentration percentage of nitric acid should be 69% per litter of water.
Planting methods
Three methods can be used to plant rice, namely; Drill, Broadcast and Dibble. For straight row planting and optimum plant population, make sure you use the Drilling and Dibbling methods.
Time of sowing
A time to plant depends on the place where you want to cultivate your Rice as lowland closest to flood area has moisture all the time suitable for growing Rice, while upland areas will have to wait for rain season. In case you want to grow Rice in rain period, make sure you plant your Rice at the beginning of the rainy season.
Transplanting of Rice
Rice can be sown in a nursery bed and when all the seedlings have germinated, you can transfer them to the main field. This method works best when you want to cultivate Rice on a small piece of land, but it becomes tiresome when you want to grow more hectares of land and you want doing transplanting manually.
Transplanting has a potential of ensuring uniformity of plant growth and it also protect Rice against weeds.
Fertilization
Before any application of fertilizer is done on your Rice plant, make sure you conduct the soil analysis to be able to know the right type and quantity of fertilizer to apply to your Rice field.
For lowland Rice production, it is recommended to apply 60 to 80 kg of nitrogen per hectare and 13 kg of phosphorus per hectare. It is recommended to apply 4 bags of N-P-K fertilizer per hectare of Rice to achieve required nutrients. Similarly, you can also apply similar quantity in uplands Rice cultivation.
Weed Control
In Rice cultivation it is recommended to weed the Rice field 2 times in 3 to 6 weeks and this can be done manually using a hoe. Herbicides can also be used to control the weeds in Rice field, but make sure you follow the required instructions.
Harvesting
From the time of planting, the Rice harvesting starts in a range of 125 to 136 days depending on type of varieties and other factors. Each plant is able to produce 70 to 100 grains. Harvesting is done by cutting the rice stem close to the base and this can be done using a sickle.
Okra Cultivation Farming

Okra Cultivation Farming
Okra is a vegetable, which can be grown on large, medium and large scale commercial production and is able to grow in most soils of different countries and is known to perform well in warm weather areas.
Okra can be prepared in different ways and is able to provide vitamin A to humans. It is a heat tolerant plant which is a member of mallow family, which flowers and produces fruit in summer temperatures. This article will give in detail on how to grow Okra for optimal yields.
Varieties
The most commonly grown varieties are; Annie Oakley, Delight, Emerald, Green, Velvet among others.
Production Requirements
Okra gives a better yield on a temperature range of 24 °C to 35 °C and they are not able to give optimal results in areas having frost conditions. Per acre, Okra has expected yield of 4536 kg to 5443 kg under good agronomic practices. Make sure you grow your Okra in areas which are able to receive almost full sunlight during the day.
The optimum soil pH for growing Okra is known to be in a range of 6 to 6.8. Okra performs well on loam and Sandy soils, so make sure, you grow your Okra in soil type of this, but the vegetable, is also able to respond positively in heavy soils having good soil drainage.
During a period of very low moisture content, make sure you supplement water through Irrigation, but always ensure that, the Okra field is not waterlogged and has right moisture content all the time.
Cultivation Practices
Site selection
Make sure you select a site which has good soil drainage and has also good soil fertility. In addition to this, make sure the chosen site for Okra production, is able to receive full sunlight during the day when possible.
Soil preparation
Make sure you till your site in preparation for growing Okra plants. You can make ridges manually with the help of a hoe or whenever the site is too long, you can use a tractor to cultivate your area faster. Make sure the soil tillage is done to a depth of 20 cm to 24 cm as recommended for optimal Okra production.
Planting
Okra performs well when soil temperatures at planting is 21 °C, so make sure during planting period soil temperature is around that number for better results. You can plant your Okra during a frost free time in spring 2 to 3 weeks after the frost period is over.
During planting, make sure you place your Okra seed 2.5 cm deep and 5 centimeters apart in rows. In Okra production, the recommended spacing for optimal results is 71 to 96 cm with 20 to 30 cm between Okra plants. Thinning in Okra plants, is done when Okra plants reach 8 cm up.
One hectare of land requires 5 to 6 kg of Okra seeds and this will result in a plant population of 33,333 per hectare. To facilitate seed germination, make sure you soak your Okra seeds in water for about 5 hours before planting time.
Fertilization
Before any application of fertilizer to your Okra field, Make sure you are able to conduct a soil analysis to know the soil nutrition of your soil and the type of fertilizer which is supposed to be applied and as well as the quantity.
Thus, any application of fertilizer in Okra field will depend on soil analysis report. It is recommended to apply 13 to 22 kg per hectare of nitrogen fertilizers before planting. In Okra, phosphorus fertilizers can be applied either before or after plant and has a quantity requirement of 23 to 45 kg per hectare.
Irrigation
If your soil has low moisture content, you can supplement moisture through Irrigation and make sure you Irrigation your Okra field in 10 days interval to avoid waterlogging, since also the Okra plant is able to withstand drought. Always observe the right moisture content all the time.
Weed Control
You can control weeds in the Okra field by using herbicides or by using manual (with the help of hands). Make sure a cost effective way is chosen as there are more ways to weed your Okra field.
Always make sure, your Okra field is free from weeds as these can result in pests and diseases building up which can increase the cost of production and at the same time decreasing your yield.
Harvesting
Okra pods are harvested 6 to 8 days after flowering, while they are still tender. Harvesting can be done easily by hands and you can be picking tender Okra pods every 2 to 3 weeks once the harvesting period begins.
Top 8 Best Hotels in the World

Top 8 Best Hotels in the World
If you're searching for a superlative place to stay for your next vacation, it can be tough knowing which hotels around the globe reign supreme — that's why we've comprised this article. You'll find the 8 best hotels in the world featured here, from Switzerland to Thailand and everywhere in between. Not only do they provide incredible amenities and picturesque scenes, but also luxurious lodgings that will make your getaway unforgettable. So start planning your travels now with these stunning accommodations!
Top 8 Best Hotels in the World
1. The Ritz-Carlton, Hong Kong

Situated in the center of Hong Kong's financial district, The Ritz-Carlton, Hong Kong is renowned as one of the leading hotels in the world. Embellished with stunning panoramic views of Victoria Harbour and offering top-notch accommodations and services, it's no wonder the hotel has achieved such acclaimed status.
Guests can bask in spacious and well-appointed rooms and suites, as well as select from an impressive variety of international cuisine at its numerous restaurants and bars.
Furthermore, leisure and business travelers alike can benefit from a diverse range of amenities such as a swimming pool, a spa, a fitness center, meeting spaces, and even a business center.
2. Burj Al Arab Jumeirah, Dubai

The Burj Al Arab Jumeirah is an illustrious hotel located in Dubai, United Arab Emirates. It stands on an artificial island resembling a sail and serves up breathtaking views of the Persian Gulf to guests.
In addition to its grand scenery, the property features nine signature restaurants, a world-class spa, and a private beach club, making it truly fit for royalty.
3. The Langham, London

The Langham, London is conveniently located in the center of town and just a short stroll away from many of the renowned spots in the city. Guests can enjoy breathtaking views of London's skyline while being provided with luxury amenities, sumptuous dining options, and comfortable lodgings to make your stay an unforgettable experience.
4. Mandarin Oriental, New York

Mandarin Oriental, New York is one of the top best hotels in the world. The hotel and its luxurious guest rooms and suites, with plush bedding and marble bathrooms, create a regal atmosphere. With its soaring ceilings, grandiose chandeliers, lavish comforts, top-notch amenities such as a spa, fitness center and Michelin-starred restaurant, the hotel provides an idyllic base for experiencing all that New York City has to offer.
5. The Peninsula, Bangkok

The Peninsula, Bangkok is a luxury hotel located on the banks of the Chao Phraya River in Bangkok, Thailand. The hotel offers a plethora of amenities and services, from an outdoor pool and spa & wellness centre to a fitness area, business facilities and eateries. All guest rooms and suites provide a space of opulence with outlooks of either the river or the cityscape.
6. The Savoy, London

The Savoy, situated in the middle of London, England, is renowned across the globe. Its stunning décor and five-star service ensures that guests have a truly luxurious stay. Since 1889 it has held numerous famous personalities and dignitaries from different countries. The amazing facilities and ideal location make it one of the best hotels available.
7. Four Seasons Hotel George V, Paris

Nestled in the center of Paris, the Four Seasons Hotel George V provides a luxurious haven for travelers. With its five-star services, fine dining options and remarkable staff, this hotel is sure to satisfy all guests. An on-site spa, fitness center and business center ensure you have everything you need during your stay.
Additionally, its location near some of the city's greatest attractions make it a great choice for visitors looking for adventure or business opportunities. No matter what brings you to Paris, the Four Seasons Hotel George V is guaranteed to surpass your expectations.
8. The Plaza, New York

The Plaza, a luxury hotel in the heart of New York City, offers much beyond its lavish rooms and fine dining. Its lobby, with marble floors and a magnificent staircase, stands out as a highlight. The Palm Court is another favorite among visitors where they can sip on afternoon tea or cocktails.
In conclusion, these 8 hotels provide tourists with an extraordinary and remarkable experience. You will be able to find the perfect fit for you, regardless of what you are after - a luxurious holiday or a thrilling escapade. So, start making those reservations and don't miss out on the opportunity of staying in one of the world's finest residences!