
Easy Steps to Repair LED bulb
In an ever changing world, a lot of technologies are happening, which are helping us to make our life much easy while at the same time making us to spend less on some things. When it comes to lightning, a few years ago, a lot of people have been using filament bulbs which were able to consume more electrical energy, similarly a few some have been using florescent lights as an alternative to filament bulbs.
Most of these bulbs have been less efficient, when it comes to electrical consumptions, thanks to LED technology, which has recently brought LED bulbs which has an efficiency of around 90% compared to ordinary filament light bulbs.
Introduction of LED bulbs did not only come with the high efficient performance, it also comes with other many advantages as majority of LED bulbs can be repaired in an easy way to reuse.
This article will uncover easy traditional way to repair an LED bulb and does not require any basic prior knowledge for you to be able to start repairing LED bulbs of any size today.
Before we go further, firstly let's shade light on the anatomy of LED bulb and how this relates to easy repairing of bulbs using traditional way.
First of all LED bulb has LED chip which holds Light emitting diodes (LED) and it is this which gives light when connected to electricity or any energy source. The majority of problems which makes the LED bulb not to give light occurs here. The LED bulb has also another important part called circuit, and some percentage of problems result due to the failure of a circuit, and in this article we will give more details, including the possible traditional way of repairing LED bulb. The LED bulb has also an important part worth discussing called encapsulates which also contribute a little percentage for LED bulb malfunction.
Having selected these important parts worth discussing, now let's talk in detail on how the LED bulb can be repaired using the traditional way, which is very easy and does not require more materials and time.
Traditional Steps to Repair an LED Bulb
Step 1: Gather materials
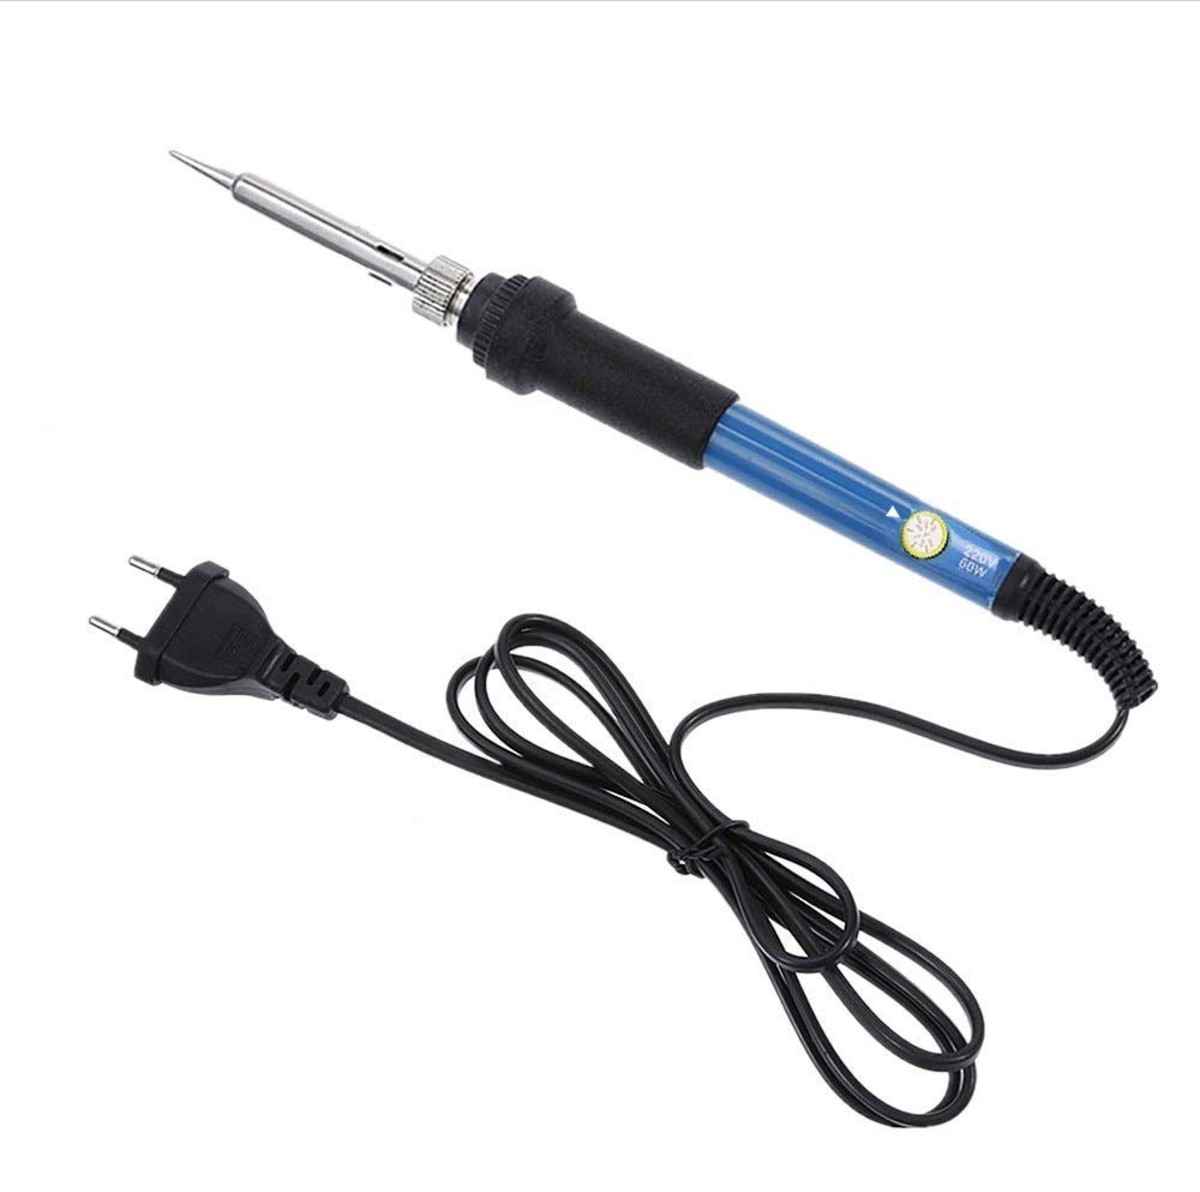
Soldering iron
The first step to ably repair non functional LED bulb is to gather right materials, and in our discussion we refer only four things, which are soldering iron, Lead alloy solder wires which melts at 188 °C (370 °F), Screw machine or any material which can be used to open the LED bulb by removing the Len and small wires in case there is a need for transferring the current from one broken LED to another broken LED staged at a distance.
Step 2: Open the LED bulb
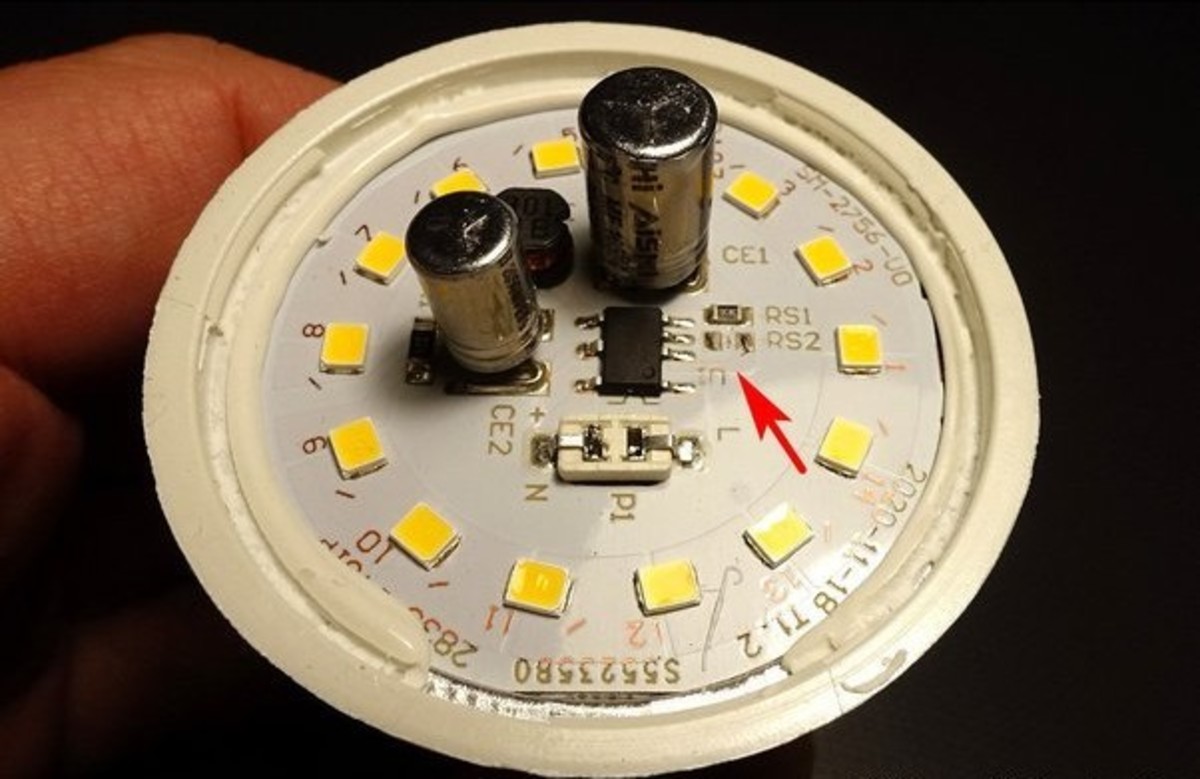
Opened Led bulb
The second step is to open, the LED bulb by taking the Len off. Up on opening the LED bulb, we expect to see three things, the first one we can see a black spot or more of these showing that a LED was demanded because of overheating, the second thing we can see a clean chip with no any black spot on any LED bulb, however, this does not necessarily mean that all LED are okay.
The third thing we can expect is that the chip has no any spot, but the circuit has some spot indicating that it was damaged, another thing we can expect is to see no any problem on the circuit as it does not show up any spot, however this does not necessarily mean that the LED bulb circuit is okay.
Step 3: Remove the broken LED and Solder it
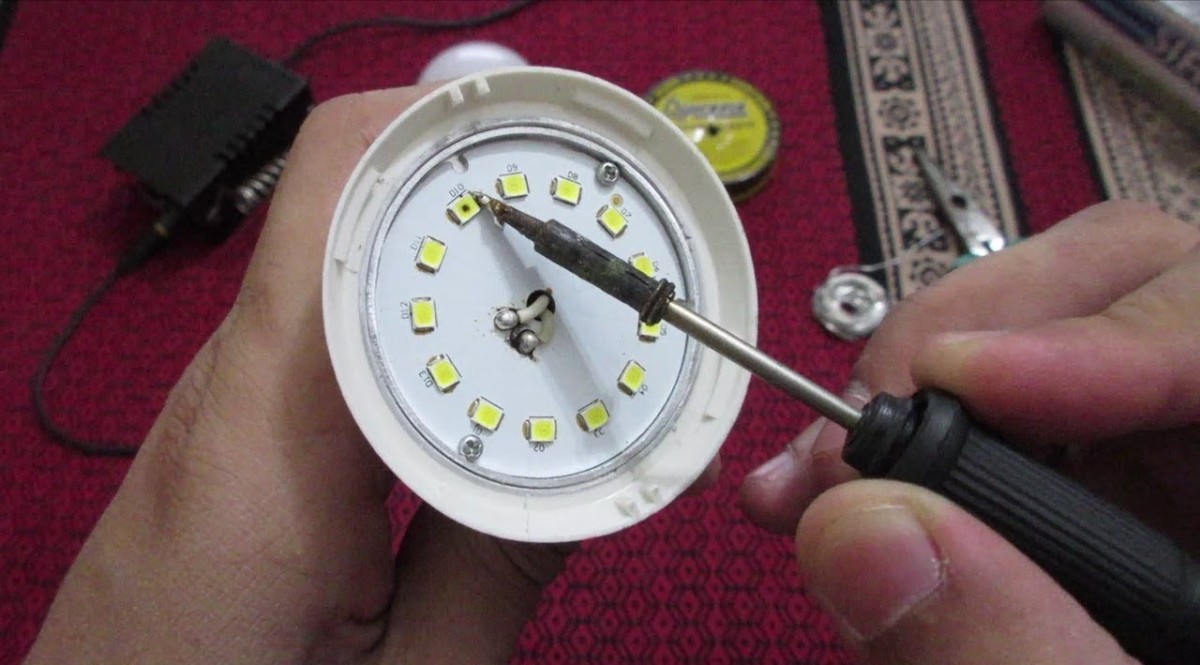
Removing Broken LED
The third step is to remove the top of the broken LED which is traced using a black spot and Solder it using the soldering iron which is connected to electricity and Lead alloy solder wire which melts at 188 °C. The purpose of this is to make the plate a complete circuit. When the black spot is not shown, what we do is that we take the hot Soldering which is connected to electricity and bring it close to each LED, once you bring in touch the lighting LED with hot ends of Soldering iron, it gives a little light which is an indication that the LED you are testing is a functional one. You need to repeat this step or process until all the LED on LED chips get tested. Through this you discover, the LEDs which do not function and you remove their top and Solder them using hot Soldering iron and Lead alloy solder wire, the purpose of doing this is to make it a complete circuit as we have already pointed out. After doing this you need to test the bulb if it gives light. If it does not give right, proceed to step 4.
Step 4: Remove the Circuit and replace it with another working one
This step is used in case the problem is not on the LED chips, such that all LED are able to give a little light when subjected to hot Soldering iron. In this case we can test the top of the plate before we proceed with replacing the circuit.
The question could be how could we be able to test if some electric current is coming of the LED chips, the best way of going about this is to make a temporary plate which holds the LED chips and connect the positive and negative wires directly on the LED Chips we are repairing, if the LED circuit is working, then the other plate will be able to give light, but if it doesn't, you will be certain that the problem is probably to do with the LED circuit, which needs to be replaced with another functional one.
After replacing it with another functional one, you can test the LED bulb again on any electrical source.
Step 5: Check wires on Encapsulates
The fifth step in case all the above steps failed to work, is to check the wires on Encapsulates. Sometime connecting wires does not connect property between the circuit and the base or Encapsulater. This occurs at a small percentage level, unlike the above mentioned ones.
Last but not on the list, there are some cases where on the top of the LED chips you would find that 3 to 4 consecutive LEDs have been damaged such that putting Lead alloy wire at this distance, will not be the best way. In this situation, what we do is to cover the distance with a connecting wire.
In conclusion, this article has uncovered 5 traditional steps which can be used to repair non functional LED bulb, which can help to lower your spending on light bulbs. Among others, the steps can be summarized by opening the LED bulb by removing the Len and checking inside for the faulty LED and soldering them with Lead alloy solder wire or changing the circuit.